

Halloween crafts do not need a cart full of supplies or a complicated tutorial that loses kids halfway through. Some of the most enjoyable projects start with things already sitting in the craft drawer, recycling bin, or kitchen cupboard.
These Halloween Crafts for Kids are built around simple materials such as paper plates, cardboard tubes, paint, craft sticks, yarn, tissue paper, and googly eyes. The goal is to give children enough room to make something themselves rather than handing them a project that an adult has to finish.
A crooked smile on a pumpkin is fine. A ghost with mismatched eyes is even better. Those little imperfections are usually what make homemade Halloween decorations worth keeping.
Below, you will find twenty approachable ideas for different ages and attention spans. Start with the supplies you already have, cover the table, and pick whichever project looks fun today.
1. Turn Paper Plates Into Friendly Halloween Ghosts
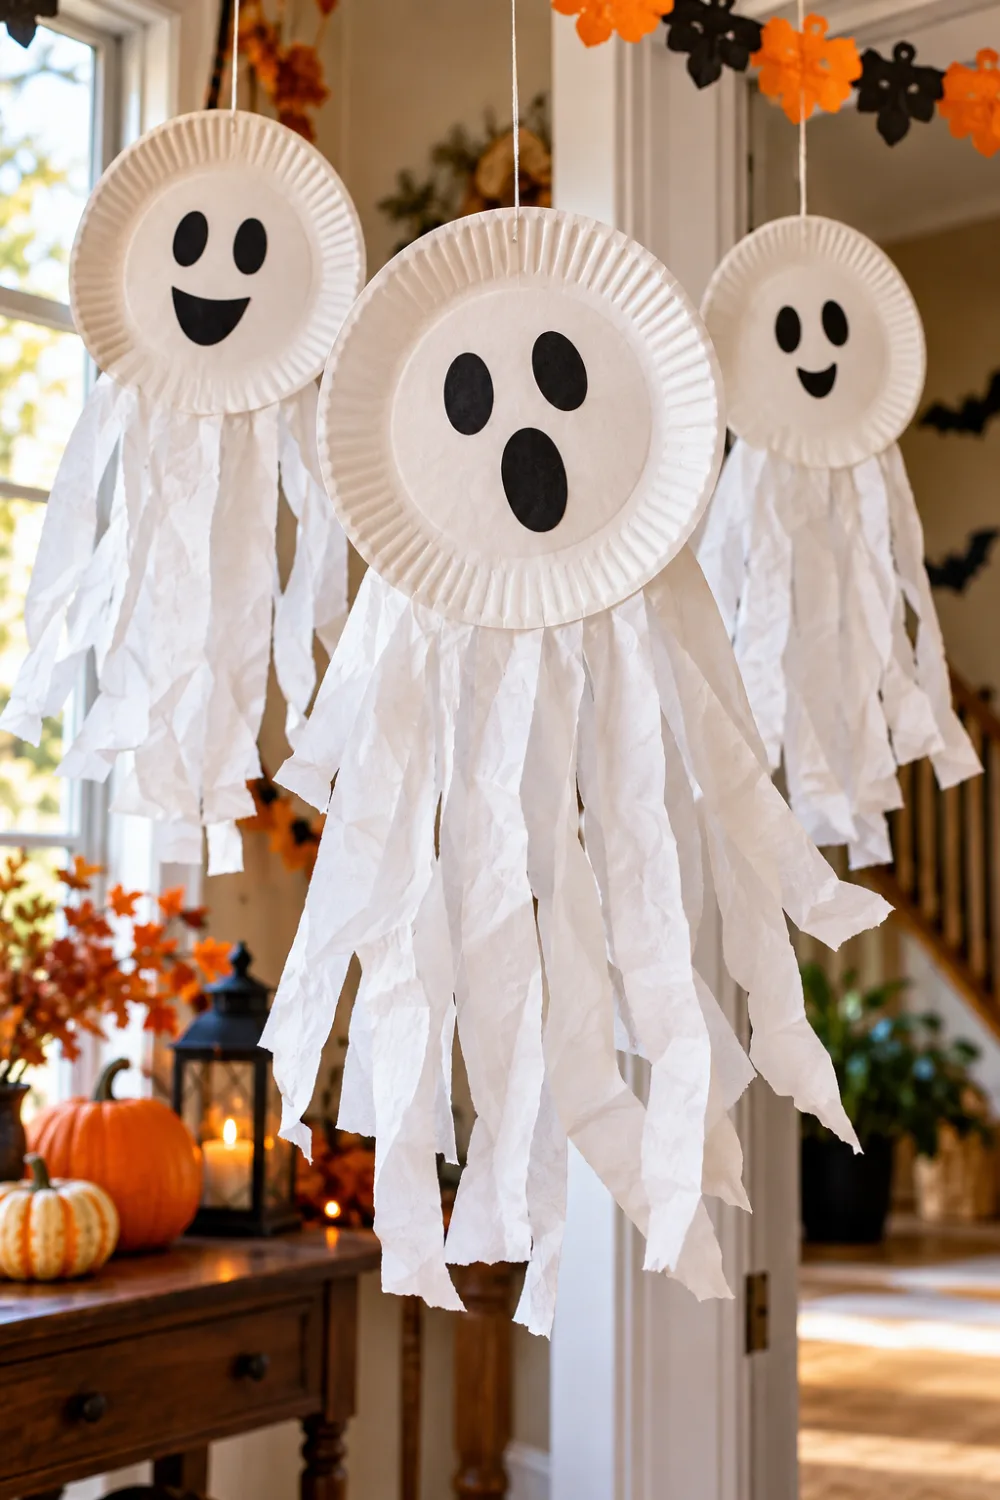
A plain white paper plate already has most of what you need for a ghost face.
Cut the plate into a soft ghost shape, or leave it round for younger children. Add black paper eyes and a surprised mouth, then attach strips of white tissue paper underneath. The strips flutter when the ghost hangs near a doorway or window.
For younger kids, prepare the paper pieces first. Older children can draw their own expressions and cut the streamers themselves.
Small detail: Make every ghost’s face different. One can look surprised, another sleepy, and another slightly silly.
2. Make a Hanging Toilet Paper Roll Ghost Family
Save a few empty toilet paper rolls instead of throwing them away. They make surprisingly good little hanging ghosts.
Wrap each tube in white paper, then glue on black paper eyes and an oval mouth. Attach pieces of tissue paper around the bottom so they hang loosely like a ghost’s body. Thread string through the top and suspend them at slightly different heights.
Make three or four rather than one. The group looks much more playful hanging together.
Kids can also change the faces. Give one ghost tiny eyes, another a huge mouth, and another a funny sideways expression.
Hanging Tip
Use different string lengths instead of hanging every ghost in a straight row. The uneven heights make the little ghost family look as though it is floating through the room.
3. Paint Spooky Monster Rocks With Googly Eyes
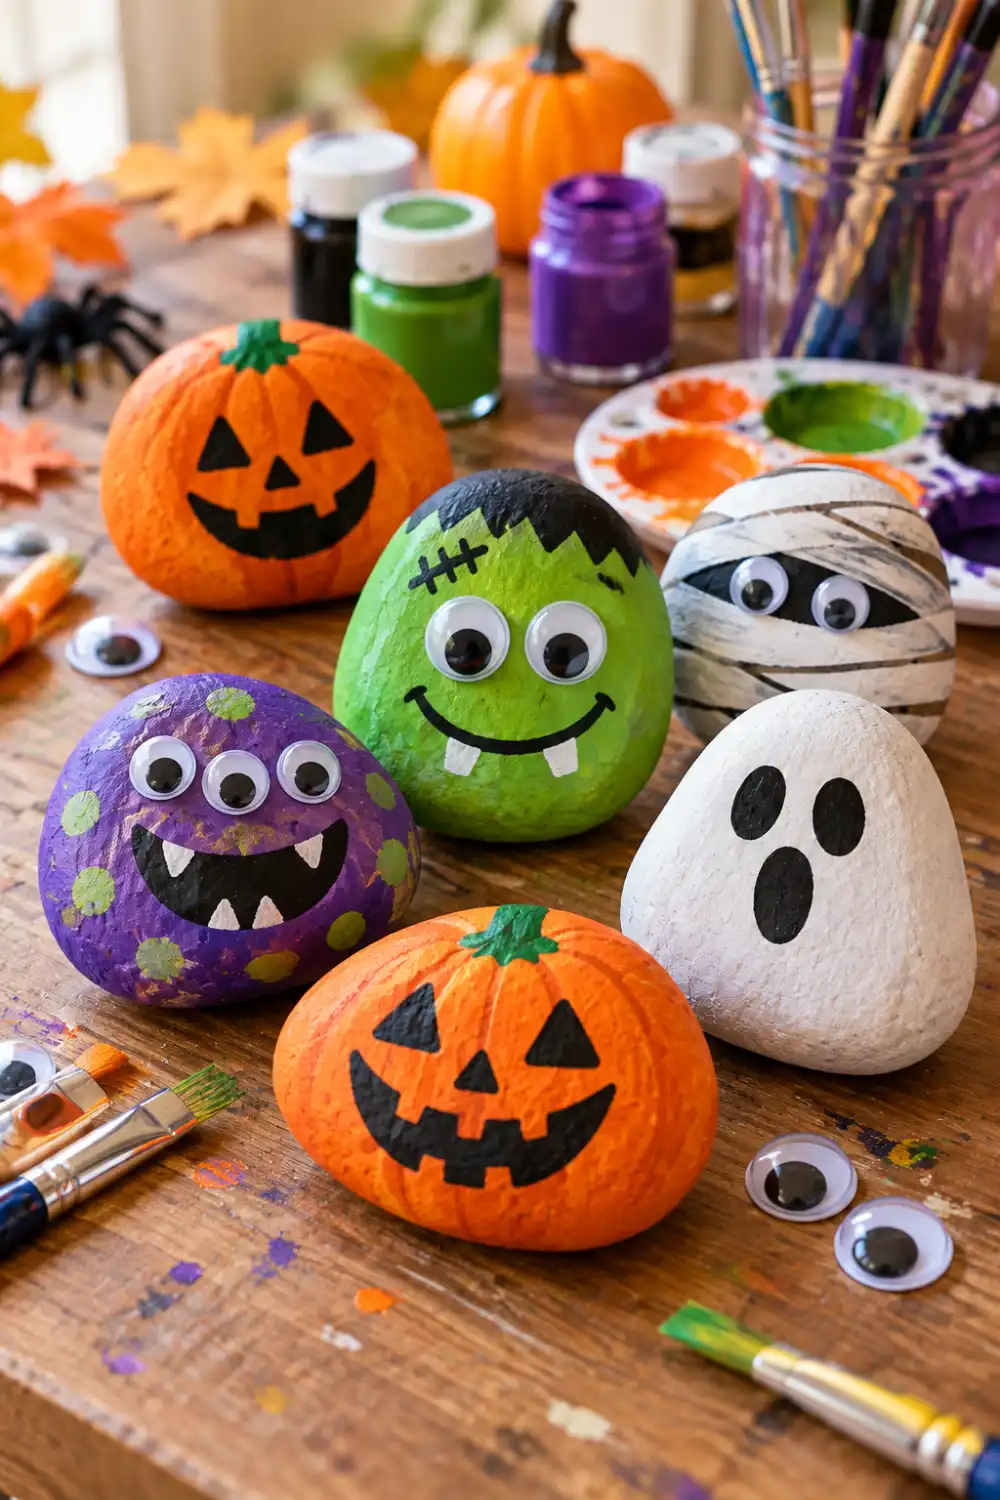
Those smooth stones children bring home from walks can become Halloween monsters with little more than paint.
Wash and dry the rocks first. Paint each one orange, purple, green, white, or another Halloween color. Once dry, add googly eyes, horns, teeth, scars, or goofy expressions.
There is no need to make every rock look like a recognizable character.
A purple monster with three eyes can sit beside a tiny ghost, pumpkin, or mummy. In fact, letting children invent their own creatures usually produces much funnier results.
Keep the painted rocks together on a shelf, windowsill, or Halloween craft table.
A few clean, smooth stones collected from the garden or a walk.
A colorful group of pumpkins, ghosts, mummies, and silly monsters with their own expressions.
4. Build Popsicle Stick Pumpkins With Big Grins
Line up several craft sticks side by side and Halloween characters start taking shape surprisingly quickly.
For a pumpkin, paint the sticks orange and glue them together across the back with one or two extra sticks. Cut eyes, a nose, and a jagged grin from black paper. A small piece of green card makes the stem.
Do not worry about getting the sticks perfectly straight. Slightly uneven edges give the pumpkin more of a handmade look.
Once children understand the basic method, the same idea can become a ghost, mummy, monster, black cat, or Frankenstein character.
1
Place the craft sticks together and glue support sticks across the back.
2
Paint the front orange and let it dry before adding the face.
3
Add black paper features, a green stem, and a string loop if you want to hang it.
5. Create a Halloween Handprint Wreath for the Door
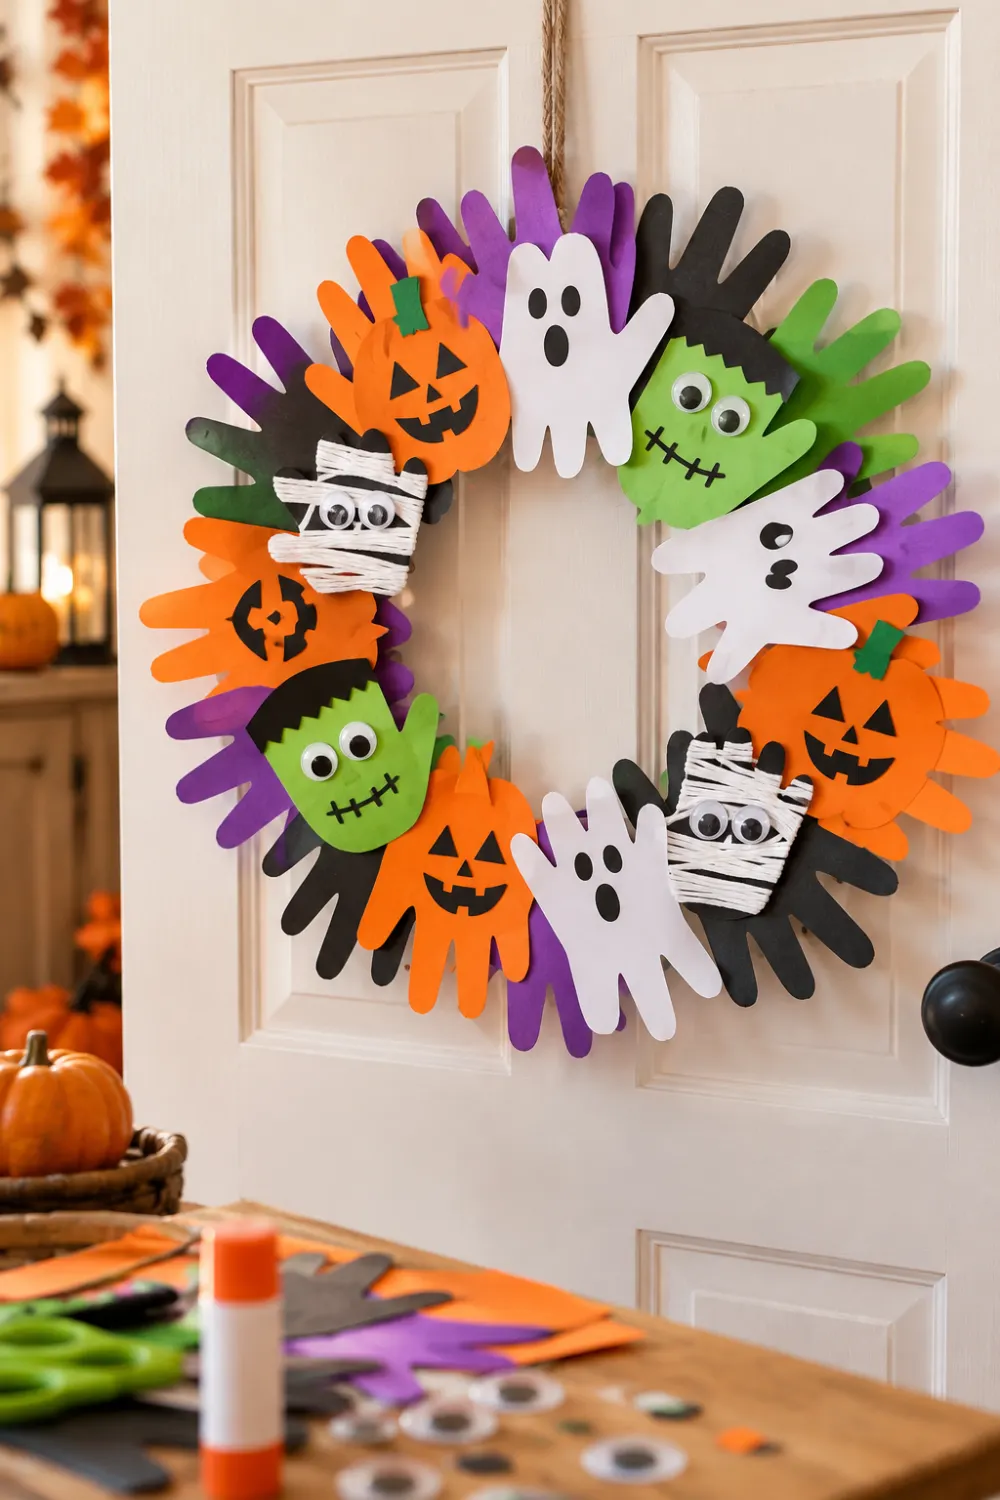
Handprints make this wreath especially fun because the finished decoration still feels personal after Halloween is over.
Trace children’s hands onto orange, purple, green, black, and white paper. Cut out enough prints to overlap around a cardboard ring. Turn some into ghosts, pumpkins, monsters, or mummies by adding simple paper faces.
Then glue the handprints around the ring with the fingers pointing outward.
A large bow at the bottom is optional. If the wreath already has plenty of color and funny faces, leaving it off can keep the finished craft from looking too busy.
Best part: several children can each decorate a handprint and contribute to one wreath.
6. Make a Paper Plate Spider With Fluffy Legs
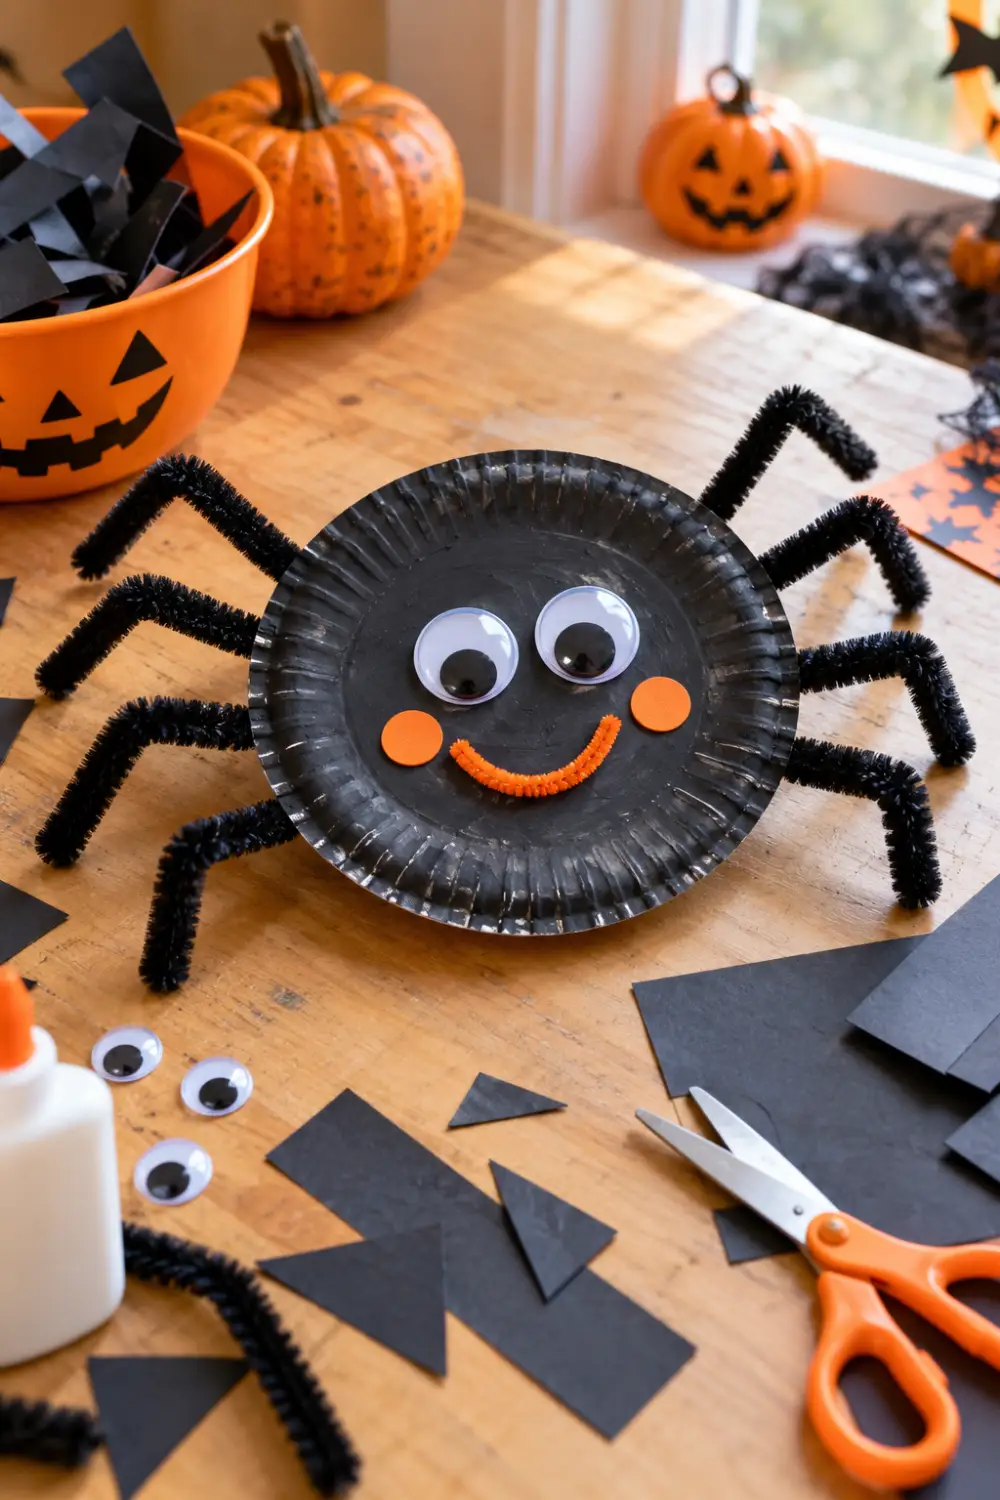
A paper plate makes a good spider body because there is plenty of room for children to paint, glue, and experiment.
Paint the plate black, purple, or orange. Once it dries, add large googly eyes and a smile, fangs, or a surprised mouth. For the legs, use pipe cleaners or strips of folded black paper. Bend each leg slightly so the spider looks less flat.
Younger children may need help attaching the legs securely.
For an extra detail, tie a piece of yarn to the top. The spider can then hang from a shelf or doorway instead of sitting on the craft table.
What to grab first
7. Turn Cardboard Tubes Into Mini Halloween Characters
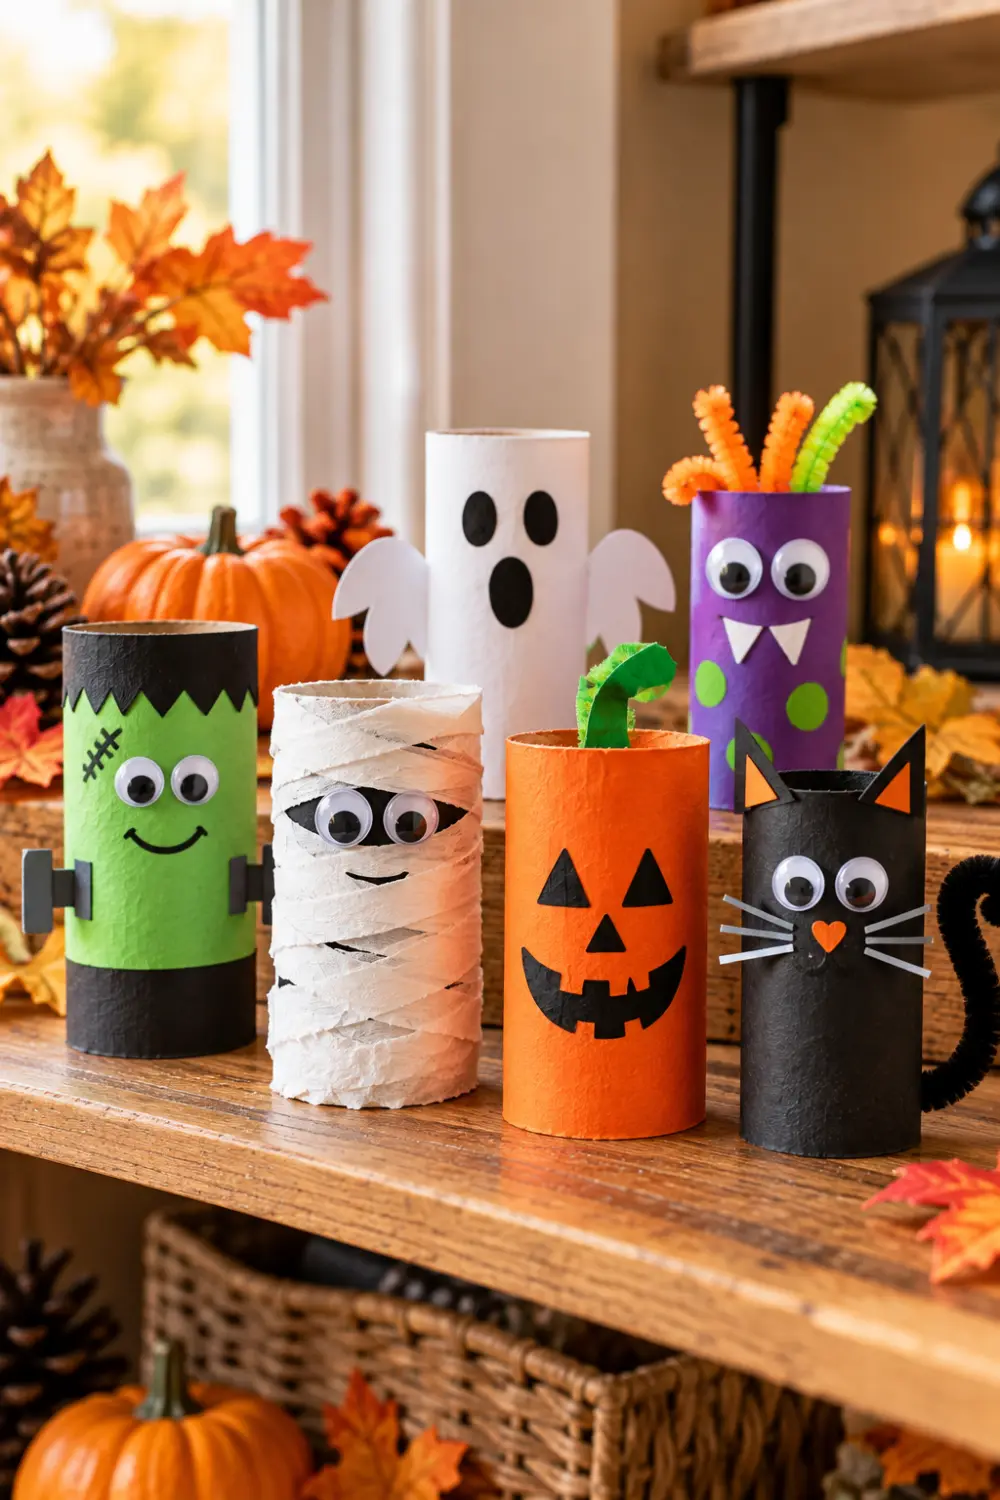
Do not limit cardboard tubes to ghosts. A handful of them can become an entire Halloween crew.
Cover or paint each tube first, then give every character its own details. Green works well for Frankenstein, orange for a pumpkin, white for a mummy, and black for a cat or bat.
Keep the shapes simple. Paper triangles make ears, yarn can become hair, and thin strips of white paper can wrap around a mummy.
The fun comes from making each character slightly different. Line the finished figures across a mantel, bookshelf, or windowsill for an easy homemade Halloween display.
Give each tube one clear character and a few bold details.
Use leftover paper, yarn, paint, and googly eyes.
Do not cover every character with tiny decorations.
Avoid complicated pieces that children cannot attach themselves.
8. Craft a Paper Ghost Garland for a Bedroom or Party
One paper ghost is cute. A whole row can fill an empty wall without creating a complicated afternoon project.
Fold white paper several times and cut simple ghost shapes, or let children trace a cardboard template. Draw different faces with a black marker, then attach the ghosts to string with tape or small wooden pegs.
Leave a little space between each one so the individual shapes are easy to see.
The garland can stretch across a bedroom wall, fireplace, classroom board, or party table. Keep the faces varied rather than trying to make every ghost match.
- ▸For a neat garland: trace one cardboard ghost template.
- ▸For more personality: let kids draw a different expression on every ghost.
- ▸For easy storage: use lightweight paper so the garland folds away after Halloween.
9. Paint a Pumpkin Rock With a Silly Face
A rounded stone has almost the right pumpkin shape before the paint even comes out.
Choose a smooth rock and paint most of it orange. Add a small green stem at the top, then let the child decide what kind of face the pumpkin needs. A traditional jack-o’-lantern grin works, but crooked teeth, huge eyes, or a tiny surprised mouth are more fun to invent.
Use several finished rocks as table decorations or tuck them among autumn leaves on a shelf.
This is also a handy project when you have paint left over from the monster rocks and want another craft without opening new supplies.
10. Make a Paper Bag Monster Puppet Kids Can Play With
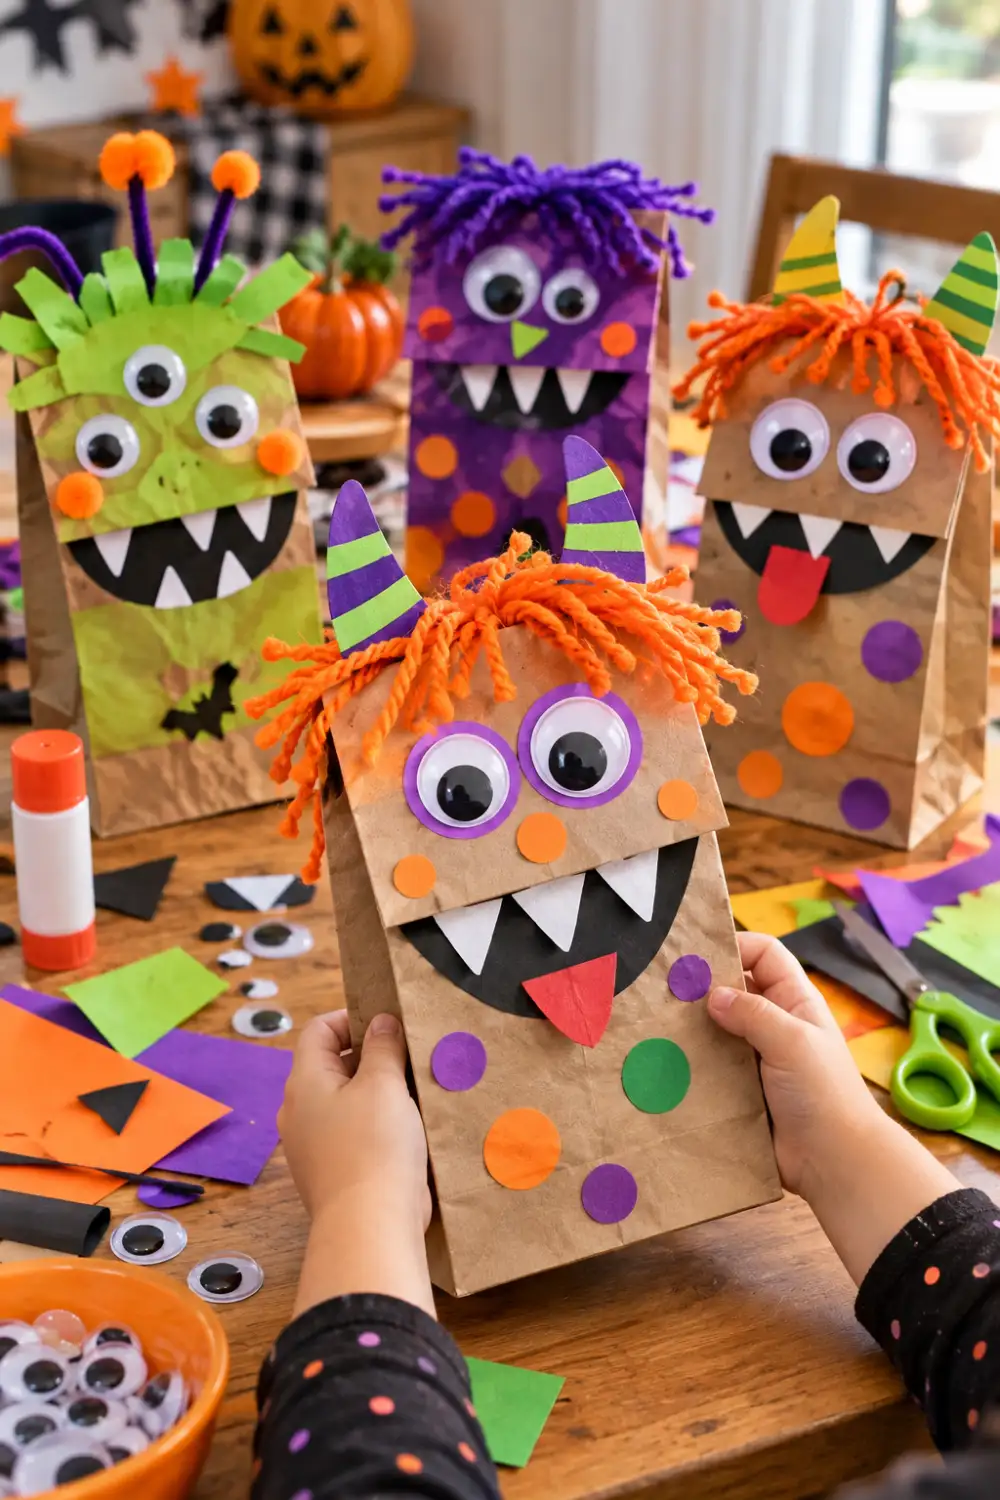
Some crafts are more fun when they do something after the glue dries. A paper bag monster becomes both a Halloween project and a puppet for pretend play.
Turn a plain paper lunch bag upside down so the folded bottom becomes the monster’s moving mouth. Add paper teeth, horns, ears, hair, and as many eyes as the child wants.
There is no correct monster to copy.
Put scraps of colored paper in the middle of the table and let children choose their own combinations. One monster might have three eyes and sharp teeth, while another ends up with pink hair and one enormous eye.
Make It Playable
Keep bulky decorations away from the fold in the paper bag. The mouth will open and close more easily, so children can use their monsters for stories and puppet shows after craft time.
11. Create a Popsicle Stick Witch With a Pointy Hat
A few green craft sticks can turn into a cheerful little witch without needing a complicated pattern.
Line up the sticks and glue one or two extra pieces across the back to hold them together. Paint the face green, then cut a tall pointed hat from black paper. Orange yarn or thin paper strips work well for messy witch hair.
Let kids decide on the expression. A crooked smile, tiny teeth, or mismatched googly eyes can give each witch a different personality.
Add a string loop to the back if you want to hang the finished witch on a door, wall, or Halloween tree.
Let the painted craft sticks dry before adding paper hair, eyes, and the hat. Decorating too soon can leave glue and paper stuck to wet paint.
12. Turn Handprints Into Colorful Halloween Monsters
Handprint crafts do not have to become neat little keepsakes. Halloween is a good excuse to make them weird.
Trace a child’s hand onto purple, green, orange, or black paper and cut it out. Turn the fingers into horns, monster hair, spider legs, or strange floppy arms. Then add paper eyes, teeth, scars, and goofy expressions.
Instead of telling children exactly what the finished creature should look like, put several paper scraps in front of them and see what they invent.
Make several monsters and arrange them together on a wall or poster board for a homemade Halloween creature collection.
1
Trace the child’s hand onto colored paper and carefully cut around the outline.
2
Turn the hand around until the fingers make useful monster features such as hair, horns, or legs.
3
Finish with eyes, teeth, paper shapes, marker details, and whatever odd features the monster needs.
13. Make a Spooky Spider Web From Paper and Yarn
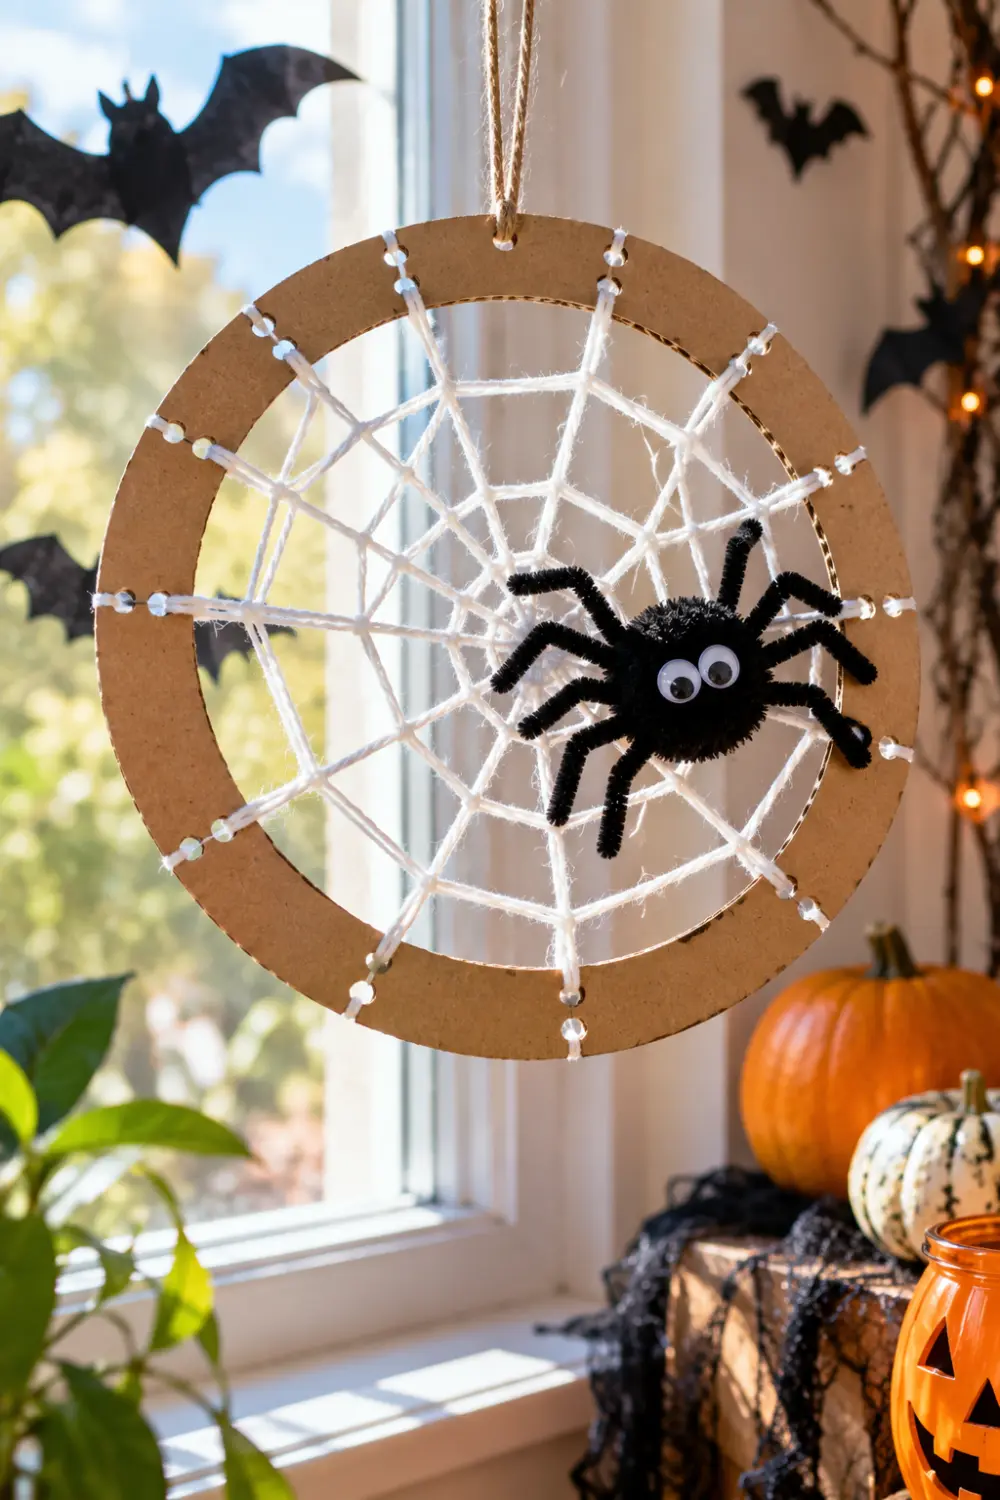
A homemade spider web looks detailed, but the basic version is quite manageable.
Start with a sturdy paper plate or cardboard circle. Cut away the center so only the outer ring remains. Punch holes around the edge, then give children white yarn to thread back and forth across the opening.
There is no need to create a perfectly even web. Crossing the yarn in different directions actually makes it more interesting.
Finish with a small paper spider or pom-pom spider attached near one side. Hang the web where light can pass through the gaps, such as a window or bright wall.
A plain cardboard or paper plate ring with holes punched around the edge.
Crisscrossed white yarn and one little spider sitting somewhere inside the web.
14. Craft a Friendly Frankenstein From Recycled Cardboard
That small cardboard box waiting for the recycling bin can become a chunky Frankenstein decoration.
Cover the cardboard with green paper or green paint. Add black paper hair across the top, then make large eyes, a straight mouth, and a few drawn stitches. Small pieces of rolled cardboard can become the bolts on either side.
Keep the facial pieces large enough for little hands to position without frustration.
A rectangular cereal box section works especially well because Frankenstein’s blocky head does not need careful shaping. Stand the finished character on a shelf alongside pumpkins and other homemade decorations.
Check the craft box
15. Build a Mini Haunted House From Paper Cups and Cardboard
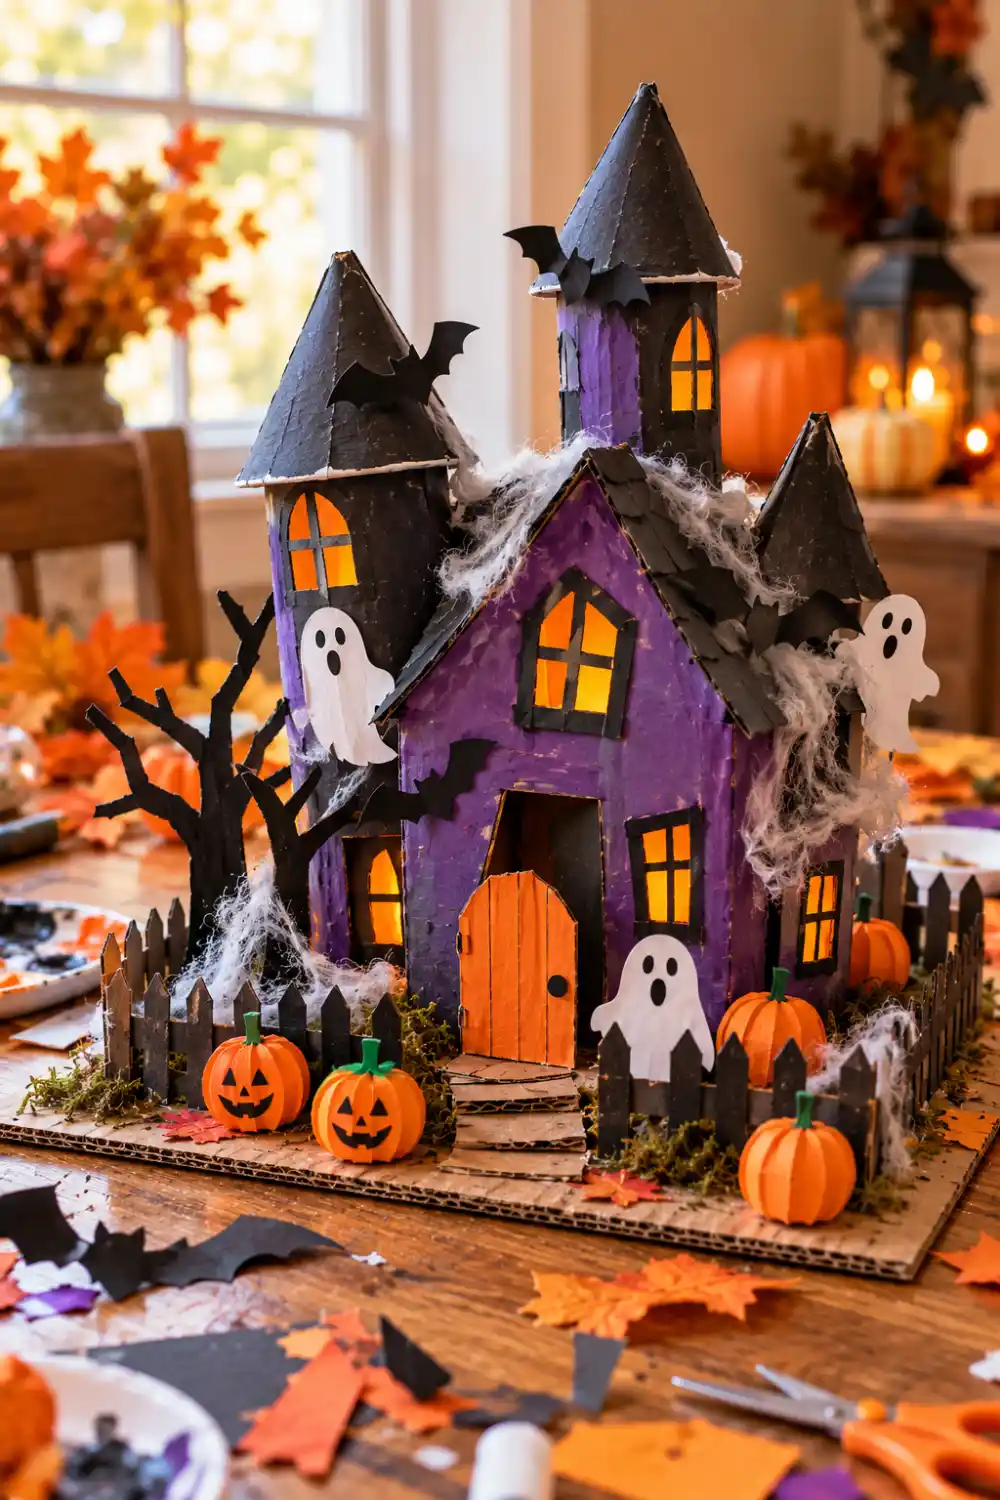
A haunted house gives kids a chance to combine several small craft ideas into one scene.
Use a cardboard rectangle as the base and an upside-down paper cup or small recycled box for the house. Cover it with black or purple paper, then add crooked windows, a bright door, and a wonky roof.
The decorations around it are where children can get creative.
Add cotton cobwebs, paper bats, tiny ghosts, an orange moon, or miniature cardboard pumpkins. Older kids can build several structures and turn the base into a whole Halloween street.
Do not chase symmetry. A haunted house looks better a little crooked.
16. Make a Halloween Bat From Folded Black Paper
A black paper bat is one of those crafts that looks good even when the cutting is not completely even.
Fold a sheet of black paper and draw a simple bat shape with the center of the body along the fold. Cut around the outline, open it up, and you have matching wings. Children can add paper eyes, tiny white fangs, or googly eyes.
For a little dimension, fold the wings slightly forward instead of leaving the whole bat flat.
Make several in different sizes and tape them across a wall. A loose group of bats looks much more interesting than a perfectly straight row.
| Folded Paper Bat | Freehand Paper Bat |
|---|---|
| Makes matching wings more easily | Lets kids make intentionally uneven shapes |
| Useful for repeating several similar bats | Good for creating bats with different personalities |
17. Create a Tissue Paper Pumpkin With a Scrunched Texture
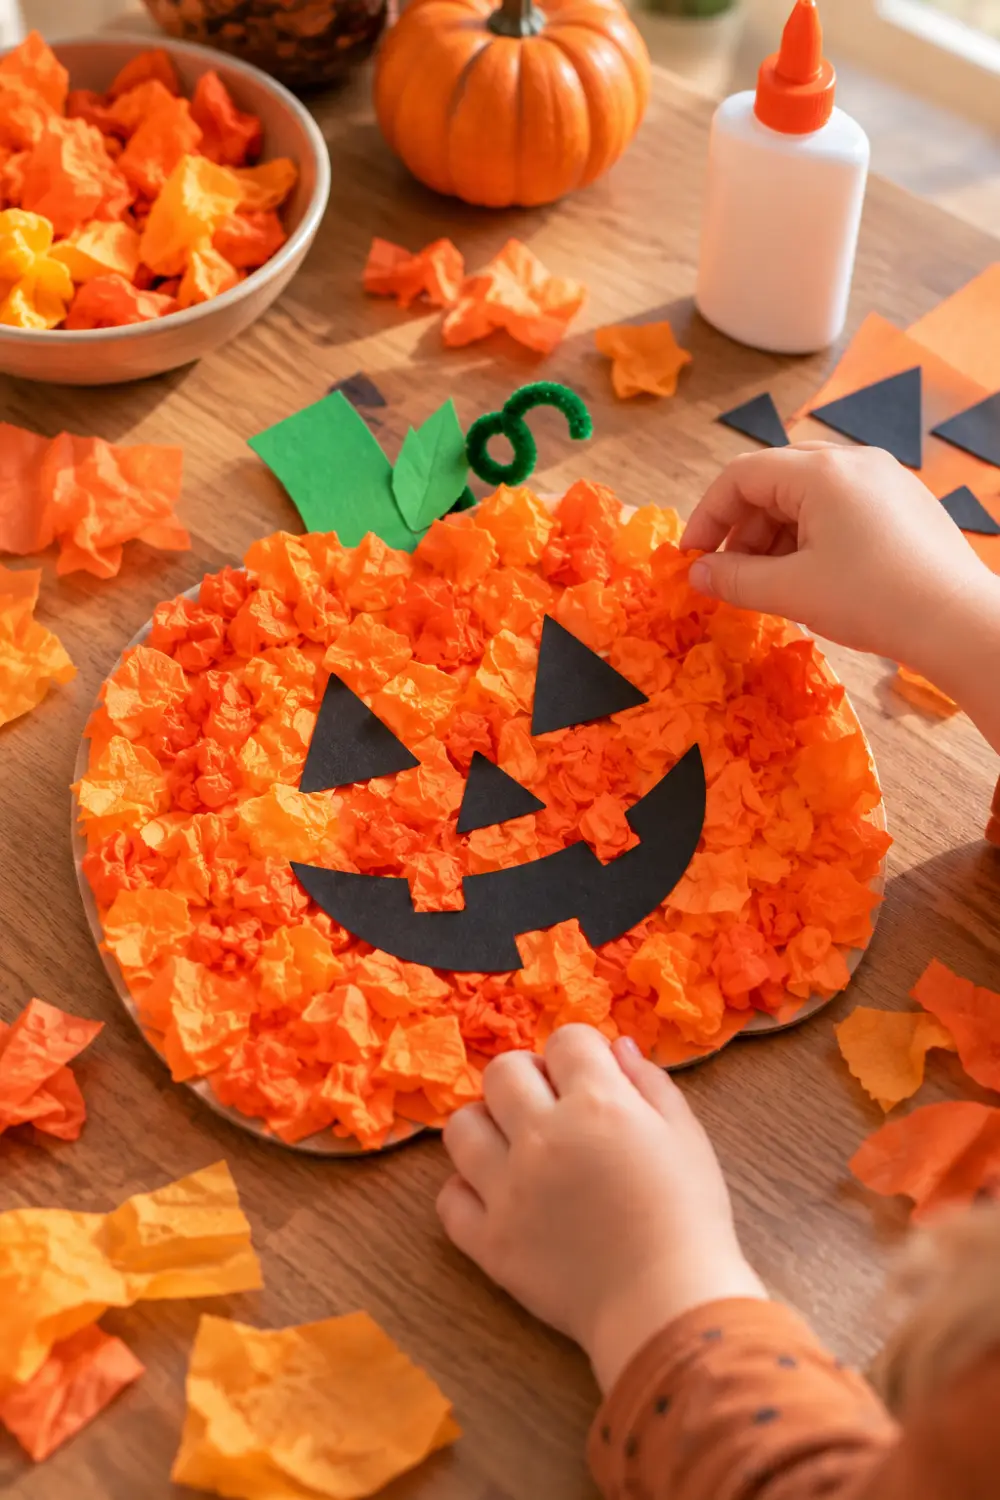
Flat paper pumpkins are easy, but scrunched tissue paper gives them a texture kids can build piece by piece.
Draw a large pumpkin outline on cardboard or thick paper. Tear orange tissue paper into small pieces, scrunch each piece loosely, and glue the little bundles inside the outline.
There is no need to fill every tiny gap.
Cut a green paper stem and add black paper features if you want a jack-o’-lantern. For a softer autumn decoration, leave the pumpkin without a face.
A shallow tray for the tissue pieces helps keep the table from disappearing under a pile of orange paper.
Scrunch the tissue loosely so the pumpkin keeps its fluffy texture.
Work across the pumpkin in small patches.
Do not flatten every tissue piece against the cardboard.
Avoid pouring glue over the entire base at once.
18. Turn Egg Cartons Into Tiny Halloween Characters
Before an empty cardboard egg carton goes into recycling, cut a few of the individual cups apart.
Those little shapes make useful bases for tiny Halloween characters. Paint one orange for a pumpkin, green for Frankenstein, white for a ghost, or black for a spider.
Once the paint dries, add simple paper features and googly eyes.
For spiders, poke pipe-cleaner legs through the sides. A pumpkin only needs a tiny green paper stem and a face. Several characters can also be glued onto a strip of cardboard to make one miniature Halloween scene.
Keep the pieces chunky if younger children are doing the decorating.
Good To Know
An adult can separate the egg-carton cups before craft time. Kids can then concentrate on painting and decorating instead of struggling with thick cardboard and scissors.
19. Make a Cotton Ball Ghost With a Simple Face
This ghost works well when you need a Halloween activity with very few steps.
Draw a large ghost outline on sturdy paper or cardboard. Spread glue inside the shape, then let children cover it with cotton balls. They can pull some cotton apart first if they want a softer, uneven surface.
Once the body is covered, add black paper eyes and a mouth.
The finished ghost can stay simple, or children can give it a bow tie, paper hat, rosy cheeks, or another funny detail.
Because most of the work is sticking down large pieces, this is one of the easier Halloween Crafts for Kids who are still developing their cutting skills.
20. Create a Recycled Halloween Character Display for Kids
The last project is a good way to use the odds and ends left behind by the other crafts.
Set out cardboard tubes, small boxes, paper scraps, leftover craft sticks, yarn, and any googly eyes still rolling around the table. Let each child choose a recycled item and turn it into a Halloween character.
A small box might become Frankenstein. A tube can become a mummy. Craft sticks can form a pumpkin, while cardboard scraps make bats and gravestones.
Arrange everything on one cardboard base when finished. Instead of twenty unrelated leftovers, you get a little Halloween scene the kids built together.
Build From the Leftovers
Conclusion
Halloween craft time does not need expensive kits or a cupboard packed with special supplies. Paper plates, cardboard tubes, craft sticks, tissue paper, yarn, and a few recycled boxes can keep little hands busy while giving children plenty of room to make their own choices.
The best Halloween Crafts for Kids are often the ones that are simple enough for children to take over. Let the pumpkin have crooked teeth. Keep the ghost with the mismatched eyes. Hang the slightly wonky bat right beside the neat one.
Pick a few ideas that match the supplies you already have, and save the rest for another October afternoon.