
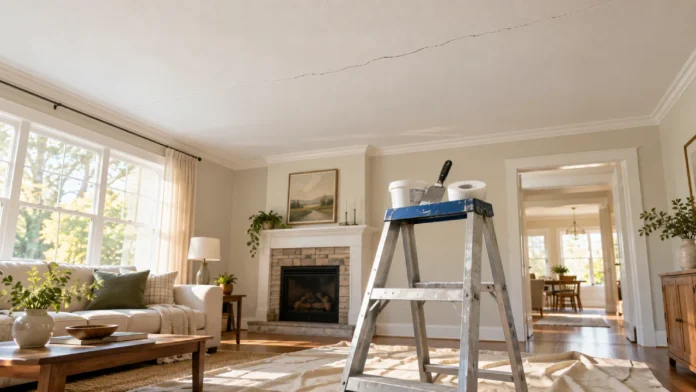


Paint the ceiling to match
Use the same paint that is already on the ceiling, if you still have it. Old paint fades over the years, so a fresh coat may look a shade brighter than the rest. Roll one thin coat over the primed spot, then blend outward in long, overlapping strokes. Let it dry for 2 to 4 hours, then add a second coat if you can still see the patch. Painting the whole ceiling, edge to edge, is the only sure way to hide a color difference.
Stage 4: Troubleshooting Table and FAQ
| If This Happens | Try This |
|---|---|
| Tape bubbles or lifts after the first coat | Cut the bubble open with a utility knife, press the tape flat, and add a thin coat of compound over it. Dust or damp spots under the tape are the usual cause. |
| The crack comes back within weeks | Trace it with a pencil and measure again. If it has grown past 1/4 inch or follows a pattern, call a pro. A moving crack means something is shifting behind it. |
| You can see a ridge under the paint | Sand the ridge flat once the paint cures, then add a very thin coat of compound that reaches farther out. Prime and repaint the spot. |
| The patch looks dull next to the old paint | Prime was too thin or skipped. Add a coat of primer, let it dry for 1 hour, then repaint. |
| Fine cracks spread across the patch as it dries | The coat was too thick or dried too fast. Sand the patch, then add a thinner coat and let it dry at room temperature with no heat. |
Stage 5: Quick Reference Card and Conclusion
- Pencil, flashlight, tape measure
- Step ladder and drop cloth
- Dust mask and safety glasses
- Utility knife and 6-inch putty knife
- Self-adhesive mesh tape
- Lightweight joint compound
- Fine sanding sponge and damp cloth
- Stain-blocking primer and matching paint
- Small roller and tray
- Trace the crack
- Measure it
- Check for warning signs
- Pick your repair path
- Cover floor, set up ladder
- Scrape loose paint
- Cut a V-groove (wide cracks)
- Wipe off dust
- Press mesh tape on
- Spread first thin coat
- Dry for 24 hours
- Sand smooth
- Spread wider second coat
- Prime
- Paint to match
Conclusion
You read the crack, patched it the right way, and painted over it so it blends in. That is the whole job, done without calling anyone.
Keep an eye on the spot for the next few weeks. If your pencil line stays clean, the repair is holding.
Next, check the rest of your ceilings with a flashlight held flat against the surface. Small cracks are much easier to fix when you catch them early.
Save this guide to your Pinterest board so it’s ready the next time a crack shows up.
- Trace the crack with a pencil in bright side light
- Measure the width and length of the crack
- Check for warning signs that call for a pro
- Decide how to fix ceiling cracks based on what you found
- Cover the floor and set up a stable ladder
- Scrape away loose paint and flaking plaster
- Cut a shallow V-groove along wider cracks
- Wipe the dust off the ceiling
- Press mesh tape over the crack
- Spread a thin first coat of joint compound
- Wait until the compound dries completely
- Sand the dry patch smooth
- Spread a wider second coat to blend the edges
- Prime the patched area
- Paint the ceiling to match
Trace the crack with a pencil in bright side light
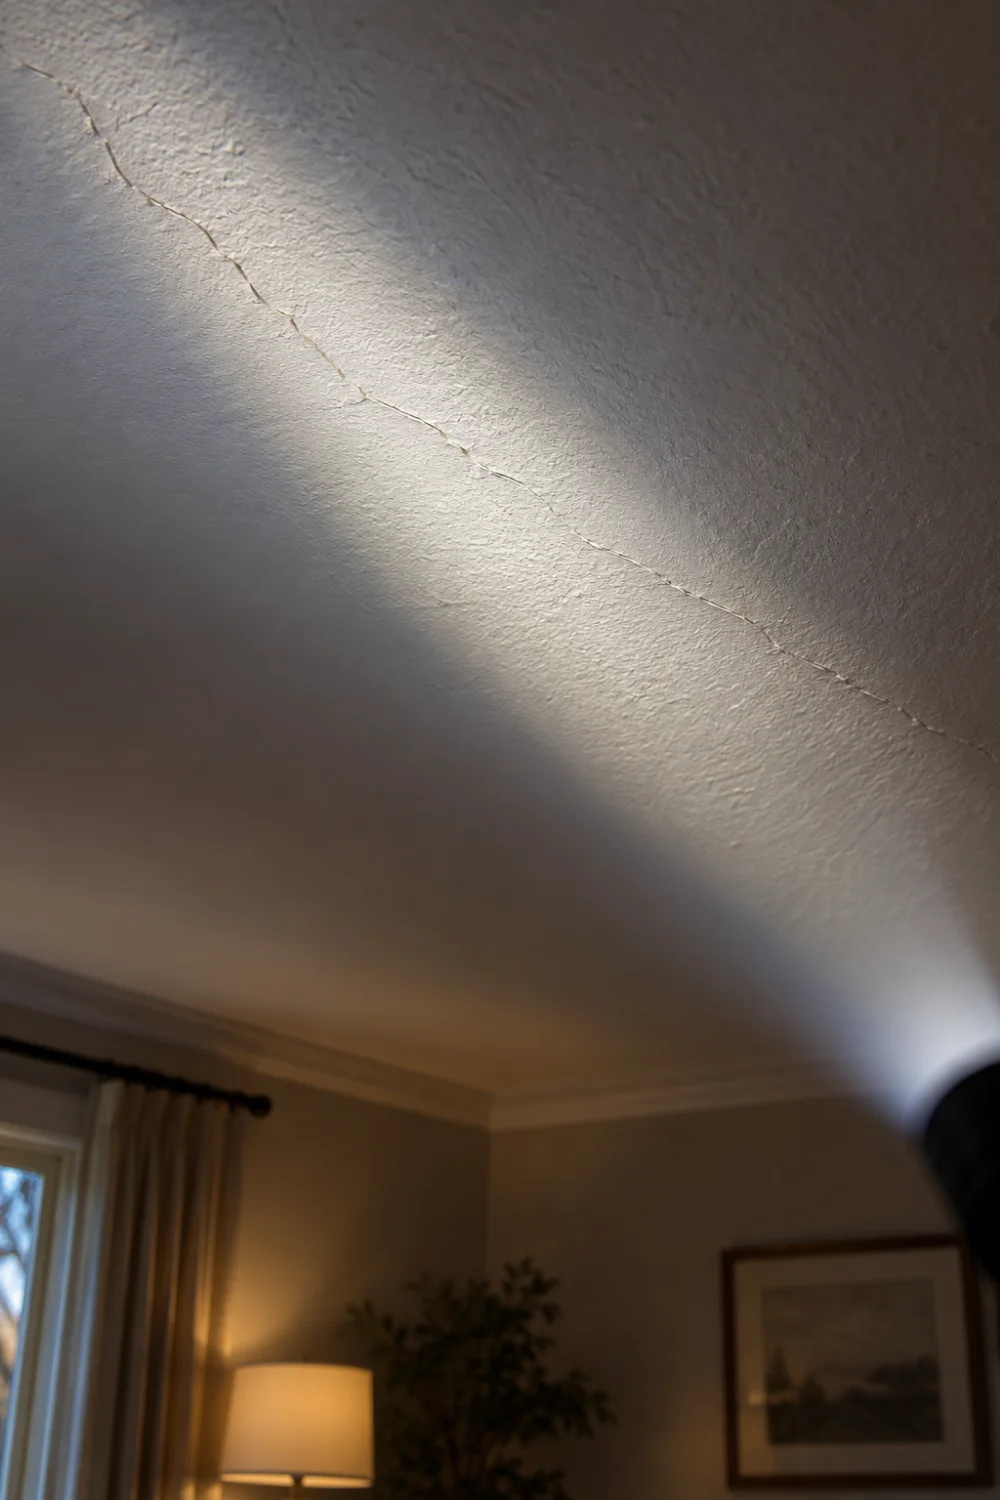
Turn off the ceiling light and hold a flashlight flat against the ceiling, aiming along its surface. Shadows pop out of even hairline cracks this way, so you can see where each one really ends. Then draw a light pencil line right along the crack. The line shows you the full length now, and it will show you later if the crack grows.
Measure the width and length of the crack
Grab your tape measure and write down two numbers on a sticky note: how long the crack is, and how wide it is at its widest point. A hairline crack is thinner than 1/16 inch, about the thickness of a credit card edge. Snap a photo with the tape measure beside the crack. A photo beats memory when you check again in a few weeks.
Check for warning signs that call for a pro

Most ceiling cracks are cosmetic. A few are not, and patching those hides a bigger problem. Look closely for any of these:
- A crack wider than 1/4 inch
- Ceiling that sags, bows, or dips near the crack
- Brown or yellow water stains around it
- A crack that grew since you traced it
- Cracks running from the ceiling down the wall
If you see even one, stop and call a contractor or a home inspector before you pick up a putty knife. If none of these fit, you are in good shape to keep going.
Decide how to fix ceiling cracks based on what you found
Your measurements from the last two steps now point to one of three paths. A crack under 1/16 inch wide is a hairline crack, so you can skip Step 7 and go straight to cleaning. A crack between 1/16 and 1/4 inch wide needs every step in this guide. Anything wider, or any warning sign from Step 3, goes to a pro. Pick your path before you buy supplies, so you only buy what the job needs.
Cover the floor and set up a stable ladder
Compound drips and dust travels farther than you expect, usually right onto the nicest rug in the room. A few minutes of setup saves an hour of cleanup. The drop cloth is the important part, but an old bedsheet works fine if you don’t own one.
- Move furniture out of the room, or to the center and cover it
- Spread the drop cloth under the whole work area
- Open the ladder all the way and lock both spreaders
- Put on your dust mask and safety glasses
- Set the putty knife and compound on the ladder shelf
Stand with your belt buckle below the top of the ladder, and never step on the top rung. If you need to lean far to reach the crack, climb down and move the ladder instead.
Scrape away loose paint and flaking plaster
Compound grips solid surfaces and slides off flaking ones, which is why this step matters. Hold the putty knife at a shallow angle and drag it along both sides of the crack, about 2 inches out from the line. Stop scraping when the paint stops coming off in flakes. You are only removing what is already loose.
Cut a shallow V-groove along wider cracks

Skip this step if your crack is a hairline, under 1/16 inch. For wider cracks, put on your safety glasses first. Hold the utility knife at a 45-degree angle and drag it along the crack, widening it into a shallow V about 1/8 inch deep. Why bother? Compound packed into a groove has something to grip. Compound smeared over a closed crack sits on top and splits again. Cut slowly, and never press hard, since wires and pipes can sit just above the ceiling.
Wipe the dust off the ceiling
Self-adhesive tape will not stick to a dusty surface, and it peels away within days. Wet a sponge or microfiber cloth and wring it out until it stops dripping. Wipe along the crack and 2 inches past each side, rinsing the cloth whenever it turns gray. Then wait 10 minutes for the ceiling to dry completely before you move on. Tape over a damp spot will bubble.
Press mesh tape over the crack
Cut a piece of mesh tape about 1 inch longer than the crack. Peel back a few inches of the backing, center the tape over the crack, and press it flat with your fingers. Work from the middle outward. Then drag the putty knife across the tape in one pass to seat it firmly. The mesh should lie flat, with no wrinkles or lifted corners.
Spread a thin first coat of joint compound
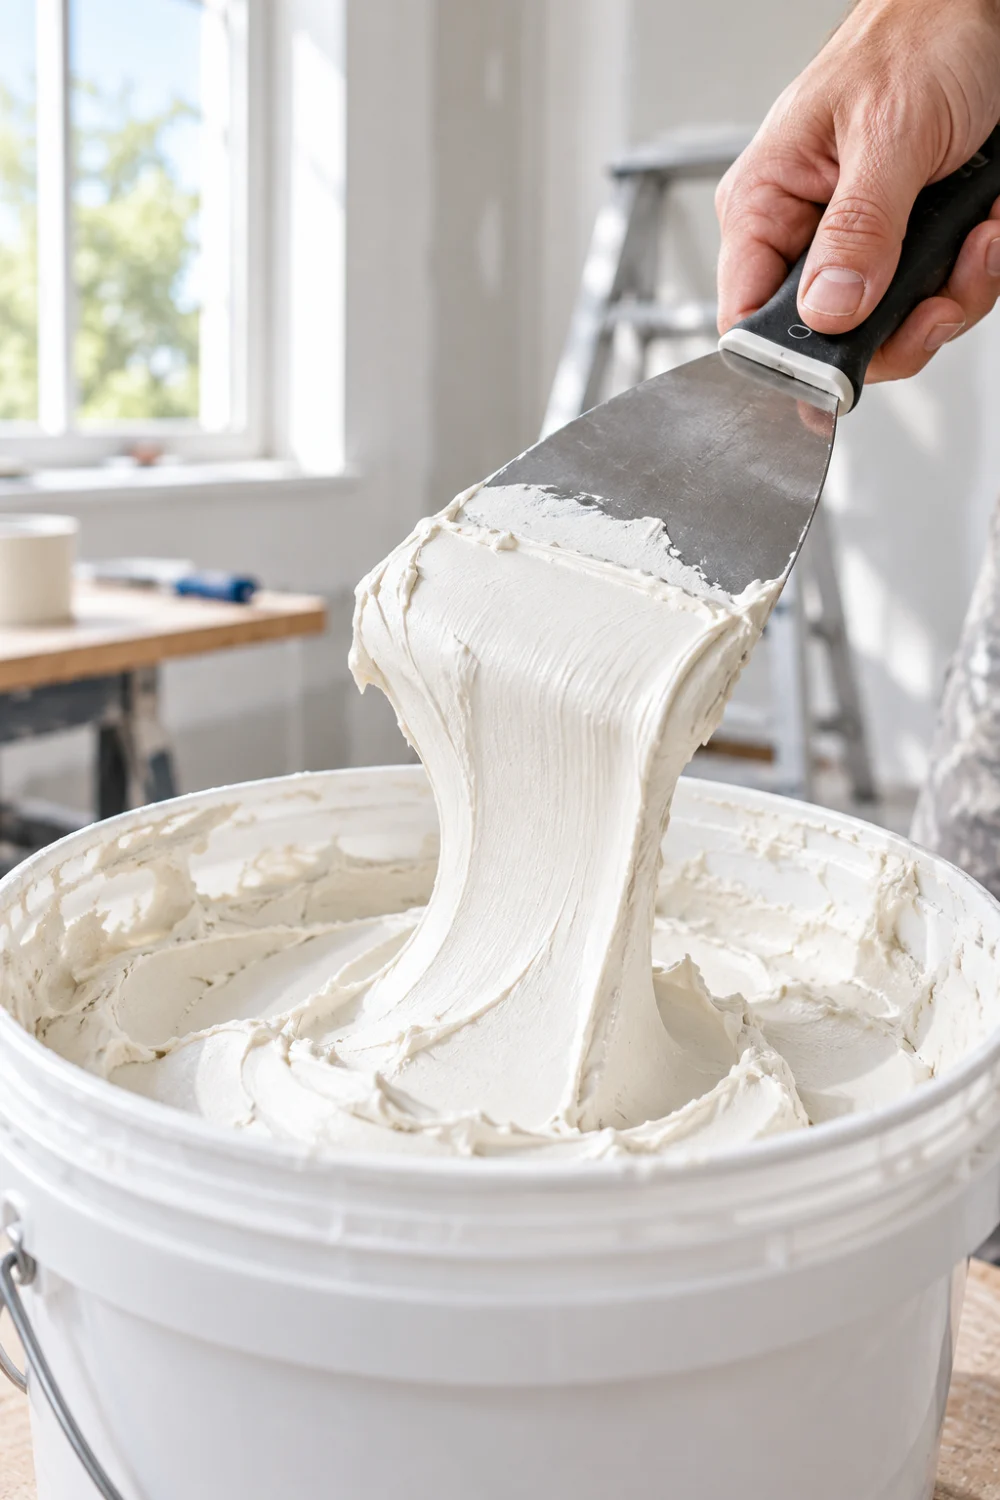
Load the putty knife with a strip of compound about as wide as the blade. Press it over the mesh tape at a shallow angle and pull in one long stroke, forcing the compound through the holes in the mesh. Scrape off the extra on the return pass. The coat should be thin enough that you can still see the tape’s pattern underneath. A thick first coat cracks as it dries, so aim for less than you think you need.
Wait until the compound dries completely
Give it 24 hours in a normal room, longer if the air is humid or the room is cold. Wet compound looks gray and feels cool to the touch. Dry compound turns bright white and feels the same temperature as the ceiling around it. Skip the hair dryer. Forcing the heat makes the surface dry faster than the layers beneath it, and that is how new hairline cracks form on a fresh patch. Open a window or run a fan across the room, not pointed at the ceiling.
Sand the dry patch smooth
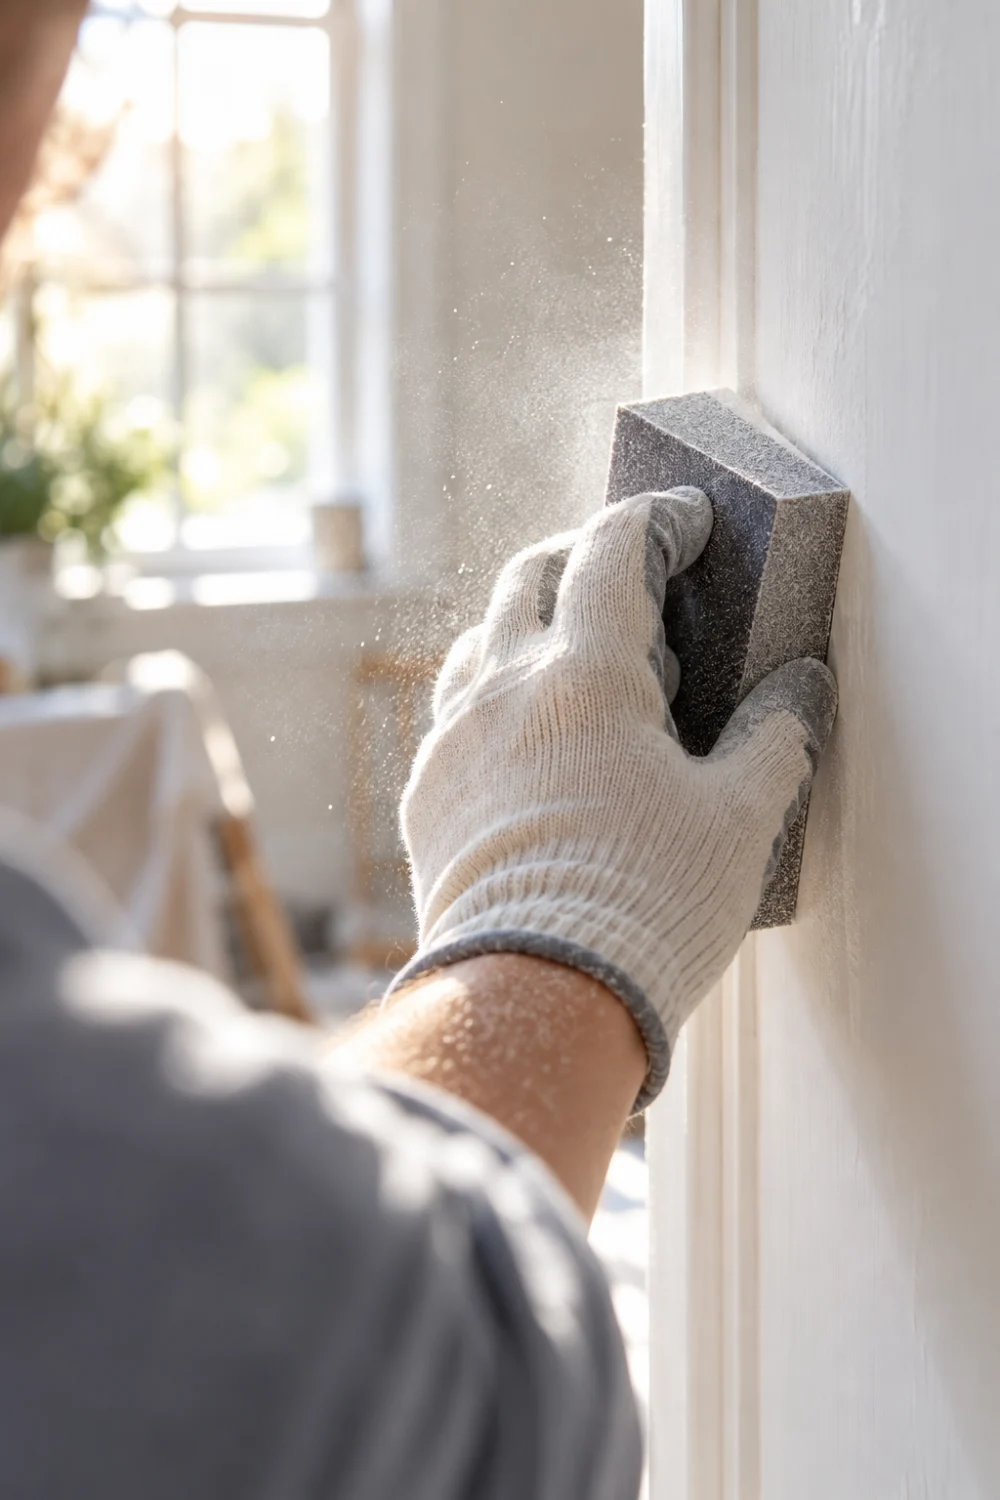
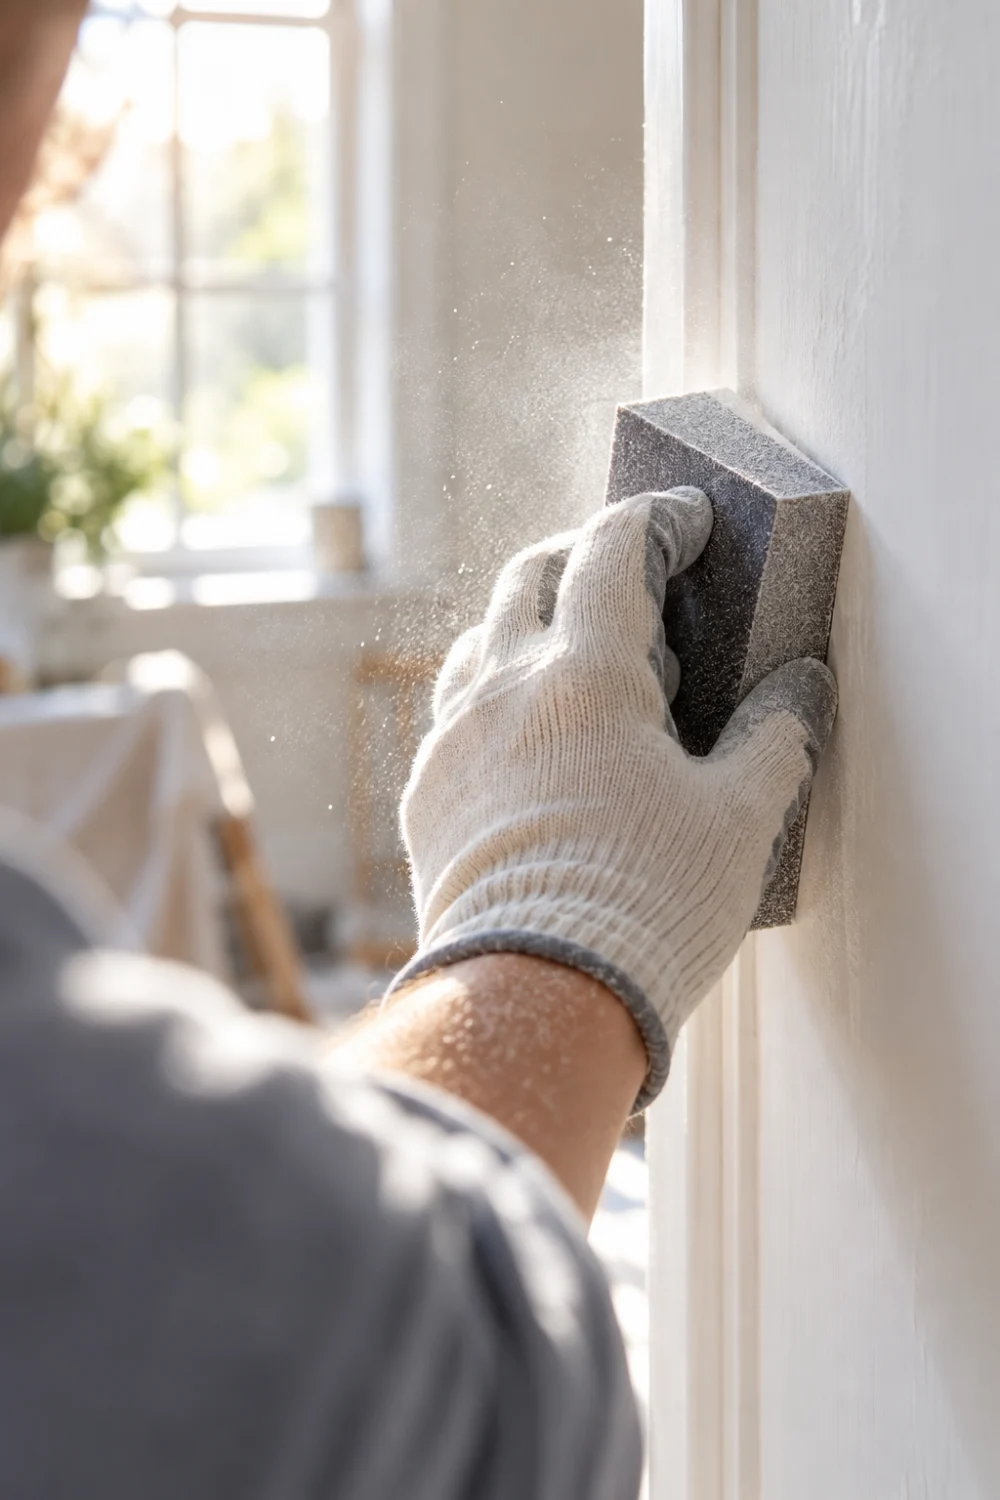
Wrap a fine sanding sponge around your hand and use light, circular strokes across the patch, working about 3 inches past the edges so the repair fades into the ceiling. Wear your dust mask and glasses again, because this is the dustiest step in the whole job. Stop when you can run your palm across the patch and feel no ridge. Check it with the flashlight held flat against the ceiling, as you did in Step 1. Shadows show every bump your fingers miss.
Spread a wider second coat to blend the edges
Sanding leaves a slight edge where the first coat ends. A second coat hides it. Apply compound in one long pass, reaching about 3 inches past the first coat on each side. Hold the knife nearly flat and ease the pressure as you reach the outer edge, so the compound feathers out to nothing. You want a layer thinner than a coin. When it dries, wipe the patch with a damp cloth and sand only if you feel a ridge. Wait another 24 hours before priming.
Prime the patched area
Joint compound soaks up paint like a sponge, so bare compound under paint leaves a dull, blotchy spot that shows from across the room. Primer seals it. Stir the primer well, then brush or roll one thin coat over the patch, extending 2 inches onto the old paint around it. Use stain-blocking primer if the ceiling ever had a water mark, or the stain can bleed through the new paint. Let it dry for the time on the can, usually about 1 hour.
Paint the ceiling to match
Use the same paint that is already on the ceiling, if you still have it. Old paint fades over the years, so a fresh coat may look a shade brighter than the rest. Roll one thin coat over the primed spot, then blend outward in long, overlapping strokes. Let it dry for 2 to 4 hours, then add a second coat if you can still see the patch. Painting the whole ceiling, edge to edge, is the only sure way to hide a color difference.
Stage 4: Troubleshooting Table and FAQ
| If This Happens | Try This |
|---|---|
| Tape bubbles or lifts after the first coat | Cut the bubble open with a utility knife, press the tape flat, and add a thin coat of compound over it. Dust or damp spots under the tape are the usual cause. |
| The crack comes back within weeks | Trace it with a pencil and measure again. If it has grown past 1/4 inch or follows a pattern, call a pro. A moving crack means something is shifting behind it. |
| You can see a ridge under the paint | Sand the ridge flat once the paint cures, then add a very thin coat of compound that reaches farther out. Prime and repaint the spot. |
| The patch looks dull next to the old paint | Prime was too thin or skipped. Add a coat of primer, let it dry for 1 hour, then repaint. |
| Fine cracks spread across the patch as it dries | The coat was too thick or dried too fast. Sand the patch, then add a thinner coat and let it dry at room temperature with no heat. |
Stage 5: Quick Reference Card and Conclusion
- Pencil, flashlight, tape measure
- Step ladder and drop cloth
- Dust mask and safety glasses
- Utility knife and 6-inch putty knife
- Self-adhesive mesh tape
- Lightweight joint compound
- Fine sanding sponge and damp cloth
- Stain-blocking primer and matching paint
- Small roller and tray
- Trace the crack
- Measure it
- Check for warning signs
- Pick your repair path
- Cover floor, set up ladder
- Scrape loose paint
- Cut a V-groove (wide cracks)
- Wipe off dust
- Press mesh tape on
- Spread first thin coat
- Dry for 24 hours
- Sand smooth
- Spread wider second coat
- Prime
- Paint to match
Conclusion
You read the crack, patched it the right way, and painted over it so it blends in. That is the whole job, done without calling anyone.
Keep an eye on the spot for the next few weeks. If your pencil line stays clean, the repair is holding.
Next, check the rest of your ceilings with a flashlight held flat against the surface. Small cracks are much easier to fix when you catch them early.
Save this guide to your Pinterest board so it’s ready the next time a crack shows up.
- Trace the crack with a pencil in bright side light
- Measure the width and length of the crack
- Check for warning signs that call for a pro
- Decide how to fix ceiling cracks based on what you found
- Cover the floor and set up a stable ladder
- Scrape away loose paint and flaking plaster
- Cut a shallow V-groove along wider cracks
- Wipe the dust off the ceiling
- Press mesh tape over the crack
- Spread a thin first coat of joint compound
- Wait until the compound dries completely
- Sand the dry patch smooth
- Spread a wider second coat to blend the edges
- Prime the patched area
- Paint the ceiling to match
Trace the crack with a pencil in bright side light
Turn off the ceiling light and hold a flashlight flat against the ceiling, aiming along its surface. Shadows pop out of even hairline cracks this way, so you can see where each one really ends. Then draw a light pencil line right along the crack. The line shows you the full length now, and it will show you later if the crack grows.
Measure the width and length of the crack
Grab your tape measure and write down two numbers on a sticky note: how long the crack is, and how wide it is at its widest point. A hairline crack is thinner than 1/16 inch, about the thickness of a credit card edge. Snap a photo with the tape measure beside the crack. A photo beats memory when you check again in a few weeks.
Check for warning signs that call for a pro
Most ceiling cracks are cosmetic. A few are not, and patching those hides a bigger problem. Look closely for any of these:
- A crack wider than 1/4 inch
- Ceiling that sags, bows, or dips near the crack
- Brown or yellow water stains around it
- A crack that grew since you traced it
- Cracks running from the ceiling down the wall
If you see even one, stop and call a contractor or a home inspector before you pick up a putty knife. If none of these fit, you are in good shape to keep going.
Decide how to fix ceiling cracks based on what you found
Your measurements from the last two steps now point to one of three paths. A crack under 1/16 inch wide is a hairline crack, so you can skip Step 7 and go straight to cleaning. A crack between 1/16 and 1/4 inch wide needs every step in this guide. Anything wider, or any warning sign from Step 3, goes to a pro. Pick your path before you buy supplies, so you only buy what the job needs.
Cover the floor and set up a stable ladder
Compound drips and dust travels farther than you expect, usually right onto the nicest rug in the room. A few minutes of setup saves an hour of cleanup. The drop cloth is the important part, but an old bedsheet works fine if you don’t own one.
- Move furniture out of the room, or to the center and cover it
- Spread the drop cloth under the whole work area
- Open the ladder all the way and lock both spreaders
- Put on your dust mask and safety glasses
- Set the putty knife and compound on the ladder shelf
Stand with your belt buckle below the top of the ladder, and never step on the top rung. If you need to lean far to reach the crack, climb down and move the ladder instead.
Scrape away loose paint and flaking plaster
Compound grips solid surfaces and slides off flaking ones, which is why this step matters. Hold the putty knife at a shallow angle and drag it along both sides of the crack, about 2 inches out from the line. Stop scraping when the paint stops coming off in flakes. You are only removing what is already loose.
Cut a shallow V-groove along wider cracks
Skip this step if your crack is a hairline, under 1/16 inch. For wider cracks, put on your safety glasses first. Hold the utility knife at a 45-degree angle and drag it along the crack, widening it into a shallow V about 1/8 inch deep. Why bother? Compound packed into a groove has something to grip. Compound smeared over a closed crack sits on top and splits again. Cut slowly, and never press hard, since wires and pipes can sit just above the ceiling.
Wipe the dust off the ceiling
Self-adhesive tape will not stick to a dusty surface, and it peels away within days. Wet a sponge or microfiber cloth and wring it out until it stops dripping. Wipe along the crack and 2 inches past each side, rinsing the cloth whenever it turns gray. Then wait 10 minutes for the ceiling to dry completely before you move on. Tape over a damp spot will bubble.
Press mesh tape over the crack
Cut a piece of mesh tape about 1 inch longer than the crack. Peel back a few inches of the backing, center the tape over the crack, and press it flat with your fingers. Work from the middle outward. Then drag the putty knife across the tape in one pass to seat it firmly. The mesh should lie flat, with no wrinkles or lifted corners.
Spread a thin first coat of joint compound
Load the putty knife with a strip of compound about as wide as the blade. Press it over the mesh tape at a shallow angle and pull in one long stroke, forcing the compound through the holes in the mesh. Scrape off the extra on the return pass. The coat should be thin enough that you can still see the tape’s pattern underneath. A thick first coat cracks as it dries, so aim for less than you think you need.
Wait until the compound dries completely
Give it 24 hours in a normal room, longer if the air is humid or the room is cold. Wet compound looks gray and feels cool to the touch. Dry compound turns bright white and feels the same temperature as the ceiling around it. Skip the hair dryer. Forcing the heat makes the surface dry faster than the layers beneath it, and that is how new hairline cracks form on a fresh patch. Open a window or run a fan across the room, not pointed at the ceiling.
Sand the dry patch smooth
Wrap a fine sanding sponge around your hand and use light, circular strokes across the patch, working about 3 inches past the edges so the repair fades into the ceiling. Wear your dust mask and glasses again, because this is the dustiest step in the whole job. Stop when you can run your palm across the patch and feel no ridge. Check it with the flashlight held flat against the ceiling, as you did in Step 1. Shadows show every bump your fingers miss.
Spread a wider second coat to blend the edges
Sanding leaves a slight edge where the first coat ends. A second coat hides it. Apply compound in one long pass, reaching about 3 inches past the first coat on each side. Hold the knife nearly flat and ease the pressure as you reach the outer edge, so the compound feathers out to nothing. You want a layer thinner than a coin. When it dries, wipe the patch with a damp cloth and sand only if you feel a ridge. Wait another 24 hours before priming.
Prime the patched area
Joint compound soaks up paint like a sponge, so bare compound under paint leaves a dull, blotchy spot that shows from across the room. Primer seals it. Stir the primer well, then brush or roll one thin coat over the patch, extending 2 inches onto the old paint around it. Use stain-blocking primer if the ceiling ever had a water mark, or the stain can bleed through the new paint. Let it dry for the time on the can, usually about 1 hour.
Paint the ceiling to match
Use the same paint that is already on the ceiling, if you still have it. Old paint fades over the years, so a fresh coat may look a shade brighter than the rest. Roll one thin coat over the primed spot, then blend outward in long, overlapping strokes. Let it dry for 2 to 4 hours, then add a second coat if you can still see the patch. Painting the whole ceiling, edge to edge, is the only sure way to hide a color difference.
Stage 4: Troubleshooting Table and FAQ
| If This Happens | Try This |
|---|---|
| Tape bubbles or lifts after the first coat | Cut the bubble open with a utility knife, press the tape flat, and add a thin coat of compound over it. Dust or damp spots under the tape are the usual cause. |
| The crack comes back within weeks | Trace it with a pencil and measure again. If it has grown past 1/4 inch or follows a pattern, call a pro. A moving crack means something is shifting behind it. |
| You can see a ridge under the paint | Sand the ridge flat once the paint cures, then add a very thin coat of compound that reaches farther out. Prime and repaint the spot. |
| The patch looks dull next to the old paint | Prime was too thin or skipped. Add a coat of primer, let it dry for 1 hour, then repaint. |
| Fine cracks spread across the patch as it dries | The coat was too thick or dried too fast. Sand the patch, then add a thinner coat and let it dry at room temperature with no heat. |
Stage 5: Quick Reference Card and Conclusion
- Pencil, flashlight, tape measure
- Step ladder and drop cloth
- Dust mask and safety glasses
- Utility knife and 6-inch putty knife
- Self-adhesive mesh tape
- Lightweight joint compound
- Fine sanding sponge and damp cloth
- Stain-blocking primer and matching paint
- Small roller and tray
- Trace the crack
- Measure it
- Check for warning signs
- Pick your repair path
- Cover floor, set up ladder
- Scrape loose paint
- Cut a V-groove (wide cracks)
- Wipe off dust
- Press mesh tape on
- Spread first thin coat
- Dry for 24 hours
- Sand smooth
- Spread wider second coat
- Prime
- Paint to match
Conclusion
You read the crack, patched it the right way, and painted over it so it blends in. That is the whole job, done without calling anyone.
Keep an eye on the spot for the next few weeks. If your pencil line stays clean, the repair is holding.
Next, check the rest of your ceilings with a flashlight held flat against the surface. Small cracks are much easier to fix when you catch them early.
Save this guide to your Pinterest board so it’s ready the next time a crack shows up.
You look up and there it is: a thin dark line running across your ceiling. Maybe it showed up overnight. Maybe it has been there for years and you finally decided to deal with it. Either way, the same question pops up. Is this a quick weekend fix, or a sign of something bigger?
This guide shows you how to fix ceiling cracks in drywall or plaster, even if you have never held a putty knife. You will also learn how to read the crack first. That part matters most. Some cracks are harmless and need only tape, compound, and paint. Others point to water damage or a sagging ceiling, and patching those only hides the problem for a few weeks.
The method works because it follows the same order pros use: check, clean, tape, fill, sand, prime, paint. Skip one, and the crack comes back.
Expect about 1.5 to 2 hours of hands-on work. Drying time adds up to 24 more hours. The job is beginner level, but it rewards patience, especially while the compound dries. Grab a pencil, a flashlight, and a cup of coffee. First, let’s look closely at what you are dealing with.
- Pencil
- Flashlight
- Tape measure or ruler
- Sturdy step ladder
- Drop cloth
- Dust mask and safety glasses
- Utility knife
- 6-inch putty knife
- Self-adhesive mesh drywall tape
- Pre-mixed lightweight joint compound
- Fine-grit sanding sponge (120 to 150 grit)
- Damp sponge or microfiber cloth
- Stain-blocking primer
- Matching ceiling paint
- Small roller and paint tray
- Trace the crack with a pencil in bright side light
- Measure the width and length of the crack
- Check for warning signs that call for a pro
- Decide how to fix ceiling cracks based on what you found
- Cover the floor and set up a stable ladder
- Scrape away loose paint and flaking plaster
- Cut a shallow V-groove along wider cracks
- Wipe the dust off the ceiling
- Press mesh tape over the crack
- Spread a thin first coat of joint compound
- Wait until the compound dries completely
- Sand the dry patch smooth
- Spread a wider second coat to blend the edges
- Prime the patched area
- Paint the ceiling to match
Trace the crack with a pencil in bright side light
Turn off the ceiling light and hold a flashlight flat against the ceiling, aiming along its surface. Shadows pop out of even hairline cracks this way, so you can see where each one really ends. Then draw a light pencil line right along the crack. The line shows you the full length now, and it will show you later if the crack grows.
Measure the width and length of the crack
Grab your tape measure and write down two numbers on a sticky note: how long the crack is, and how wide it is at its widest point. A hairline crack is thinner than 1/16 inch, about the thickness of a credit card edge. Snap a photo with the tape measure beside the crack. A photo beats memory when you check again in a few weeks.
Check for warning signs that call for a pro
Most ceiling cracks are cosmetic. A few are not, and patching those hides a bigger problem. Look closely for any of these:
- A crack wider than 1/4 inch
- Ceiling that sags, bows, or dips near the crack
- Brown or yellow water stains around it
- A crack that grew since you traced it
- Cracks running from the ceiling down the wall
If you see even one, stop and call a contractor or a home inspector before you pick up a putty knife. If none of these fit, you are in good shape to keep going.
Decide how to fix ceiling cracks based on what you found
Your measurements from the last two steps now point to one of three paths. A crack under 1/16 inch wide is a hairline crack, so you can skip Step 7 and go straight to cleaning. A crack between 1/16 and 1/4 inch wide needs every step in this guide. Anything wider, or any warning sign from Step 3, goes to a pro. Pick your path before you buy supplies, so you only buy what the job needs.
Cover the floor and set up a stable ladder
Compound drips and dust travels farther than you expect, usually right onto the nicest rug in the room. A few minutes of setup saves an hour of cleanup. The drop cloth is the important part, but an old bedsheet works fine if you don’t own one.
- Move furniture out of the room, or to the center and cover it
- Spread the drop cloth under the whole work area
- Open the ladder all the way and lock both spreaders
- Put on your dust mask and safety glasses
- Set the putty knife and compound on the ladder shelf
Stand with your belt buckle below the top of the ladder, and never step on the top rung. If you need to lean far to reach the crack, climb down and move the ladder instead.
Scrape away loose paint and flaking plaster
Compound grips solid surfaces and slides off flaking ones, which is why this step matters. Hold the putty knife at a shallow angle and drag it along both sides of the crack, about 2 inches out from the line. Stop scraping when the paint stops coming off in flakes. You are only removing what is already loose.
Cut a shallow V-groove along wider cracks
Skip this step if your crack is a hairline, under 1/16 inch. For wider cracks, put on your safety glasses first. Hold the utility knife at a 45-degree angle and drag it along the crack, widening it into a shallow V about 1/8 inch deep. Why bother? Compound packed into a groove has something to grip. Compound smeared over a closed crack sits on top and splits again. Cut slowly, and never press hard, since wires and pipes can sit just above the ceiling.
Wipe the dust off the ceiling
Self-adhesive tape will not stick to a dusty surface, and it peels away within days. Wet a sponge or microfiber cloth and wring it out until it stops dripping. Wipe along the crack and 2 inches past each side, rinsing the cloth whenever it turns gray. Then wait 10 minutes for the ceiling to dry completely before you move on. Tape over a damp spot will bubble.
Press mesh tape over the crack
Cut a piece of mesh tape about 1 inch longer than the crack. Peel back a few inches of the backing, center the tape over the crack, and press it flat with your fingers. Work from the middle outward. Then drag the putty knife across the tape in one pass to seat it firmly. The mesh should lie flat, with no wrinkles or lifted corners.
Spread a thin first coat of joint compound
Load the putty knife with a strip of compound about as wide as the blade. Press it over the mesh tape at a shallow angle and pull in one long stroke, forcing the compound through the holes in the mesh. Scrape off the extra on the return pass. The coat should be thin enough that you can still see the tape’s pattern underneath. A thick first coat cracks as it dries, so aim for less than you think you need.
Wait until the compound dries completely
Give it 24 hours in a normal room, longer if the air is humid or the room is cold. Wet compound looks gray and feels cool to the touch. Dry compound turns bright white and feels the same temperature as the ceiling around it. Skip the hair dryer. Forcing the heat makes the surface dry faster than the layers beneath it, and that is how new hairline cracks form on a fresh patch. Open a window or run a fan across the room, not pointed at the ceiling.
Sand the dry patch smooth
Wrap a fine sanding sponge around your hand and use light, circular strokes across the patch, working about 3 inches past the edges so the repair fades into the ceiling. Wear your dust mask and glasses again, because this is the dustiest step in the whole job. Stop when you can run your palm across the patch and feel no ridge. Check it with the flashlight held flat against the ceiling, as you did in Step 1. Shadows show every bump your fingers miss.
Spread a wider second coat to blend the edges
Sanding leaves a slight edge where the first coat ends. A second coat hides it. Apply compound in one long pass, reaching about 3 inches past the first coat on each side. Hold the knife nearly flat and ease the pressure as you reach the outer edge, so the compound feathers out to nothing. You want a layer thinner than a coin. When it dries, wipe the patch with a damp cloth and sand only if you feel a ridge. Wait another 24 hours before priming.
Prime the patched area
Joint compound soaks up paint like a sponge, so bare compound under paint leaves a dull, blotchy spot that shows from across the room. Primer seals it. Stir the primer well, then brush or roll one thin coat over the patch, extending 2 inches onto the old paint around it. Use stain-blocking primer if the ceiling ever had a water mark, or the stain can bleed through the new paint. Let it dry for the time on the can, usually about 1 hour.
Paint the ceiling to match
Use the same paint that is already on the ceiling, if you still have it. Old paint fades over the years, so a fresh coat may look a shade brighter than the rest. Roll one thin coat over the primed spot, then blend outward in long, overlapping strokes. Let it dry for 2 to 4 hours, then add a second coat if you can still see the patch. Painting the whole ceiling, edge to edge, is the only sure way to hide a color difference.
Stage 4: Troubleshooting Table and FAQ
| If This Happens | Try This |
|---|---|
| Tape bubbles or lifts after the first coat | Cut the bubble open with a utility knife, press the tape flat, and add a thin coat of compound over it. Dust or damp spots under the tape are the usual cause. |
| The crack comes back within weeks | Trace it with a pencil and measure again. If it has grown past 1/4 inch or follows a pattern, call a pro. A moving crack means something is shifting behind it. |
| You can see a ridge under the paint | Sand the ridge flat once the paint cures, then add a very thin coat of compound that reaches farther out. Prime and repaint the spot. |
| The patch looks dull next to the old paint | Prime was too thin or skipped. Add a coat of primer, let it dry for 1 hour, then repaint. |
| Fine cracks spread across the patch as it dries | The coat was too thick or dried too fast. Sand the patch, then add a thinner coat and let it dry at room temperature with no heat. |
Stage 5: Quick Reference Card and Conclusion
- Pencil, flashlight, tape measure
- Step ladder and drop cloth
- Dust mask and safety glasses
- Utility knife and 6-inch putty knife
- Self-adhesive mesh tape
- Lightweight joint compound
- Fine sanding sponge and damp cloth
- Stain-blocking primer and matching paint
- Small roller and tray
- Trace the crack
- Measure it
- Check for warning signs
- Pick your repair path
- Cover floor, set up ladder
- Scrape loose paint
- Cut a V-groove (wide cracks)
- Wipe off dust
- Press mesh tape on
- Spread first thin coat
- Dry for 24 hours
- Sand smooth
- Spread wider second coat
- Prime
- Paint to match
Conclusion
You read the crack, patched it the right way, and painted over it so it blends in. That is the whole job, done without calling anyone.
Keep an eye on the spot for the next few weeks. If your pencil line stays clean, the repair is holding.
Next, check the rest of your ceilings with a flashlight held flat against the surface. Small cracks are much easier to fix when you catch them early.
Save this guide to your Pinterest board so it’s ready the next time a crack shows up.