
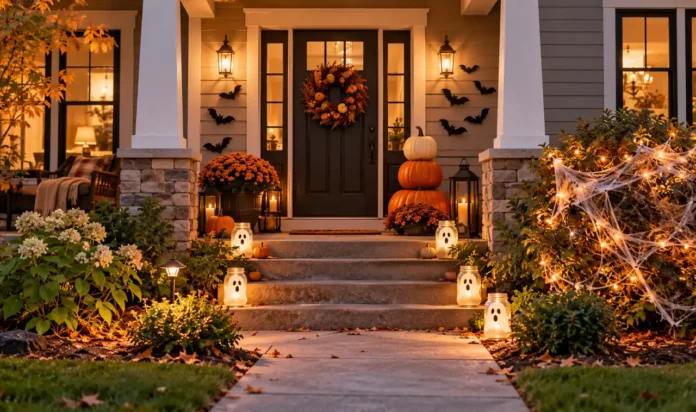


The biggest myth about October decorating is that a good Halloween house needs a big Halloween budget. Walk into any craft store in mid September and the price tags make it look true. A plastic skeleton costs twenty dollars, a light up ghost costs thirty, and a decent wreath eats half your grocery money.
But the houses that stop cars on October 31 rarely rely on store bought set pieces. They rely on paper, light, paint, and a few clever repeats. That is the whole point of Halloween decoration ideas on a budget: you spend your money where eyes actually land, and you fake the rest with crafts that look far more expensive than they are.
The twenty five ideas below cost almost nothing each, most under five dollars, and many use things already sitting in your junk drawer or recycling bin. Pick three for the porch, two for the living room, and one for the front door, and the whole house reads as decorated without a single big ticket buy.
1. Cut a Swarm of Paper Bats From One Pack of Cardstock
A ten pack of black cardstock is the best money you will spend in October.
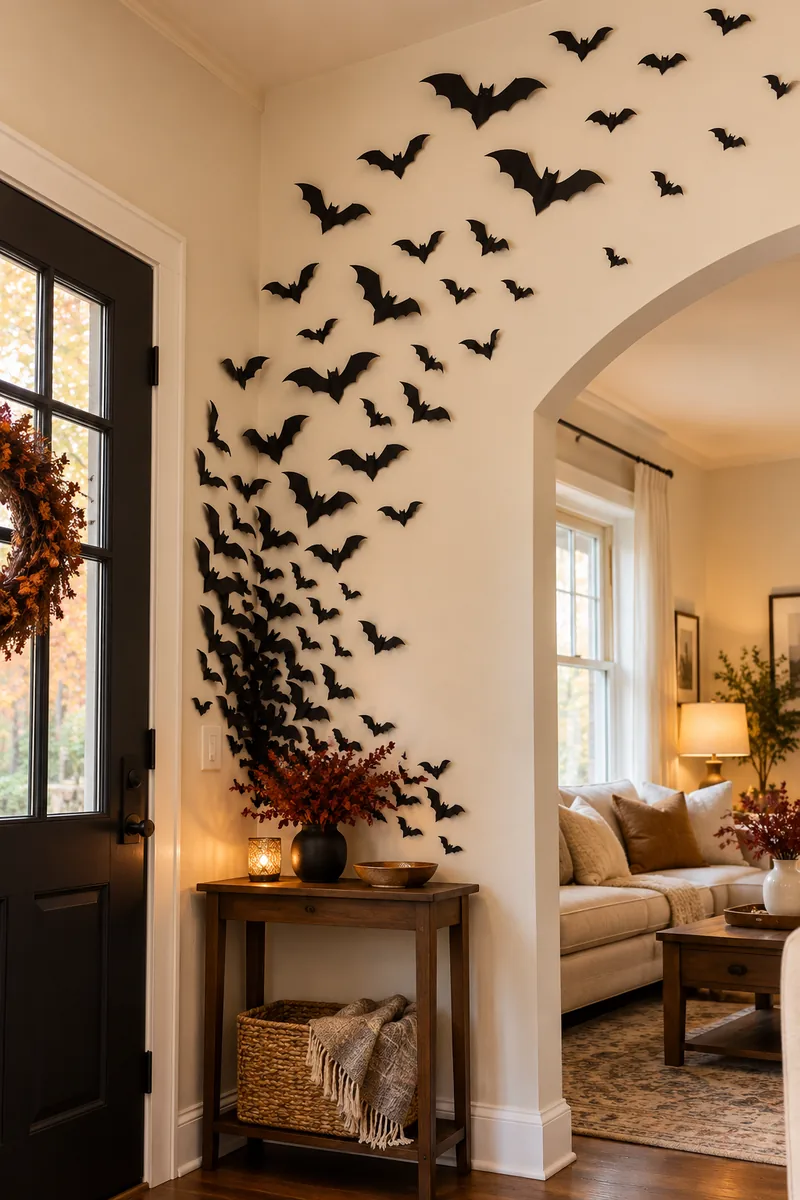
One pack cuts into forty or more paper bats, and a whole wall of bats reads as a real installation instead of a craft project. Cut them in three sizes so the swarm looks natural, then stick small loops of painter’s tape behind each one so the paint stays safe.
- Cluster them tight by the door and spread them wider as they climb, like they are lifting off together.
- Run a few across the porch ceiling for the full cave effect.
- Let kids cut while you stick, and the whole project takes under an hour.
Renters, this idea was made for you.
What to grab first
2. Turn Mason Jars Into Glowing Ghost Lanterns
Glowing ghosts on the porch steps make the whole house feel alive after dark, and they cost almost nothing.
Draw simple faces on mason jars or any clean glass jars with a black paint pen, drop in a battery tea light, and set them along the walk or windowsill. The glass softens the light so it flickers like a real candle without any fire risk.
- Use frosted spray paint on the inside for a softer glow.
- Add a strip of gauze around the jar neck for a scarf.
- Hide the tea light switch under the jar rim so it stays invisible.
Guests will ask where you bought them, which is the best review a budget craft can get.
3. Stretch Fake Spiderweb Over the Table and Add Plastic Spiders
A plain table with a candy bowl looks unfinished, but a full table runner set costs more than the candy.
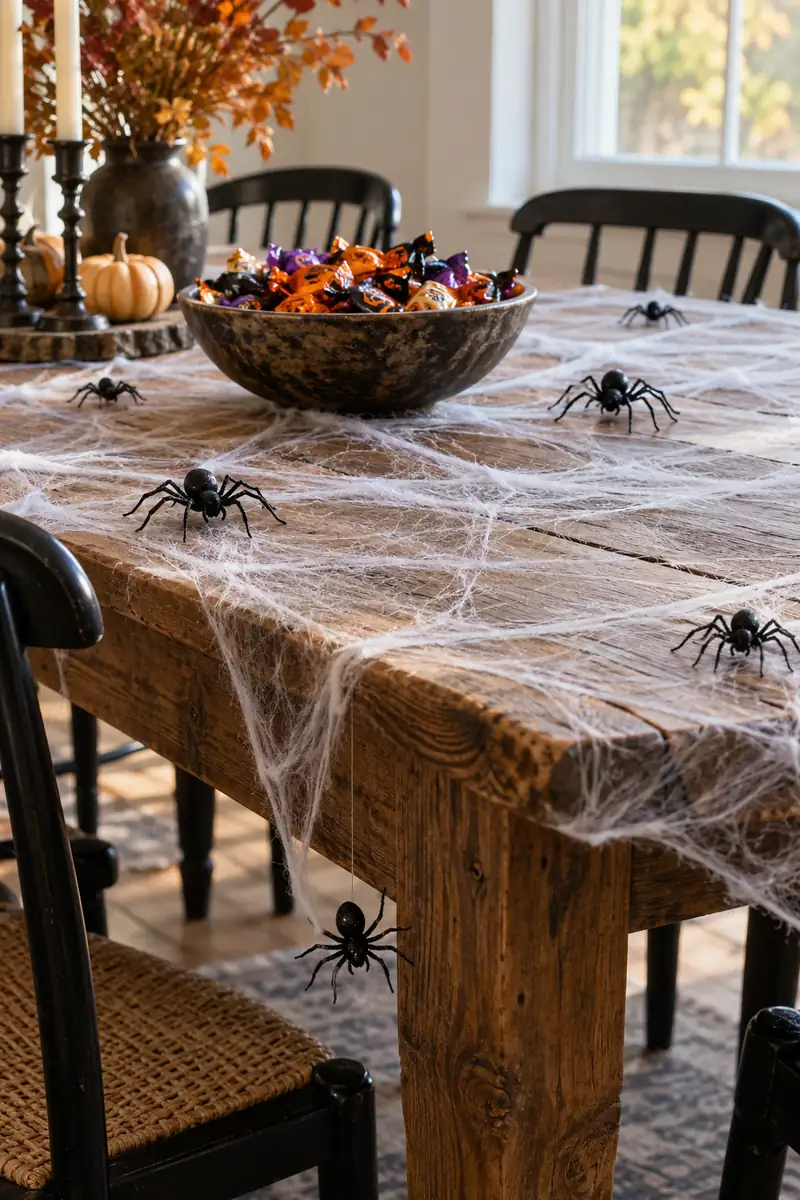
Stretch a bag of fake spiderweb over the table and pull it thin until you can see through it. Drop a handful of plastic spiders on top and hang one or two off the edge on fishing line. The whole setup costs about three dollars and takes five minutes, yet it turns a flat surface into the spookiest corner of the room.
- Wear gloves so the web does not stick to your hands.
- Use two bags for a big dining table.
- Save the spiders in a drawer for next year.
It is the fastest win on this list.
💡 Quick Tip
Stretch the web thinner than you think you should. A web you can see through reads as a web, while a thick white layer reads as a dropped sheet.
4. Paint Pumpkins Instead of Carving Them
Skip the carving kit this year.
Carving is messy, the pumpkin rots in four days, and good carving tools cost real money. Painted pumpkins last all month and cost the price of one bottle of craft paint. Wash the pumpkin, let it dry, then paint faces, stripes, polka dots, or whole black cats. Metallic gold paint on a white pumpkin looks expensive and uses barely any paint at all.
- Use acrylic craft paint, it sticks to pumpkin skin.
- Seal with a clear spray so rain does not wash it off.
- Touch up chips with a dab of paint on party day.
Kids can paint their own without a single sharp tool in sight.
A painted pumpkin lasts the whole season. A carved one lasts a long weekend.
5. String a Tissue Paper Ghost Garland Across the Mantle
The mantle always looks bare in October, like it is waiting for something.
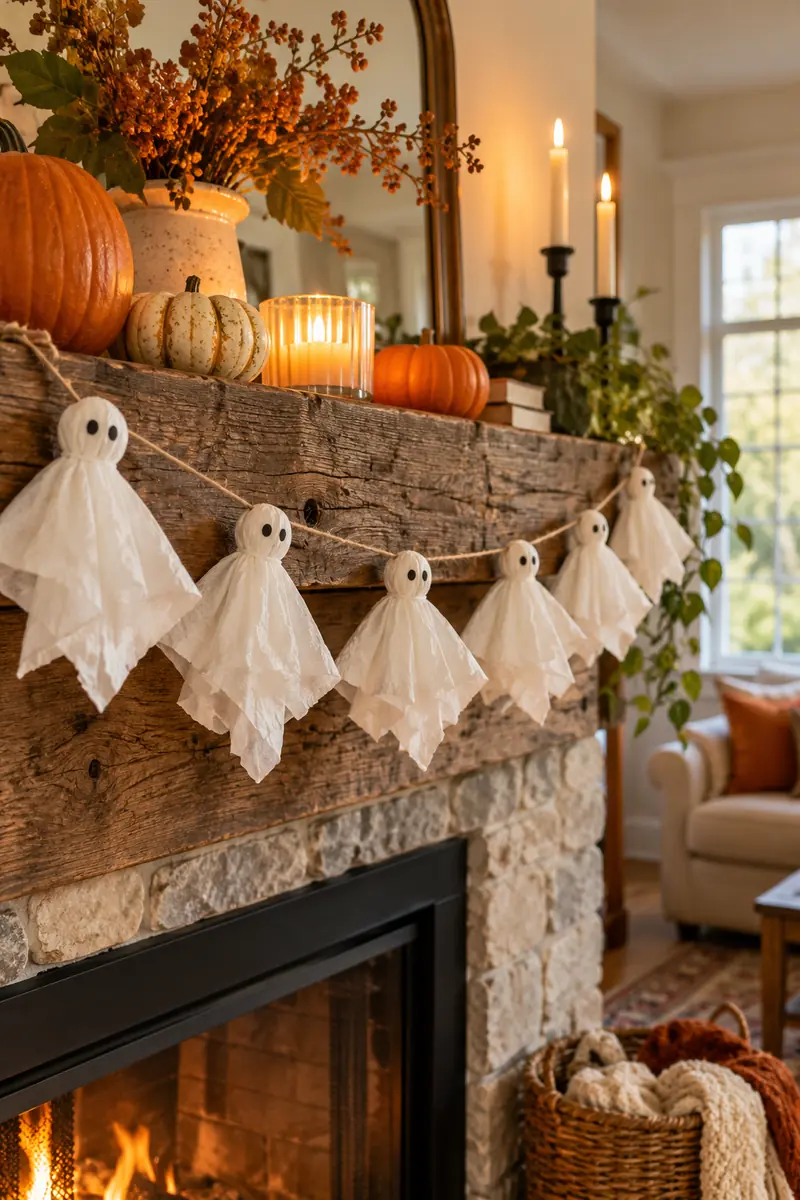
A ghost garland fixes that in twenty minutes. Scrunch a square of white tissue over a cotton ball, tie it with string under the ball to make the head, and draw two dot eyes. Repeat until you have a dozen, then knot them along a long piece of twine with a few inches between each ghost.
Hang it across the mantle, a doorway, or the front of a bookshelf.
Cut twelve inch squares of white tissue paper.
Scrunch over a cotton ball, tie below the head, draw two dot eyes.
Knot each ghost onto twine and hang with removable hooks.
6. Build Cardboard Tombstones That Fool the Sidewalk
The myth says a front yard graveyard needs foam tombstones from the craft store, and those run eight dollars each.
The truth is cardboard tombstones look just as good from the sidewalk, which is where everyone sees them. Cut tombstone shapes from big moving boxes, paint them grey, and write funny names with a black marker. Push a wooden stake behind each one and into the ground so they stand through wind.
- Double up the cardboard for windy yards.
- Spray with clear sealer so dew does not warp them.
- Vary the heights, real cemeteries are never uniform.
From the street, nobody can tell the difference.
Cut two layers and glue them together for real thickness.
Stick to greys and one mossy green for paint.
Skip neon paint, it reads as a craft project from far away.
Skip glitter, it washes off in the first rain.
7. Hang a Spooky Gallery Wall With Thrifted Frames and Free Printables
Art is the difference between a decorated wall and a wall with stuff stuck on it.
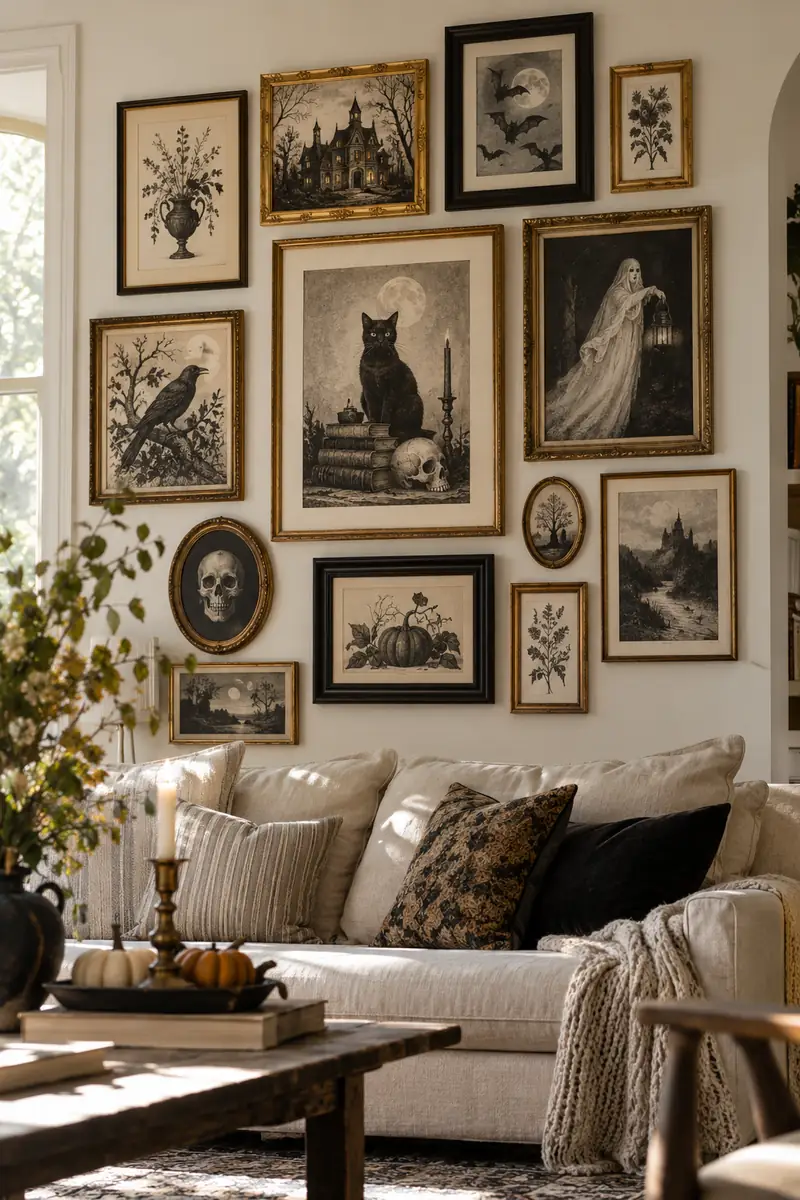
Thrift stores sell solid frames for a dollar or two, and free printable Halloween art is easy to find online if you search for public domain vintage illustrations. Print in black and white on regular paper, trim to fit, and hang a tight cluster over the sofa or in the hallway. The mix of old frames and spooky prints looks collected instead of bought.
Swap the prints back out on November 1 and the frames work year round.
| Source | Cost and notes |
|---|---|
| Thrift store frames | A dollar or two each, and they have the best character. |
| Library printer | Pennies a page for the art itself. |
| Dollar store frames | Plain but fine, spray them black so they match. |
8. Float Cheesecloth Ghosts From the Porch
A porch corner with one sad pumpkin looks unfinished from the street.
Hang three cheesecloth ghosts at different heights and the whole corner changes. Drape cheesecloth over a balloon tied to string, stiffen it with a mix of white glue and water, let it dry overnight, then pop the balloon and draw a face. They sway a little in the breeze, which makes them feel alive in the best way.
Cheesecloth costs a few dollars a pack and makes a whole family of ghosts.
A bare porch corner with one pumpkin and a doormat.
Three floating ghosts at different heights, swaying gently and catching the porch light.
9. Fill the Hallway Ceiling With Hanging Ghost Balloons
The mistake people make with balloons is scattering them on the floor where they just roll around.
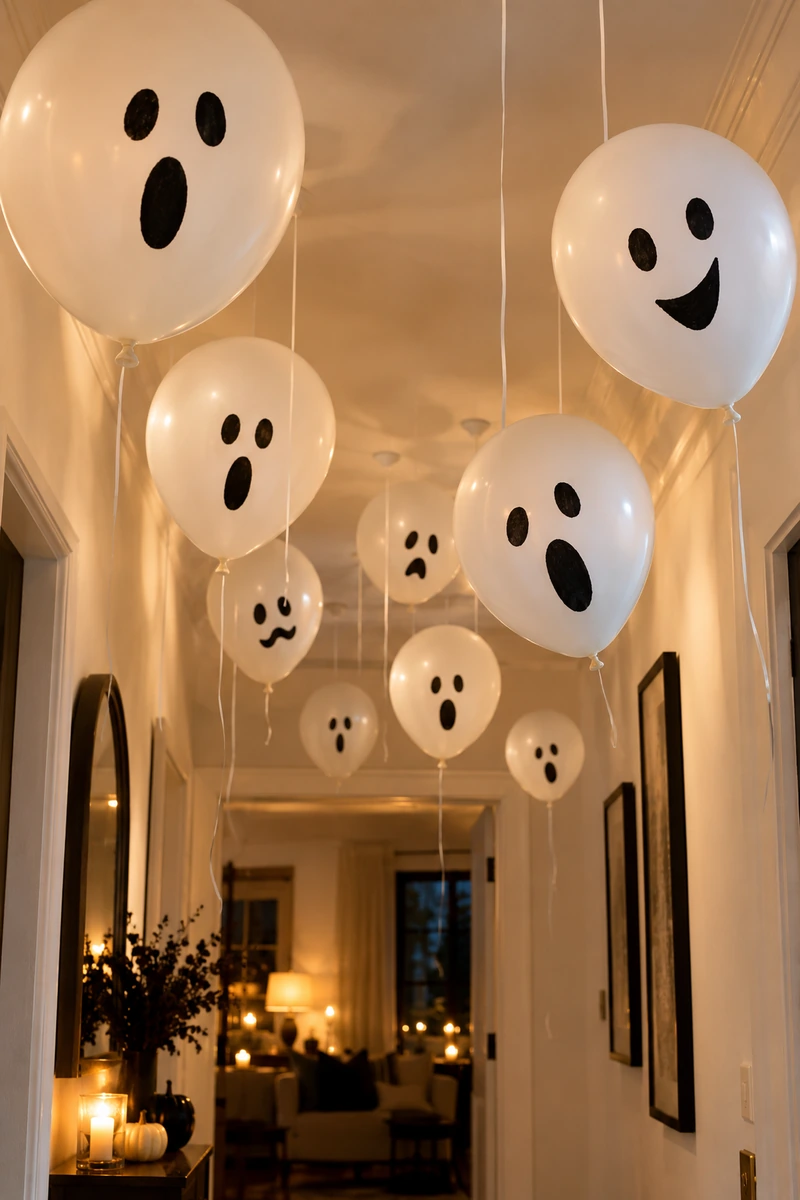
Draw ghost faces on white balloons with a black marker, fill them with air, not helium, since you want them to hang down, and tie them to the ceiling with string at different lengths. A hallway full of hanging ghost balloons feels like walking through a friendly haunting, and the whole thing costs the price of one bag of balloons.
- Use string, not curling ribbon, so nothing tangles.
- Keep them away from ceiling fans.
- Draw faces after inflating so the ink does not crack.
Kids lose their minds over this one, in a good way.
⚠️ Watch Out
Keep balloons away from hot light bulbs and ceiling fans, and keep small children away from broken balloon pieces.
10. Plant a Mum in a Dollar Store Cauldron
Every October I watch neighbors spend real money on fall planters, then toss them in November.
A black plastic cauldron from the dollar store plus one grocery store mum gives you the same look for a fraction of the price. Set the potted mum right inside the cauldron, no repotting needed, and stick a few plastic bones or a fake crow on top of the soil. It sits by the front door all month and the mum keeps blooming.
After Halloween, move the mum to the garden bed and keep the cauldron for next year.
11. Cut Black Silhouettes for the Windows
Windows are free display space most people forget about.
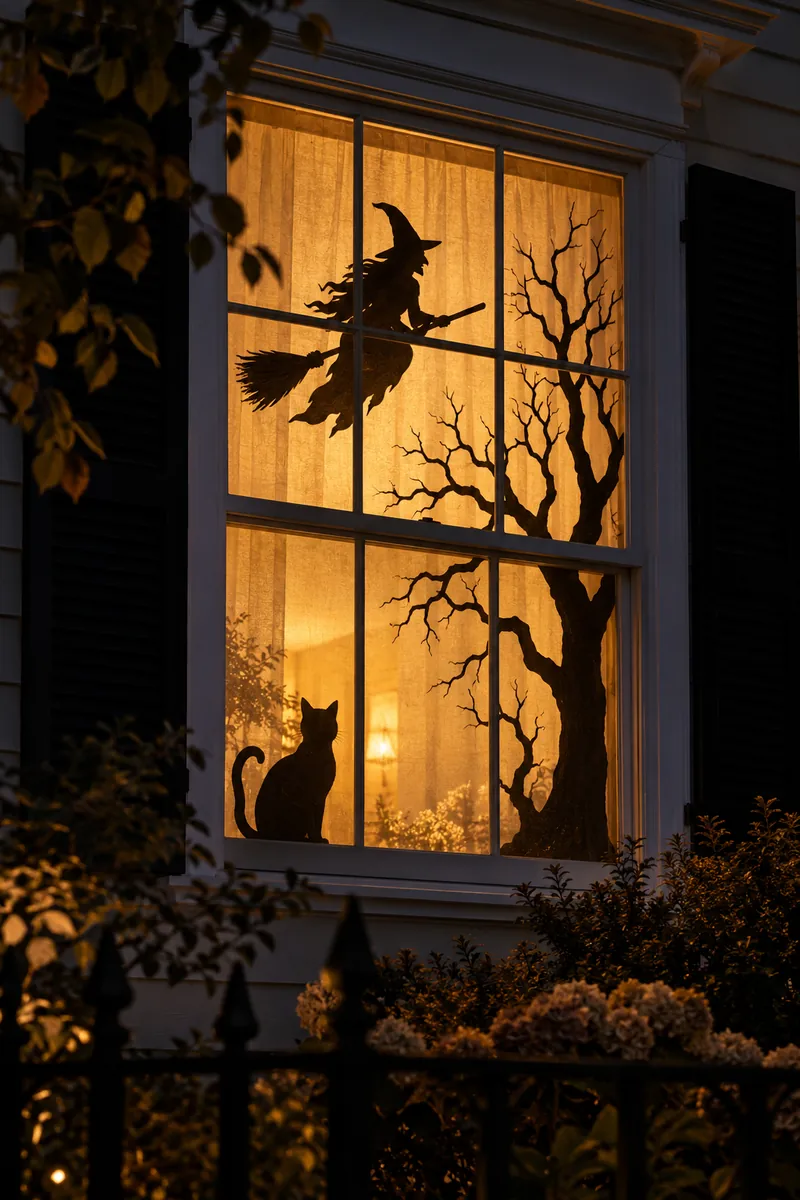
Cut black silhouettes from trash bags or black poster board: cats with arched backs, witches on broomsticks, bare trees. Tape them inside the glass so they read as sharp shadows, then leave one lamp on behind them at night. From the street it looks like a shadow puppet show, and the whole project costs whatever a roll of tape costs.
- Cut silhouettes slightly bigger than you think, glass shrinks them visually.
- Tape inside the window so rain never touches them.
- One lit lamp behind the window is all the lighting you need.
This is the idea neighbors photograph from their cars.
What to grab first
12. Paint Tin Cans as Candy Corn Vases
Flowers in October feel wrong, but empty tables feel worse.
Save three tin cans, wash them well, and paint them as candy corn: orange bottom, yellow middle, white top. Fill each with dried wheat, bare branches, or a bundle of cinnamon sticks tied with twine. They look like a craft fair find on the entryway table, and they cost exactly nothing if the cans come from your recycling.
Group them in threes, odd numbers always look more styled.
13. Weave String Lights Through a Bush Spiderweb
Tiny rule: light beats stuff. One lit decoration outshines ten unlit ones.
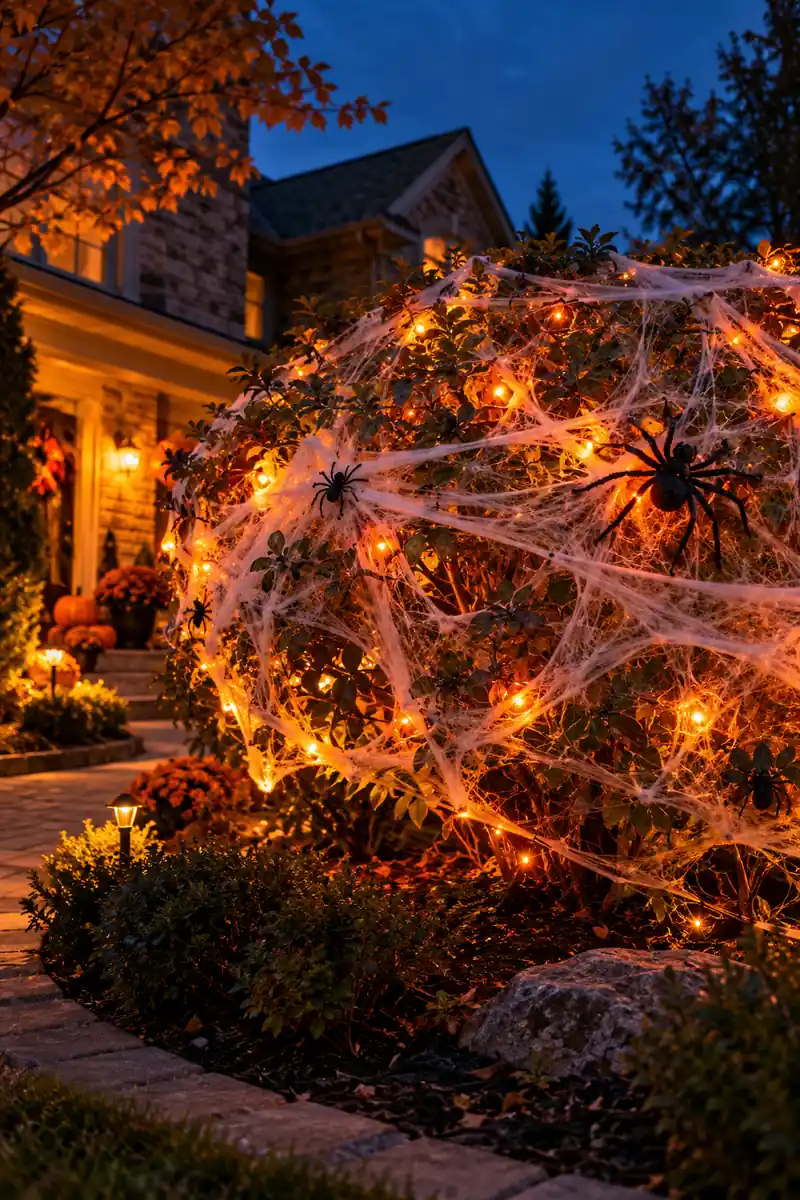
Drape a big spiderweb over a bush, then weave a strand of orange string lights through it instead of just laying lights on top. The web catches the light and glows from inside, which looks far more expensive than plain lights on a shrub. Use the lights you already own from Christmas, nobody will know the difference.
Drivers slow down for this one.
Stretch the web over the bush and anchor the corners so wind cannot move it.
Weave the lights through the web strands, not over the top of them.
Plug in at dusk and adjust any dark spots before the street wakes up.
14. Park a Homemade Witch Broom by the Front Door
On Halloween night the front door gets more foot traffic than any other spot in the house.
Lean a witch broom beside the door and it reads as a witch lives here. Make one from a fallen branch, a bundle of raffia or straw tied with twine, and you have spent nothing. Park it in a tall basket or umbrella stand so it stands upright, with a little tag that says the witch is out.
- A fallen branch beats a store dowel, it looks real.
- Soak raffia in water first so it bends without snapping.
- Lean it at a slight angle, straight up looks stiff.
It takes five minutes and greets every trick or treater.
One strong prop by the door beats a dozen small ones scattered around the yard.
15. Stake a Crooked Cemetery Fence in the Front Yard
A graveyard scene without a fence looks like tombstones someone dropped on the lawn.
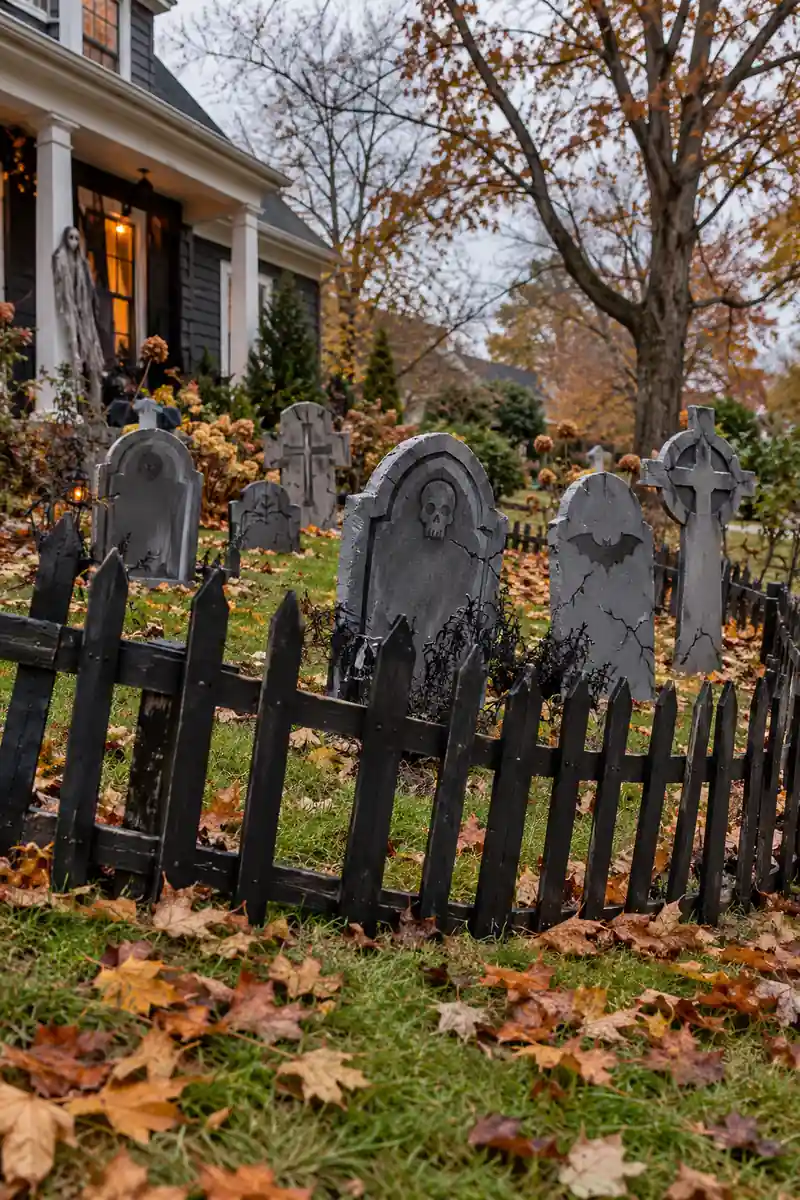
A low fence ties the whole scene together. Screw short pallet slats into two horizontal rails, or cut pickets from cardboard boxes and paint them black. Either way, stake it in a loose curve in front of the tombstones instead of a straight line, curves look older and spookier.
Lean a few pickets crooked on purpose, perfect fences look new.
| Material | Why it works |
|---|---|
| Pallet wood | Free from behind most stores, the sturdiest option, needs a saw. |
| Cardboard boxes | Free from your recycling, easiest to cut, seal it against rain. |
| Dollar store garden edging | Very cheap per piece, fastest option, spray it black. |
16. Line the Walkway With Painted Rock Monsters
The walkway to the front door is the most seen and least decorated spot in most yards.
Line it with painted rock monsters and every guest steps past a little audience. Collect smooth flat rocks, paint them white or orange, and add googly eyes or painted faces with sharp teeth. Seal them so one rain does not erase the work. Kids love finding and painting the rocks, which makes this a free afternoon activity and a decoration in one.
They survive the whole season and come back next year.
Use flat rocks, they sit still on the path edge.
Seal with clear spray for rainy Octobers.
Skip tiny pebbles, they disappear in the grass.
Skip faces on both sides, the rocks roll and look odd.
17. Fill Thrifted Jars as a Spooky Apothecary Shelf
A shelf of old glass jars with yellowed labels looks like it came from a haunted pharmacy.
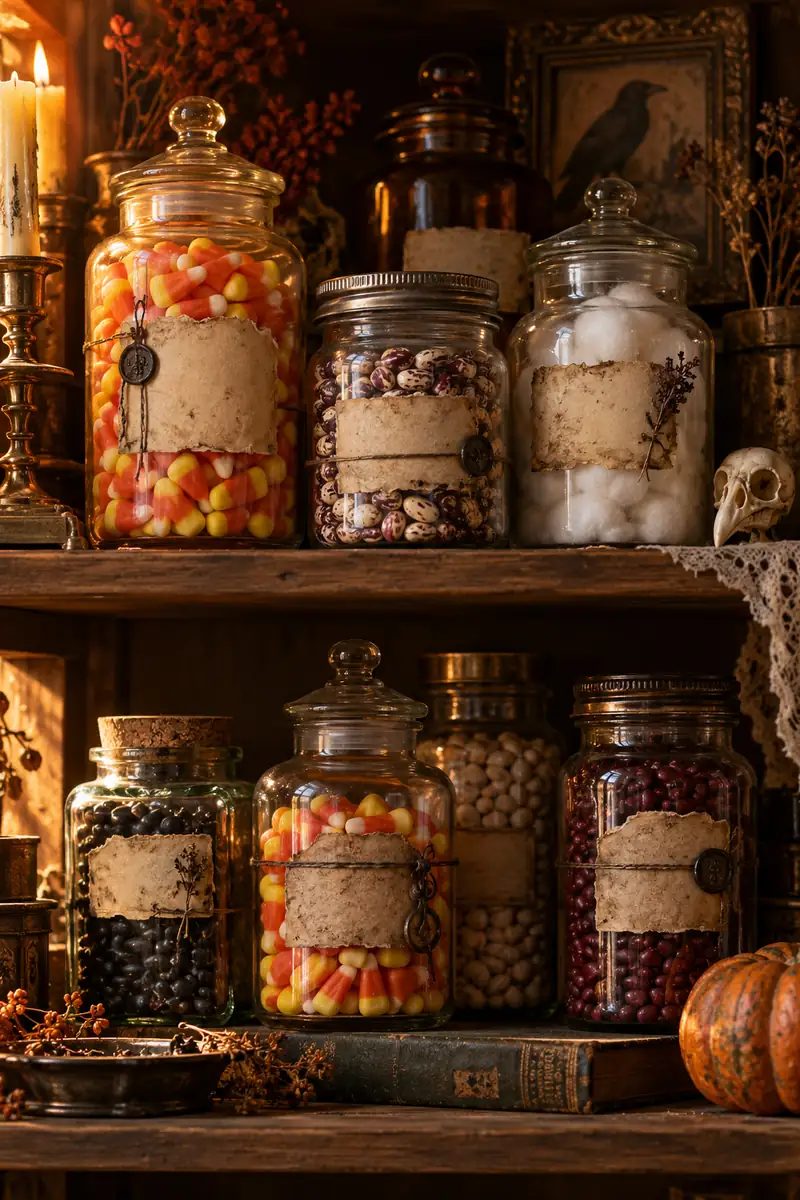
Thrift stores sell odd glass jars and vases for pocket change. Wash them, fill with dried beans, candy corn, fake spiders, or cotton balls, and print simple labels that say things like bat wings or spider venom. Group three or five together on a tray so they read as a collection instead of clutter.
- Odd numbers group better than even.
- Keep labels simple, two words is plenty.
- Put the tallest jar in the middle or at the back.
This is the grown up corner of your Halloween decor.
🗌 Good To Know
Aged labels are easy. Print on regular paper, dab the edges with a wet tea bag, and let them dry before gluing them on.
18. Wrap a Pool Noodle Into a Full Halloween Wreath
Store bought Halloween wreaths start at fifteen dollars and all look the same.
Bend a pool noodle into a circle and tape the ends, then wrap it with black fabric strips or torn trash bags. Hot glue on dollar store picks: plastic leaves, tiny pumpkins, a crow. Hang it with a wide ribbon. It looks full and textured, and the noodle keeps it feather light on the door.
Total cost stays under five dollars if you shop the dollar store.
A bare porch corner with one pumpkin and a doormat.
A full textured wreath with layered black fabric, fall picks, and a crow perched on top.
19. Hide Glowing Eyes in the Bushes
After dark, the bushes are the scariest part of any yard, so put that to work.
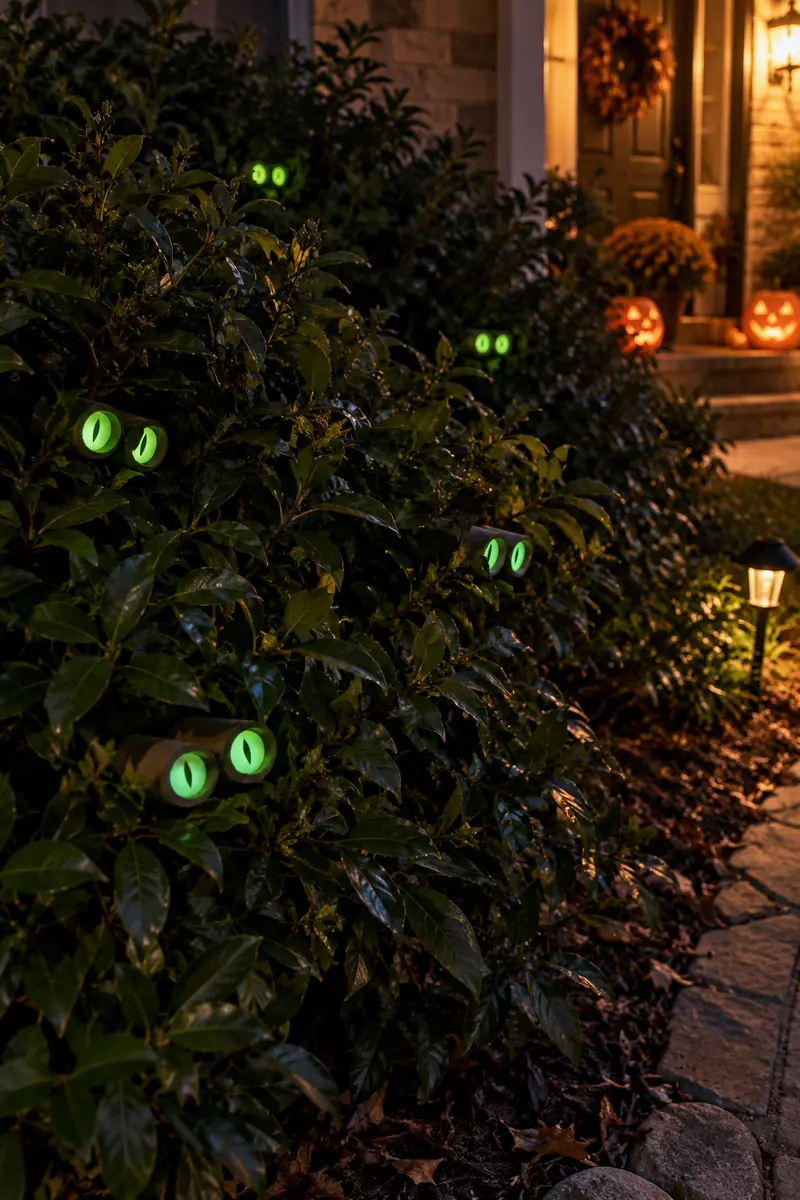
Cut eye shapes out of empty toilet paper rolls, crack a glow stick inside each one, and nestle them deep in the bushes facing the sidewalk. When night falls, pairs of glowing eyes stare out of the dark. It is the cheapest jump scare on this list and trick or treaters talk about it for weeks.
- Use green or orange glow sticks, red reads as car tail lights.
- Push rolls deep so only the eyes show.
- Replace glow sticks on party night for the brightest effect.
Pull them out on November 1 and the bushes go back to normal.
What to grab first
20. Write Spooky Messages on the Bathroom Mirror
The myth says spooky mirror writing needs special decals or glass paint.
A dry erase marker writes right on any mirror and wipes off with a paper towel. Write a backwards message like get out or behind you so it reads correctly in the reflection. Guests do a double take in the bathroom, which is exactly the reaction you want. It costs nothing and takes thirty seconds.
- Test on a corner first to make sure it wipes clean.
- Write backwards so it reads right in the mirror.
- One message is spooky, ten is clutter.
Wipe it away November 1 with zero trace.
21. Hang Floating Witch Hats, the Halloween Decoration Idea on a Budget Everyone Asks About
I tried this last year expecting it to look silly, and it stole the whole party.
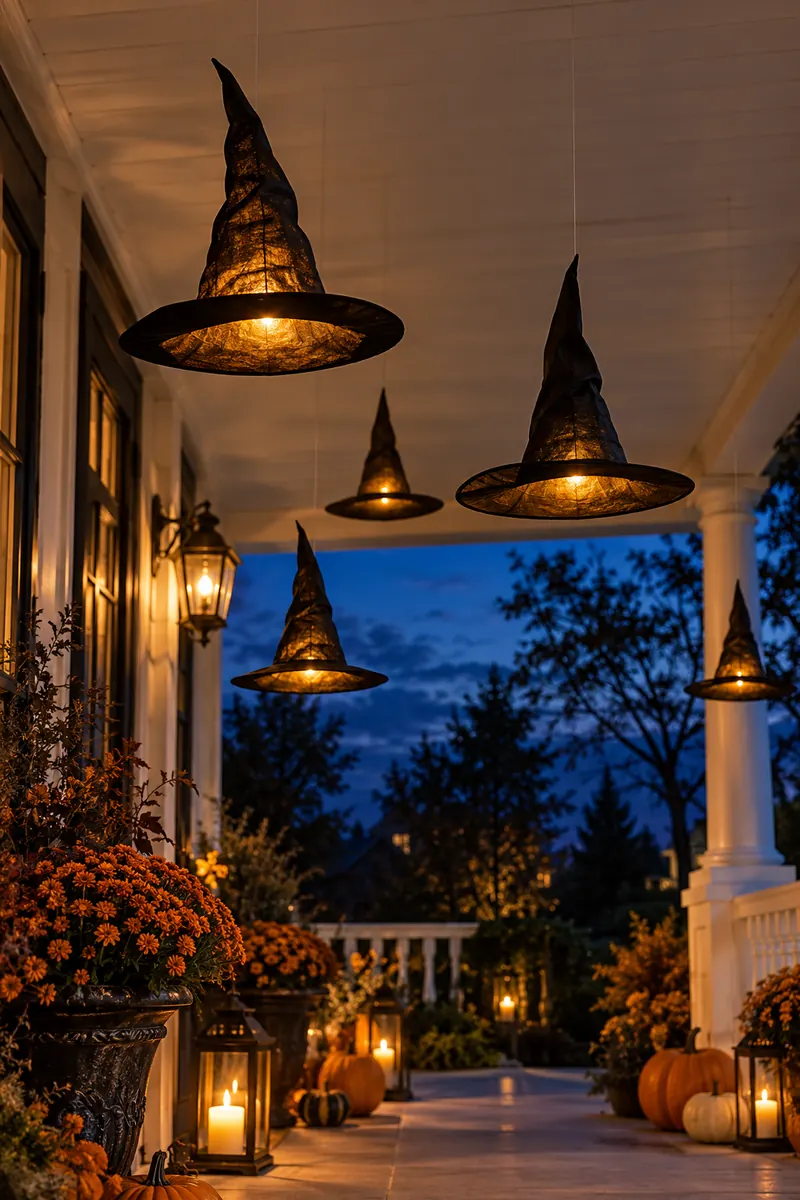
Tie fishing line to the tip of cheap witch hats and hang them from the porch ceiling or a tree branch at different heights. They bob and turn in the breeze like they are hovering. Add a battery tea light inside each hat and they glow from within after dark, which looks like real magic to small kids.
Take photos at dusk, that is when they look their best.
Tie clear fishing line to the tip of each witch hat.
Hang them at staggered heights from the porch ceiling or tree branches.
Tuck a battery tea light inside each hat for a nighttime glow.
22. Wrap the Front Door Like a Mummy
The mistake is buying a door cover, they wrinkle, tear, and look flat.
Wrap the door yourself with white crepe paper streamers instead. Crisscross long strips across the door and tape the ends on the inside edge, then stick on two big googly eyes from the craft aisle. It costs about two dollars, survives the month if it stays dry, and looks handmade in the good way.
- Tape streamer ends inside the door edge so they stay hidden.
- Crisscross, do not line up straight rows.
- Bring it in during heavy rain or it will melt.
Kids will insist on being photographed in front of it.
23. Stack Foam Pumpkins Into a Topiary
One pumpkin on the step looks lonely, but three stacked look like a plan.
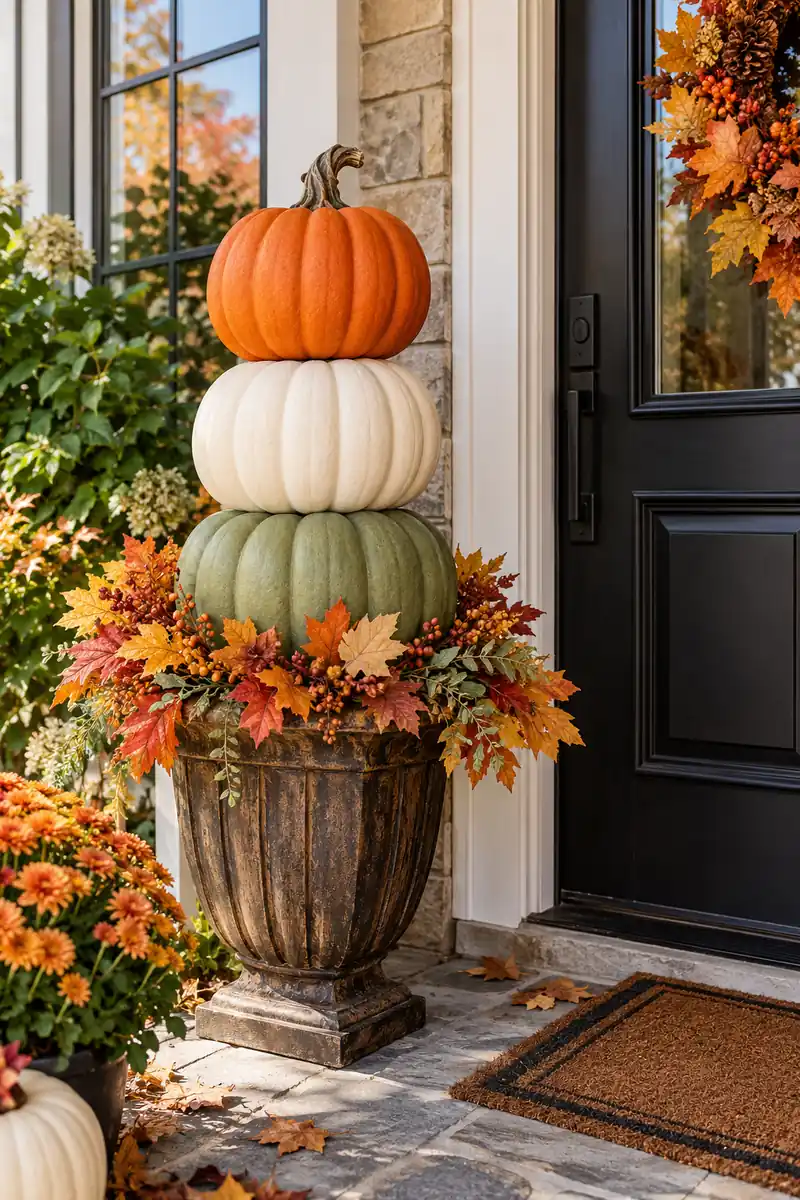
Stack foam pumpkins from the craft store into a topiary: large on the bottom, medium in the middle, small on top, glued with hot glue and set in a planter. Foam pumpkins never rot, so the stack lasts for years and the yearly cost drops to zero. Tuck fake leaves or moss around the base to hide the planter.
Store it whole in a trash bag and it is ready next October.
| Pumpkin type | Trade offs |
|---|---|
| Real pumpkins | Rot in weeks, heavy to stack, carve only once. |
| Foam pumpkins | Last for years, light to stack, paint any color. |
| Paper mache | Cheapest to make, fun with kids, keep them dry. |
24. Drape Black Gauze Over the Furniture
Tiny rule: fabric changes a room faster than any small decoration.
Drape black gauze, cheesecloth, or an old black sheet over the sofa back, the bookshelf, and the dining chairs. It reads as a haunted house set instead of a living room with Halloween stuff in it. A few dollars of gauze from the fabric store covers a whole room, and it all comes down in ten minutes on November 1.
- Use gauze, not sheets, so light still passes through.
- Let corners puddle on the floor for a haunted look.
- Keep fabric away from candles and heaters.
It is the closest thing to a movie set you can buy for pocket change.
Drape fabric over the biggest furniture first. Small surfaces can wait.
25. Line the Walkway With Paper Bag Luminaries
On Halloween night, the walkway decides whether kids stop at your house or skip it.
Line the path with paper bag luminaries: fold down the top inch of brown lunch bags, drop a battery tea light in each, and set them a few feet apart along the walk. The warm glow marks your house as the welcoming one on the street. A pack of fifty bags costs a couple of dollars and lights the whole block.
- Fold the tops down for a sturdier rim.
- Space them three feet apart for the best glow.
- Turn them on at dusk, off before bed.
It is a small effort with the biggest payoff of the night.
💡 Quick Tip
Weigh each bag with a scoop of sand or rice so a gust of wind does not tip them over.
None of these Halloween decoration ideas on a budget need a craft store splurge, just paper, light, paint, and a free afternoon. Start with the porch since that is what the street sees, then add one or two indoor ideas where your family actually hangs out.
Save this list to a Halloween board on Pinterest so every idea is waiting when October rolls around again, and share it with the friend who always says decorating costs too much. For more seasonal ideas that respect your wallet, keep browsing insightsjournal.co.uk.