
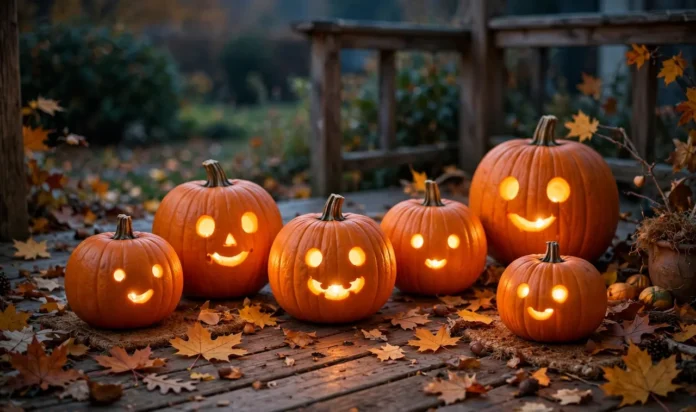


Every October the same thing happens. You buy a pumpkin with big plans, then stare at it for three days because every carving idea online needs an art degree.
Here is the truth: the pumpkins people love most are the simple ones. Clean shapes, bold cuts, and a candle inside. Nobody photographs the complicated dragon. They photograph the goofy face glowing on the porch.
These easy pumpkin-carving ideas are picked for real humans with basic tools. Each one takes under an hour, most take twenty minutes, and every design below can be drawn freehand with a marker before you cut. Grab a serrated carving saw, a scoop, and a pumpkin, and start with number one. New to this? Our pumpkin carving for beginners guide covers the basics.
1. The Classic Triangle-Eye Jack-o’-Lantern
Start where everyone should start. Two triangle eyes, a triangle nose, and a jagged grin. The trick is cutting the mouth in one zigzag motion instead of tiny pieces.
Draw it with a dry-erase marker first so mistakes wipe off. Cut the lid at an angle so it sits back like a puzzle piece instead of falling in. A pumpkin with thick walls holds these bold shapes best, so pick one that feels heavy for its size.
2. Sleepy Face Pumpkin
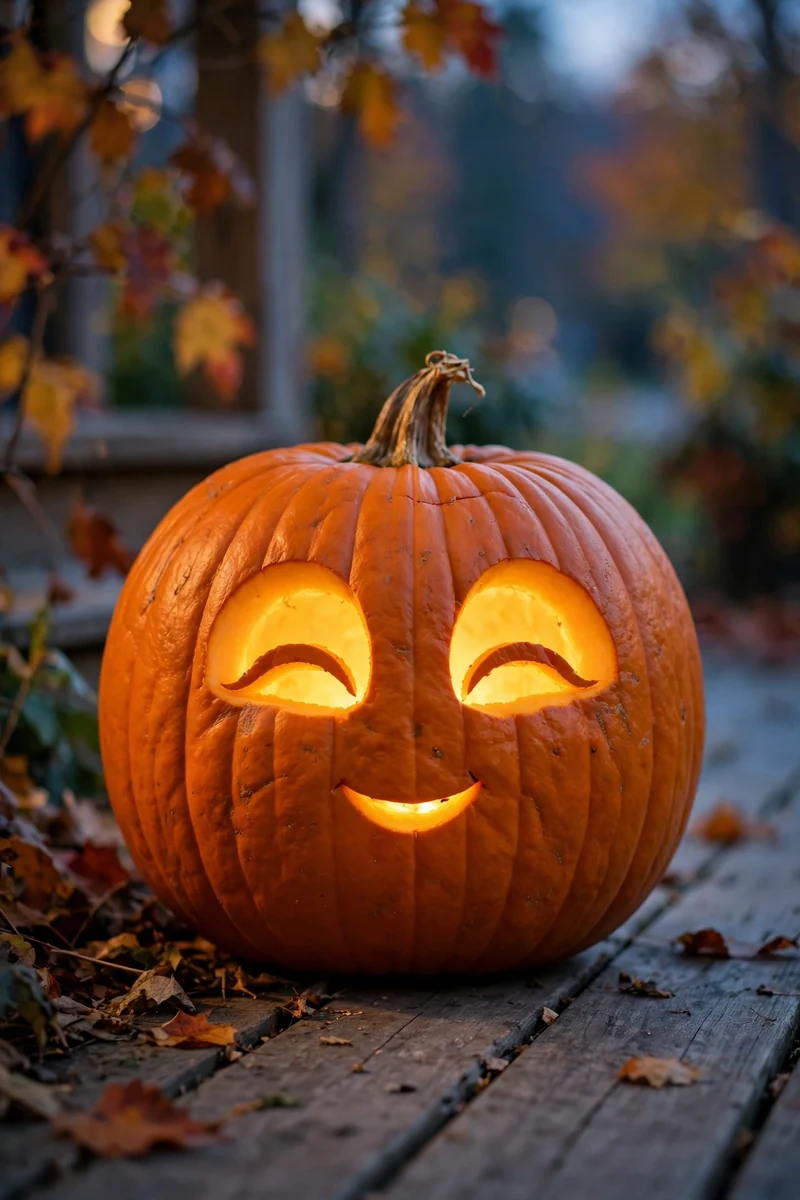
Two curved lines for closed happy eyes, a tiny smile, and that is the whole face. It looks calm and cute on a doorstep, especially in a row of three.
Keep the cuts thin. Closed eyes read better as slits than holes, so saw narrow lines and push the pieces out gently. Place this one near the door where guests see it up close, since the charm is in the small details.
3. Polka Dot Pumpkin
Drill or carve dots in different sizes across the whole pumpkin. When the candle lights up, the dots glow like fairy lights.
Use a power drill with three bit sizes if you have one. No drill? A small apple corer punches clean circles through the wall. Work from the top down so your hand never covers the dots you just finished.
💡 Quick Tip
Space the dots wider than you think. Light needs room to breathe, and crowded dots blur together in the dark.
4. Zigzag Chevron Band
Carve one bold zigzag stripe around the middle of the pumpkin, like a sweater pattern. It looks modern and takes ten minutes.
Wrap a strip of masking tape around the pumpkin as your guide line, then draw the zigzags on the tape. Peel the tape before lighting. This design suits tall, narrow pumpkins best, where the band has room to wrap cleanly.
5. Starry Night Pumpkin
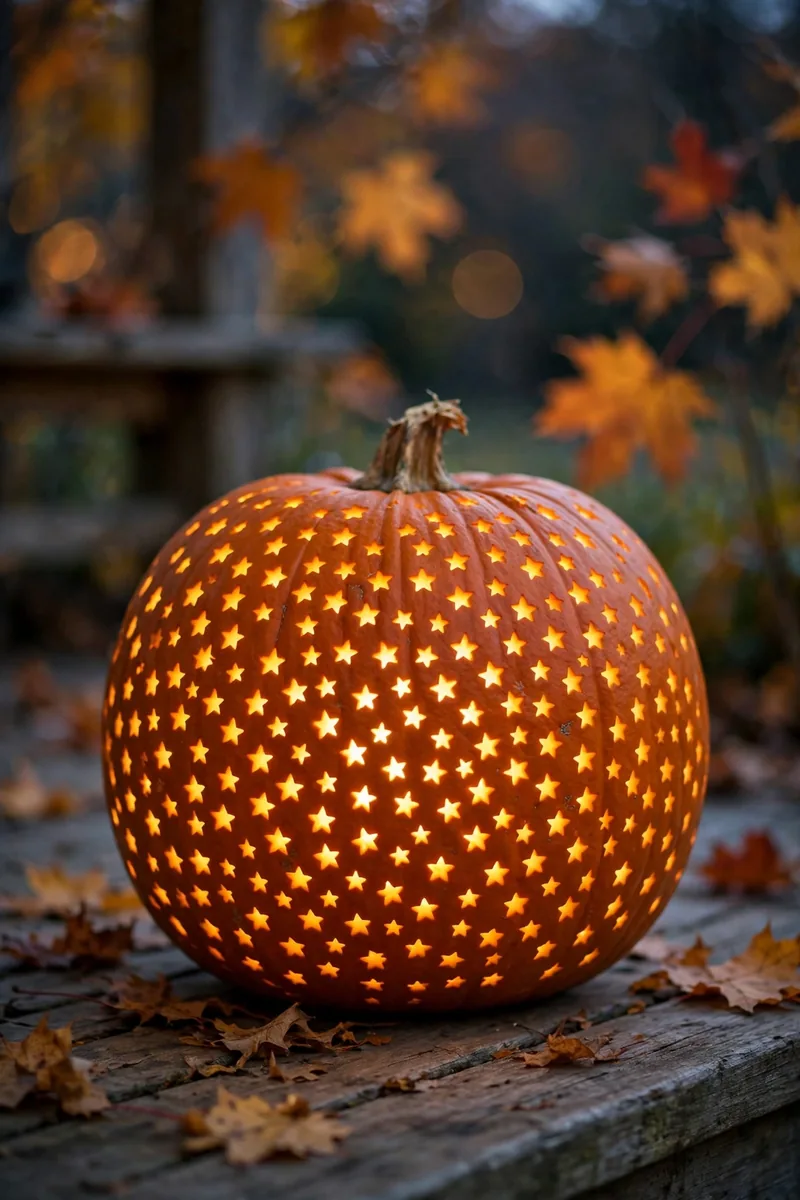
Tiny star shapes scattered over the whole surface. Five-pointed stars are easier than they look: draw them as five short lines meeting in the middle.
Cut only the star outlines and leave the centers in place for a stained-glass effect. Or punch them out fully for maximum glow. Scatter a few extra tiny dots between stars to fill empty patches.
6. Moon and Stars
One big crescent moon with three small stars around it. The moon shape is just two curved cuts, and it photographs beautifully.
Draw the crescent with a bowl edge as a stencil. Cut the moon as one piece and pop it out in a single push. Put the moon high on the pumpkin so it reads clearly from the sidewalk.
7. Simple Cat Silhouette
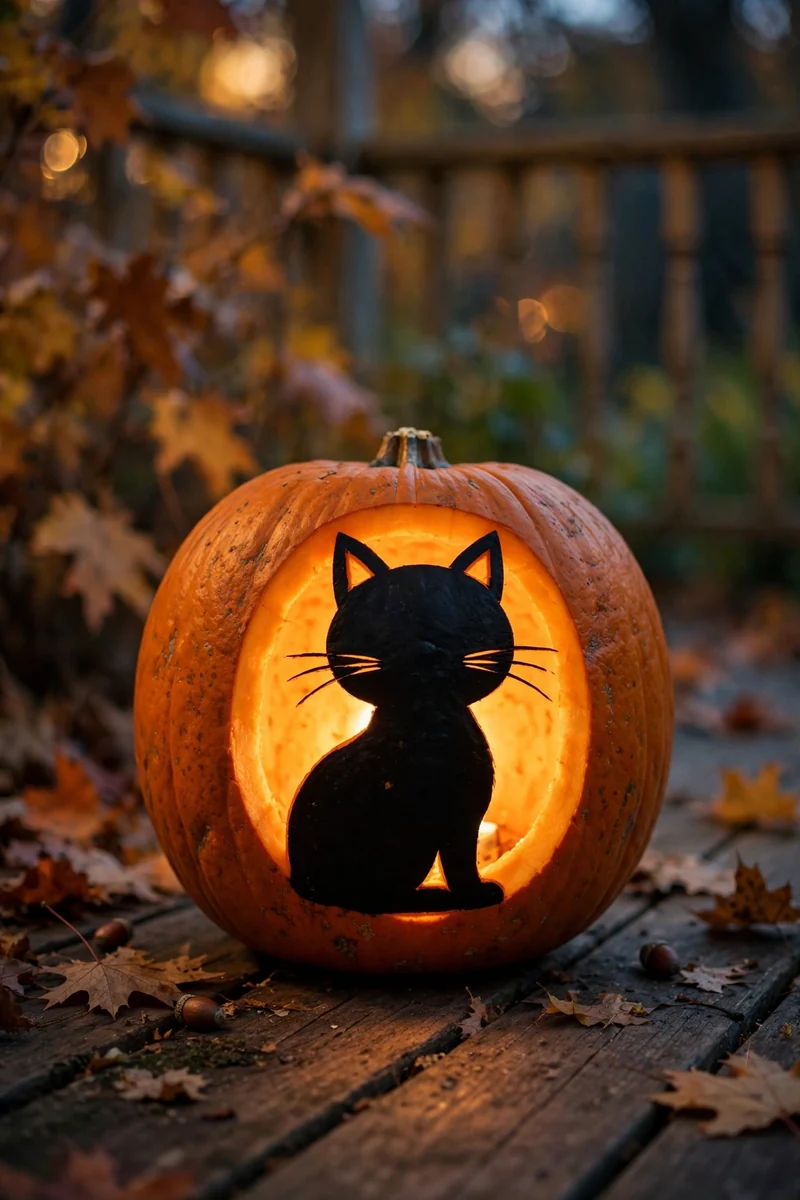
Triangle ears, round head, whisker slits. A black cat silhouette is the most forgiving animal shape because wobbly lines still read as “cat.”
Cut the whole silhouette as one connected shape. Leave a bridge of pumpkin at the ears so nothing flops over. Whiskers work best as thin scraped lines rather than full cutouts.
8. Friendly Ghost
An oval body, two round eyes, and an open “o” mouth. Cute, not scary, and kids love drawing this one for you to cut.
Make the ghost float by carving it high on the pumpkin with empty space below. Add a wavy bottom edge for the classic sheet look. A second tiny ghost beside it turns one shape into a scene.
What to grab first
9. Bat Trio
Three simple bat shapes at different sizes flying across the pumpkin. Each bat is two arcs for wings and a small body bump.
Draw the biggest bat first in the center, then two smaller ones. Cut wings as one piece per bat to keep it sturdy. Angle the bats slightly upward so they look like they are climbing into the night sky.
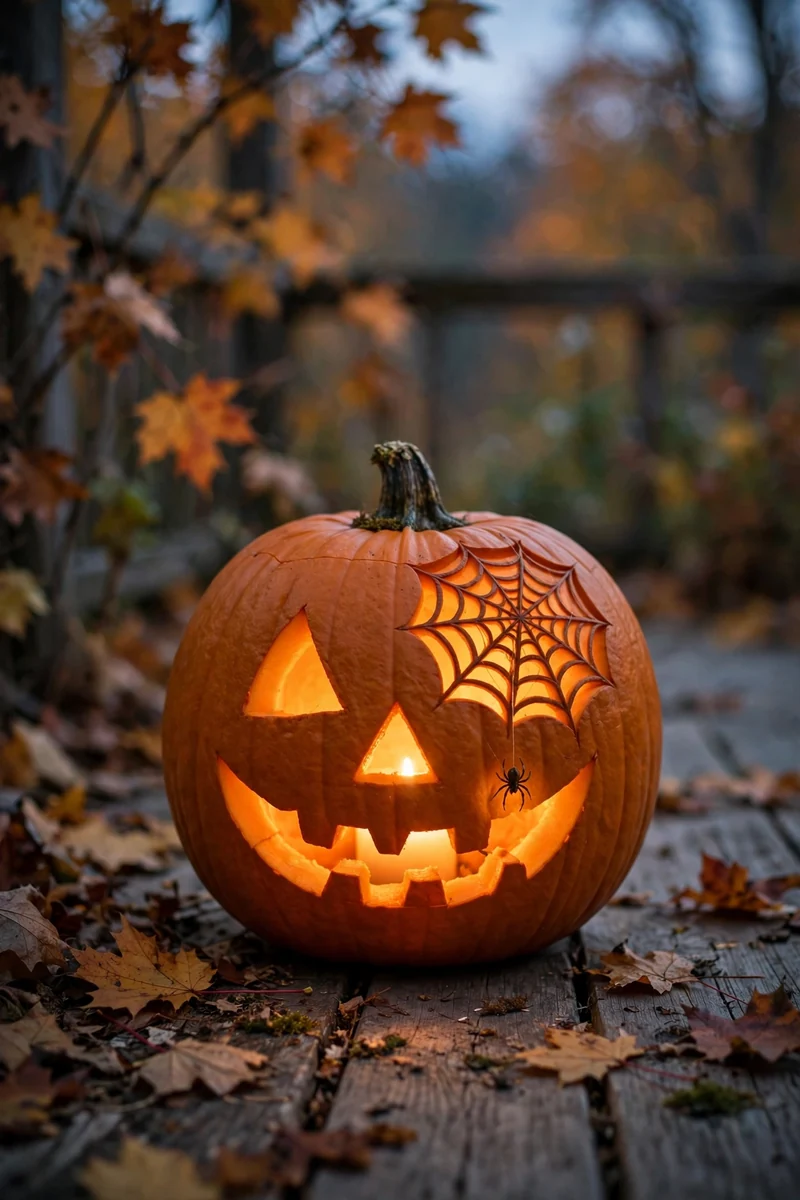
10. Corner Spiderweb
Carve a quarter web tucked into one corner of the pumpkin, with a tiny spider hanging from it. The asymmetry looks artsy with zero effort.
Draw three straight spokes first, then connect them with curved lines. Cut only the lines, thin and clean. Hang the spider from a single thread line so it dangles when the pumpkin moves.
11. Candy Corn Stripes
Three horizontal carved bands, then paint the sections orange, yellow, and white like a candy corn. Carving plus paint is cheating in the best way. For more porch projects, see our DIY Halloween decorations.
Carve the bands as shallow grooves rather than full cutouts, then fill with acrylic paint. It glows softly instead of blazing. Let each color dry before adding the next so the stripes stay crisp.
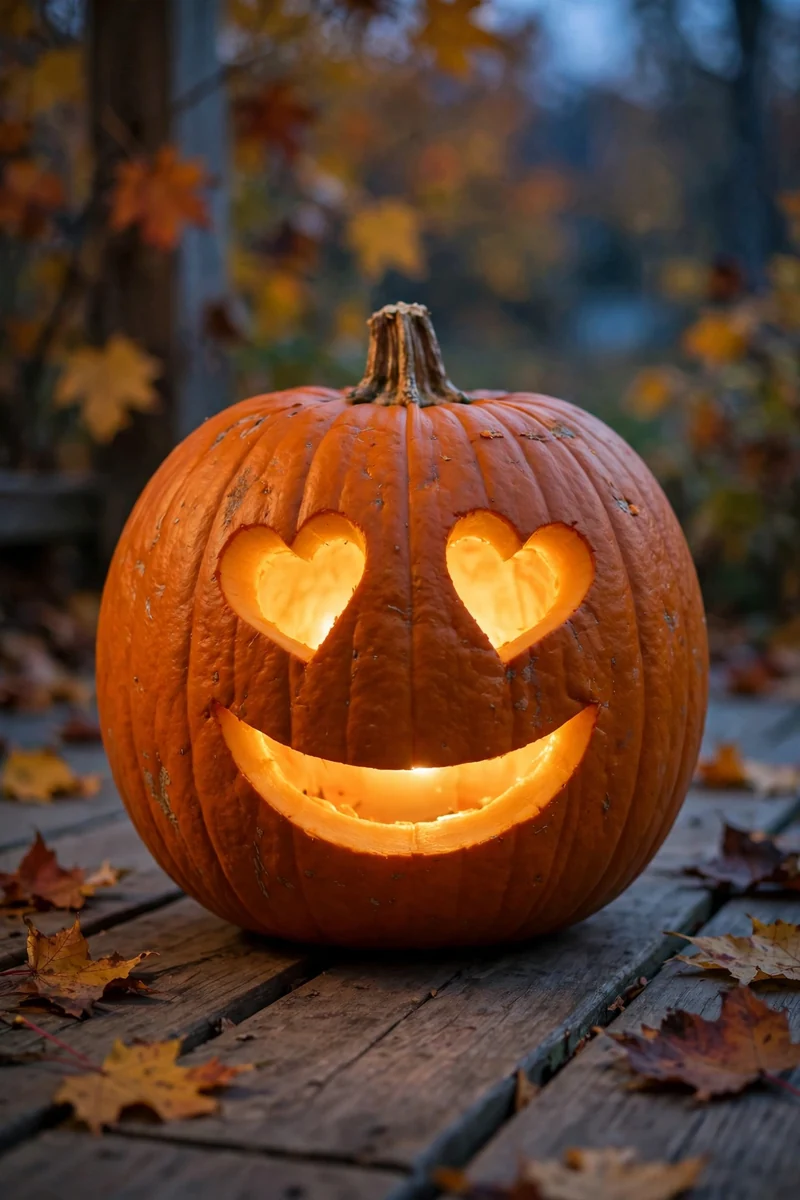
12. Heart-Eyes Emoji Face
Two heart eyes and a big smile. Everyone recognizes it instantly, and hearts are just two bumps, easy to cut.
Cut the hearts slightly smaller than you draw them. Thick walls between the eyes keep the face from collapsing. This one is a hit with teens, so put it where they will see it.
13. Falling Leaves Pattern
Simple leaf outlines scattered like they are falling. Each leaf is an oval with a pointed tip and one center vein line.
Carve only the outline of each leaf and scrape the inside skin thin with a spoon so light shines through softly. Tilt the leaves at different angles so they look caught mid-fall.
Draw five leaf ovals in different spots and angles.
Saw the outlines, then thin the insides with a spoon.
Drop in an LED light and check the glow from across the room.
14. Diamond Harlequin Band
A row of diamonds wrapping around the pumpkin like a ribbon. Diamonds are just four straight cuts, and straight cuts are the easiest kind.
Mark even spacing with tape first. Cut every other diamond fully and scrape the rest thin for a two-tone glow. The band looks best on round pumpkins where the pattern wraps evenly.
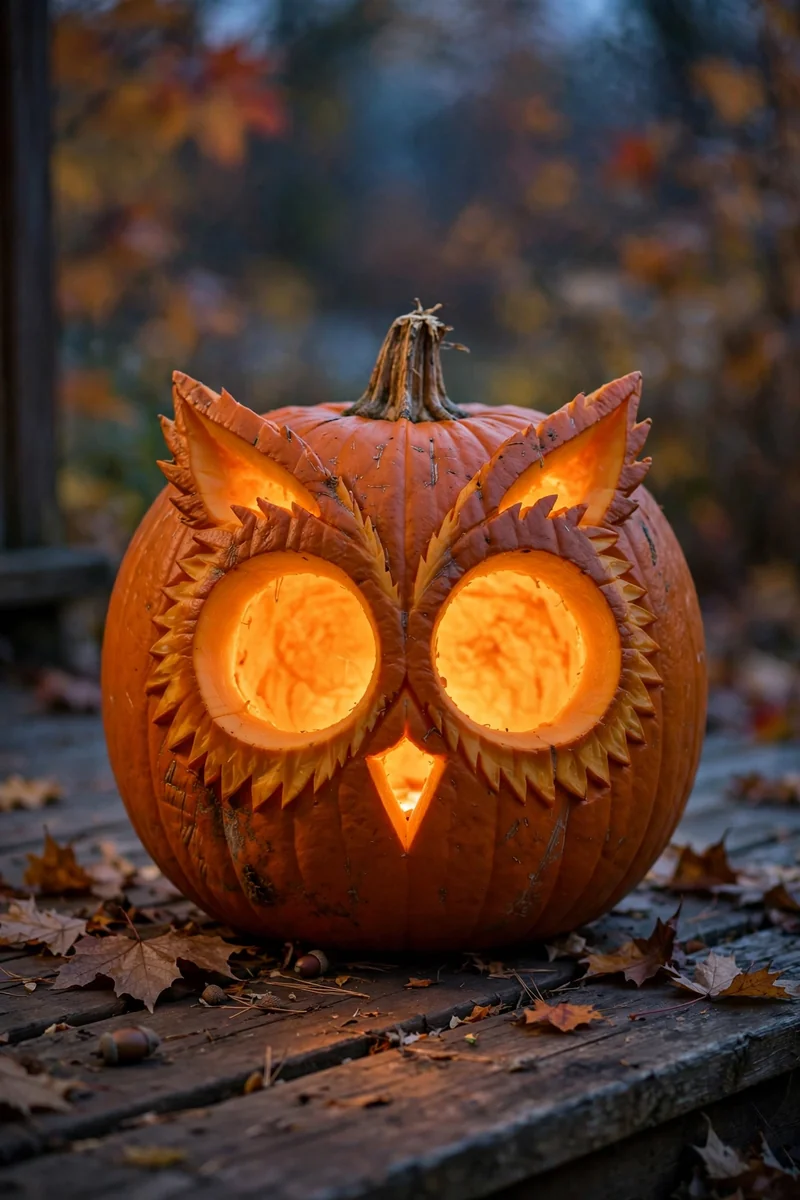
15. Owl Face
Two huge round eyes, a triangle beak, and ear tufts. Owls look wise even when the circles are a little lopsided.
Use a jar lid to trace perfect eye circles. Cut the beak as a small triangle between and slightly below the eyes. Add two small triangle tufts at the top for instant owl recognition.
16. Witch Hat Silhouette
A tall pointy hat with a brim, floating alone on the pumpkin. One bold shape, huge impact from the street.
Draw the hat tall and slightly crooked. A bent tip looks more charming than a straight one, and it is easier to cut. Add a small buckle square on the band for a classic witch look.
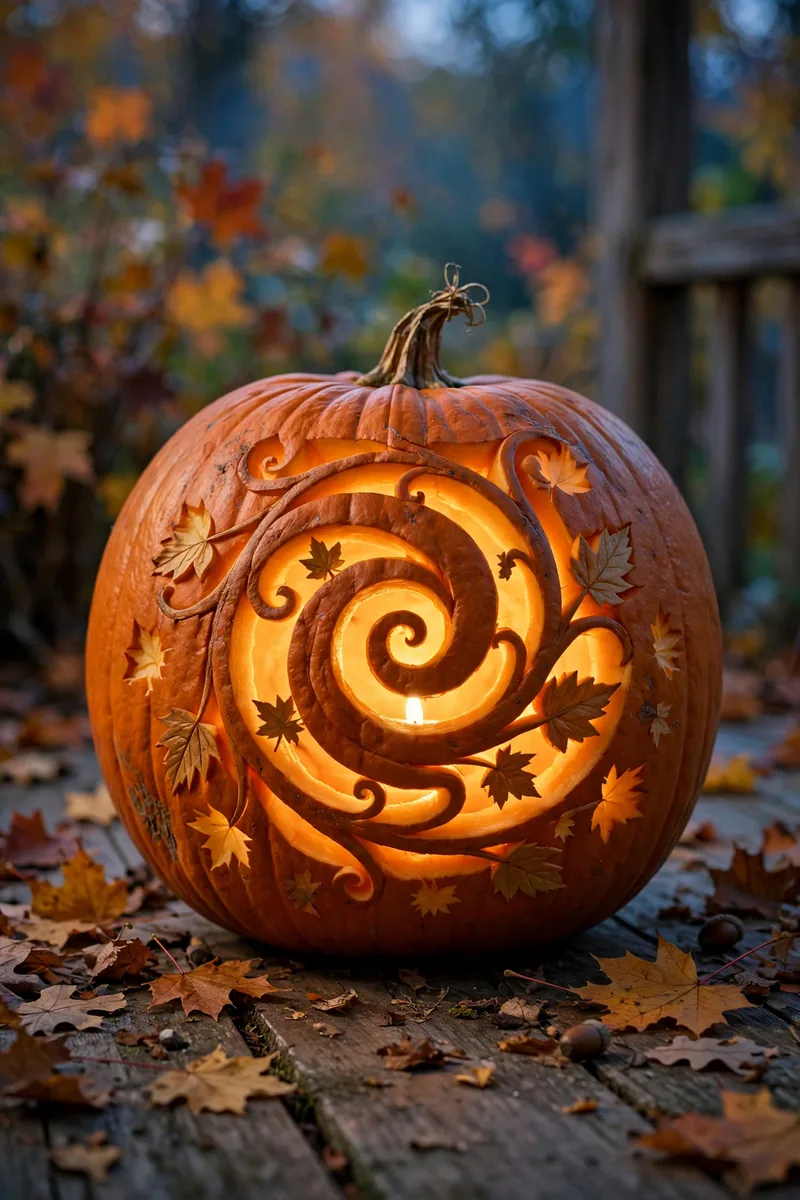
17. Swirly Vine Pumpkin
One continuous curly vine spiraling around the pumpkin with a few leaves. It looks fancy but it is literally one wavy line.
Draw the vine in one go without lifting the marker. Follow it with the saw slowly; curves forgive wobbles. Add three small leaves along the vine for balance.
18. Cute Mini Skull
Round skull, big eye sockets, tiny nose heart. Keep it round and friendly, more cartoon than creepy.
Small pumpkins work best for this one. A big skull on a small pumpkin has the best proportions. Keep the jaw short so it stays cute instead of scary.
Cut the lid at an angle so it rests on top instead of falling inside.
Scoop the walls to about an inch thick for cleaner cuts.
Do not use a big kitchen knife. It slips and the cuts look ragged.
Do not carve more than two days before Halloween. It wilts fast.
19. Sunflower Face
Round center face with petal shapes radiating out. Carve the petals as cutouts and paint the center yellow for a sunny porch.
Draw petals with a spoon edge as a stencil so they stay even. Twelve petals is the sweet spot for fullness. A smiling face in the center makes it friendly instead of plain.
20. Plaid Crosshatch
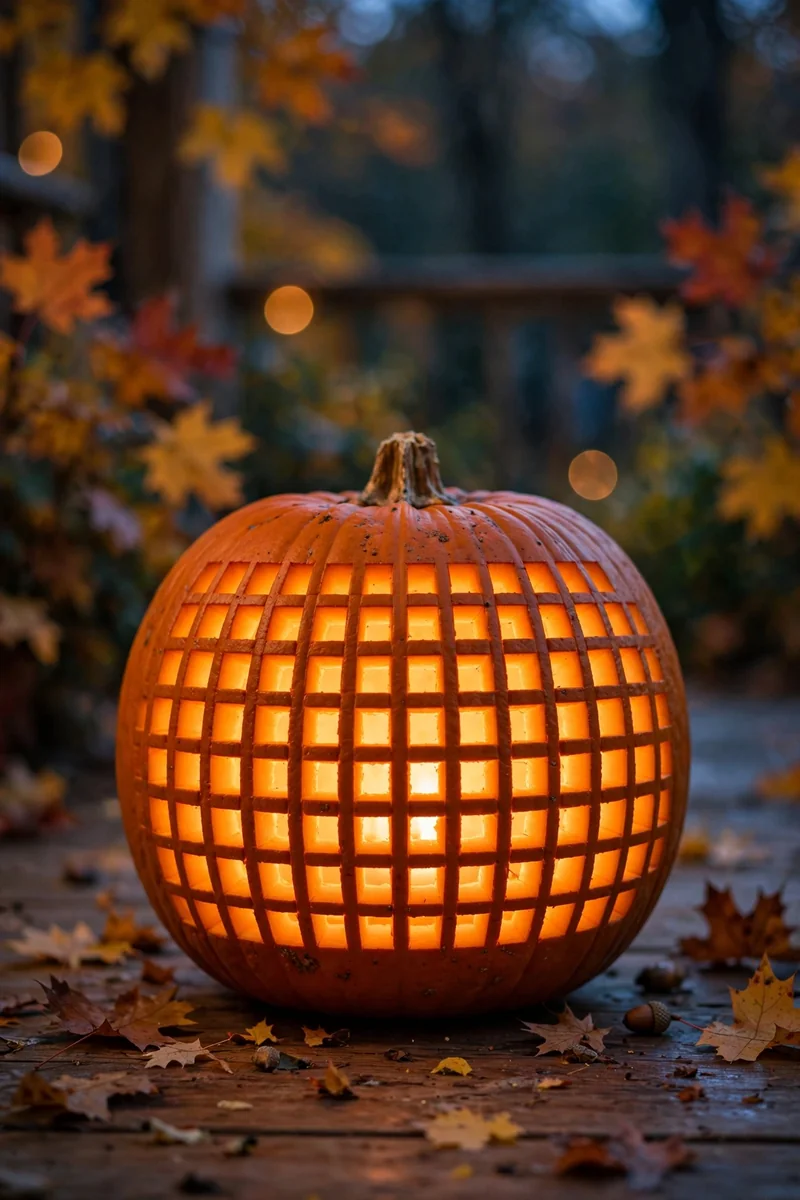
Straight vertical and horizontal lines crossing into a plaid grid. It sounds plain until it glows, then it looks like a lantern.
Score the lines lightly first, then deepen. Even spacing matters more than perfect straightness here. Use a ruler pressed gently against the curve as a guide.
21. Monogram Letter
Carve the first letter of your family name in a bold block style. It is personal, classy, and stencils are free online.
Print the letter large, tape it on, and poke the outline with a pin. Connect the dots with your saw. Block letters cut cleaner than script, so keep it bold.
22. Little House Silhouette
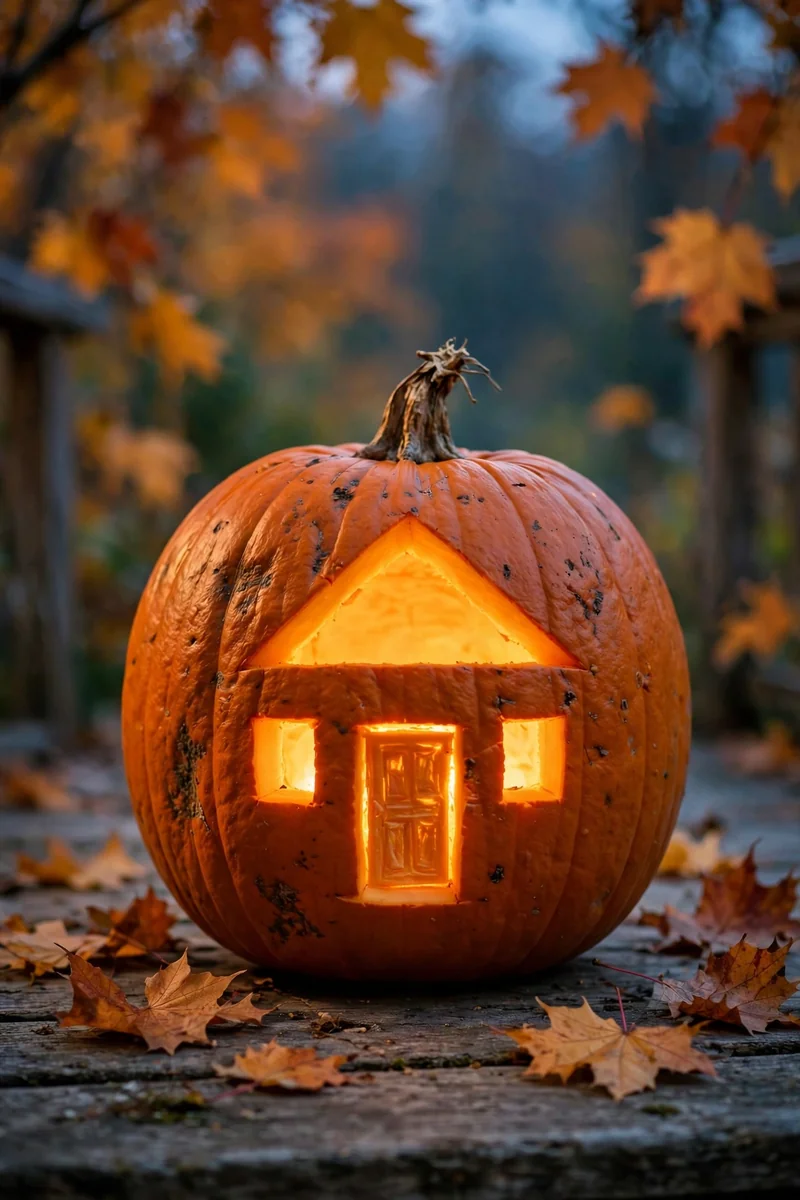
A square with a triangle roof, a door, and two lit windows. It tells a whole story in four shapes.
Cut the windows out fully and leave the walls solid. The glowing windows against the dark house is the whole charm. Add a tiny chimney for extra character.
23. Acorn and Oak Leaves
Two acorns with oak leaf clusters. Nature designs age well on the porch and stand out among all the faces.
Draw the acorn as a small oval with a cap, leaves as lobed ovals. Thin the leaf interiors with a spoon for a soft glow. Cluster them low on the pumpkin like they just fell.
Bold, simple shapes beat fiddly details every time. If you can draw it with a marker in ten seconds, you can carve it.
24. Frog Face
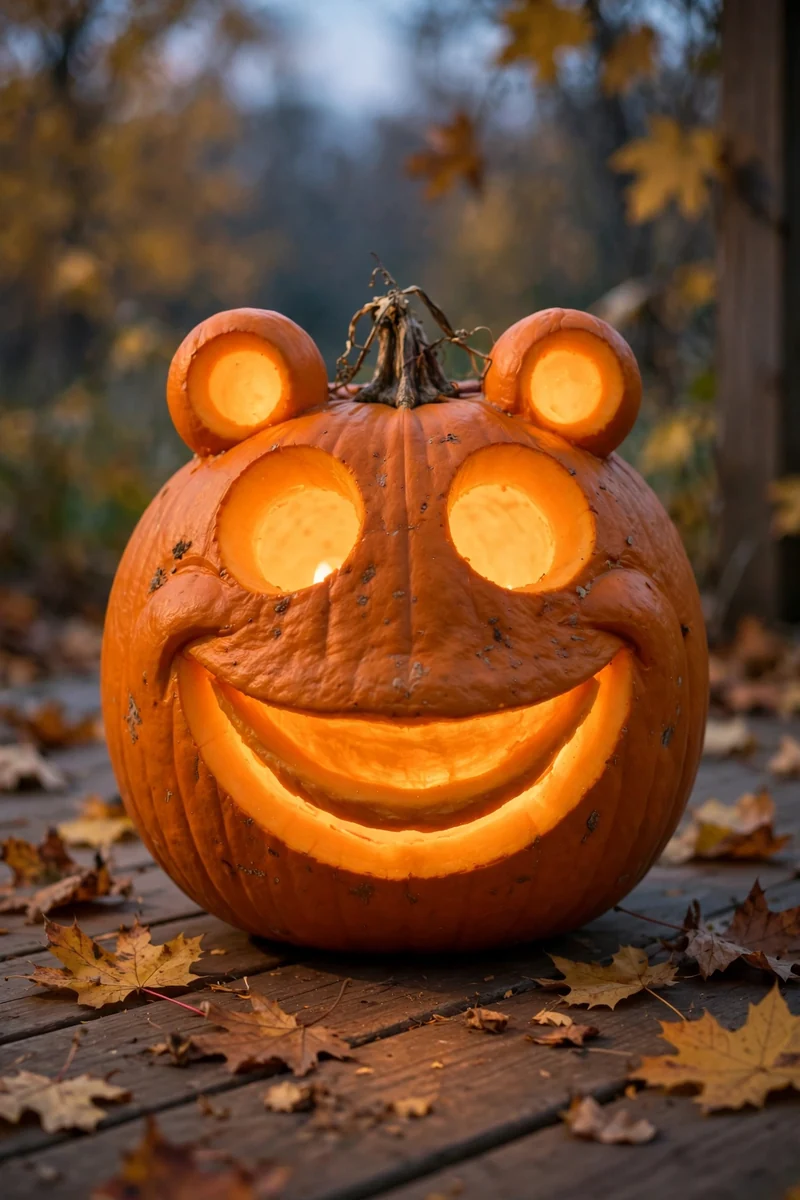
Two bugged-out eyes on top, one wide smile. Frogs are funny, and funny pumpkins get the most compliments.
Draw the eyes as circles sitting half above the pumpkin’s top curve. The smile should stretch edge to edge. A slightly crooked smile is funnier, so do not fix it.
25. One-Line Doodle Face
Draw a face without lifting the marker, then carve along that single wandering line. Every one comes out different and artsy.
Keep the line looping back on itself so the cut stays connected. It is the fastest design on this list, under ten minutes. No two doodles match, which makes each pumpkin one of a kind.
That is the whole collection. Twenty-five designs, zero art degrees required, and every one of them looks better with a candle inside than it does in daylight. Pick the three that made you smile, carve them this weekend while the pumpkins are still firm, and put the best one where the trick-or-treaters will see it. Planning a party too? Check our Halloween party ideas. These easy pumpkin-carving ideas work because they respect the material: bold cuts, simple shapes, warm light.
📌 Save this list on Pinterest so it is there when the pumpkins hit the porch. Pin your favorite design and carve it this week.