
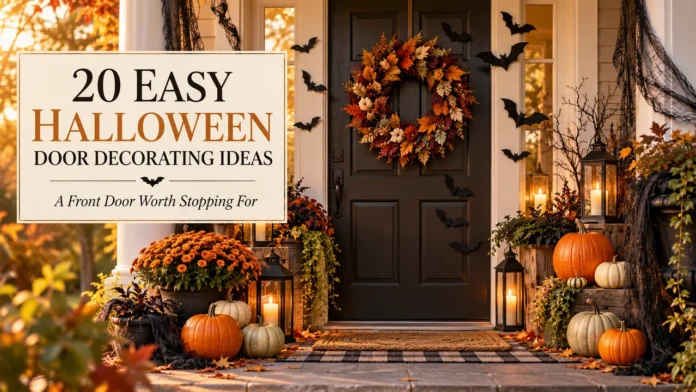


Most Halloween front doors get a plastic skeleton and a rushed wreath, and then nobody looks twice. The trouble is rarely effort. It is usually that the door is a big flat rectangle, and a small decoration gets lost on it.
The good news is that the best Halloween door decorating ideas work with the whole door, not just one corner. A few rolls of cheap gauze, some black card, or a ball of white yarn can turn a plain door into something the neighbours stop to photograph. Also, none of it needs power tools, and most of it fits into an afternoon.
Below you will find 20 easy ideas, and each one comes with a quick reference to help you pick. Some are renter friendly, so they leave the paint alone. Others suit a rainy week because the materials stay dry. Start with the one that matches the supplies already in your craft drawer, then add a second idea if you feel brave.
1. Wrap the Whole Door in Gauze for a Mummy With Googly Eyes
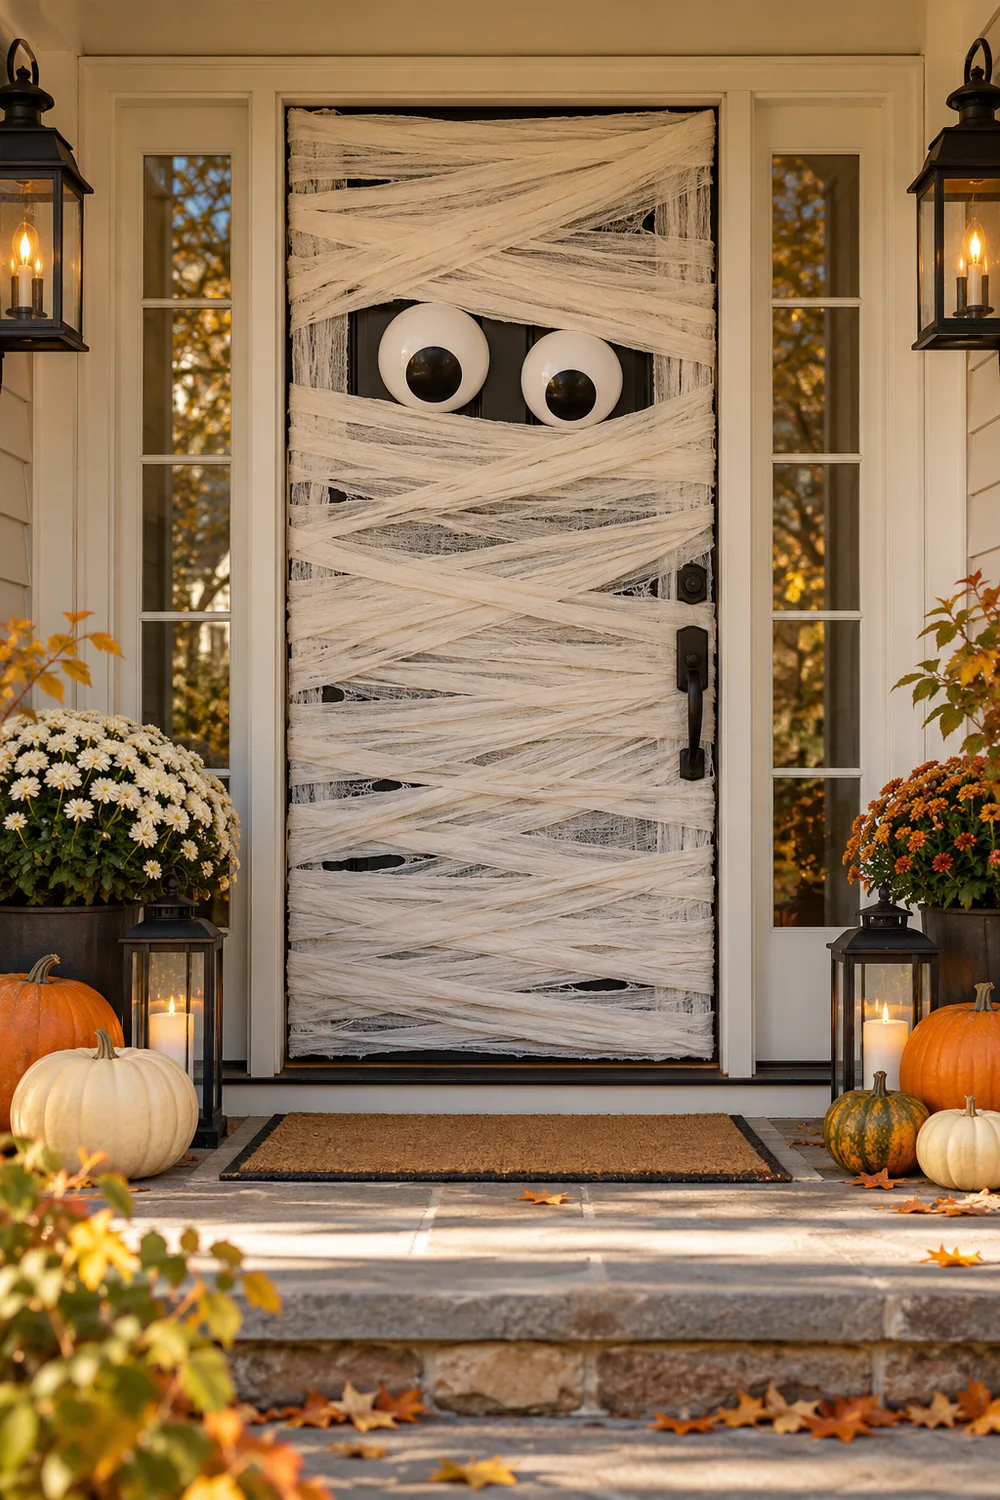
Two round eyes peeking out of a wall of white strips is all a mummy door needs.
Here is how the layers go:
- Cut white gauze or old sheet strips to run across the width of the door.
- Overlap each strip a little, because gaps look like a mess instead of bandages.
- Leave a slim gap about one third of the way down for the eyes.
- Stick two large googly eyes, or paper circles with a black dot, in that gap.
Put masking tape on the back of each strip. It holds well and usually lifts off painted doors cleanly. Let a few strips hang loose at the bottom, since ragged ends look more convincing.
2. Tape a Black Cat Silhouette Cut From Card to the Centre Panel
The usual mistake is cutting the cat too small, so it vanishes on a big door.
Aim for a cat around 40 cm tall, with sharp triangle ears and a curved tail. Black card stock works well. Draw the outline on the back, because the pencil lines then stay hidden. Place the cat at eye level, and add two yellow paper circles for eyes.
Then add two extras:
- A crescent moon cut from yellow card behind the cat
- Three or four small paper stars scattered nearby
Quick Tip
Rented door? Use poster putty tabs in the four corners of the cat. They hold card well and rub off without marking the paint.
3. Fill a Wreath Ring With Mini Faux Pumpkins and Dried Stems
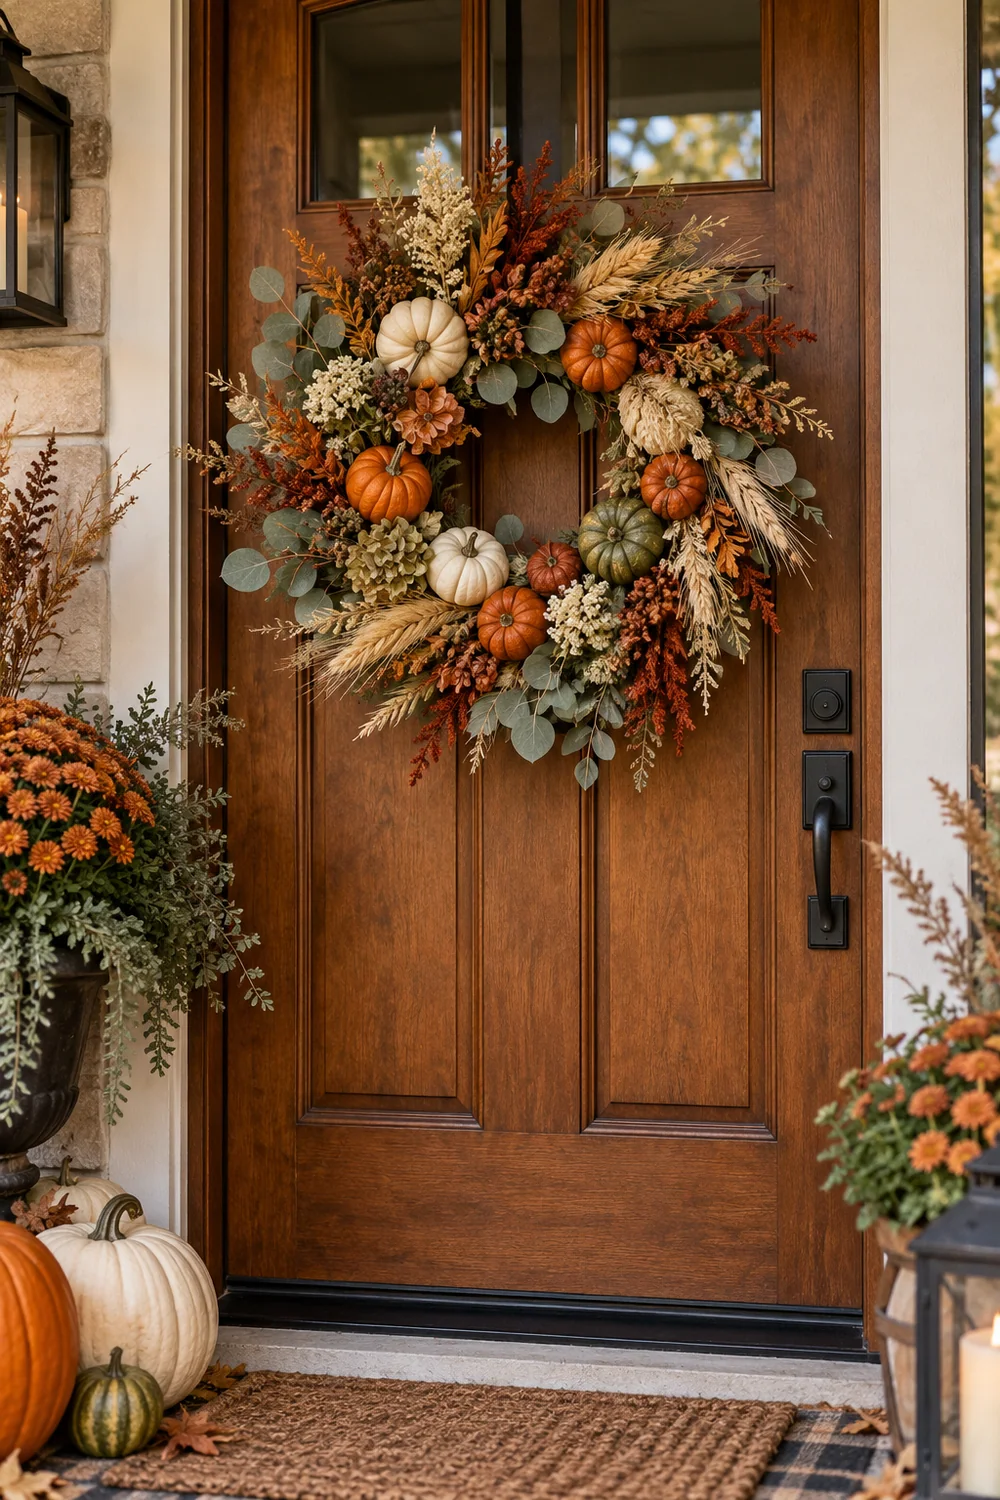
Store bought wreaths often look thin once you stand back on the pavement. A fuller one fixes that quickly.
Start with a plain grapevine ring. Then glue mini pumpkins in a loose arc along one side, not all the way round. Tuck dried stems between them so the ring still shows through in places.
Three details help:
- Mix two pumpkin sizes
- Keep one colour dark, like deep purple or black
- Tie a ribbon loop at the top for hanging
If rain is likely, add a wire loop behind each pumpkin as well as the glue.
4. Stretch White Yarn Into a Giant Spiderweb Across the Door
Anchor first, then fill in. That one rule keeps a yarn web from turning into a tangle.
Pick white or pale grey yarn so it shows up against a dark door. Thick wool also reads better from the street than thin craft thread. Finally, hang a small paper spider from the centre, and keep it small, because the web is the star.
1
Mark the centre of the door and six points around the edge with small squares of tape.
2
Run yarn from the centre to each edge point and tape the ends down firmly.
3
Wrap a loose spiral around the spokes, and dab a little tape where the yarn crosses each one.
5. Send Paper Bats Flying Up the Door and Over the Frame
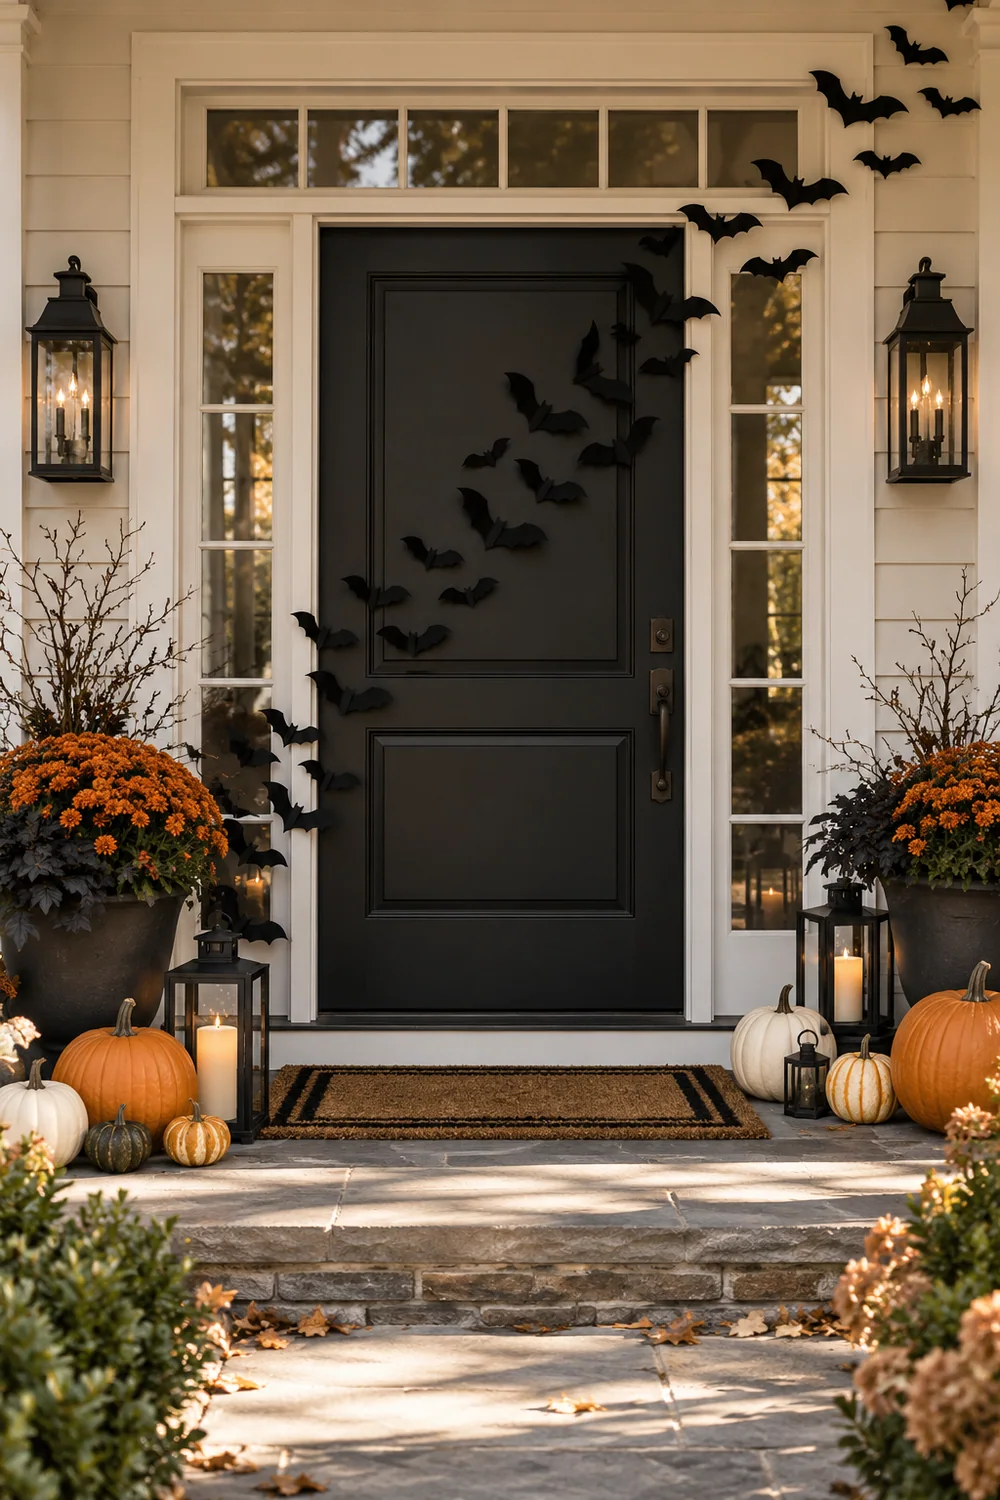
Bats make a flat door look busy in seconds.
Cut about 15 bats from black card in three sizes. Stick the biggest near the bottom and the smallest near the top, so the flock seems to fly away from you. Curve each wing slightly with your fingers, because the little shadows then look real.
Two small habits make the flock believable:
- Angle every bat a different way
- Let two or three cross the frame onto the wall
A plain door with one lonely wreath and a lot of empty space around it.
A trail of bats in mixed sizes climbing from the handle to the top corner, with movement in every direction.
6. Turn the Door Into a Jack O’ Lantern With Orange Paper and Black Shapes
Cover the door in orange first, then let the black face do the talking.
A roll of orange wrapping paper works well, or you can tape sheets of craft paper together with overlapping edges. Next, sketch two triangle eyes, a nose, and a jagged mouth on black card. Cut them out and stick them on, keeping the eyes above handle height so the mouth sits near the middle. Make the shapes bold, since thin ones disappear when you view the door from the pavement.
What to grab first
7. Hang a Felt Letter “BOO” Garland Across the Top
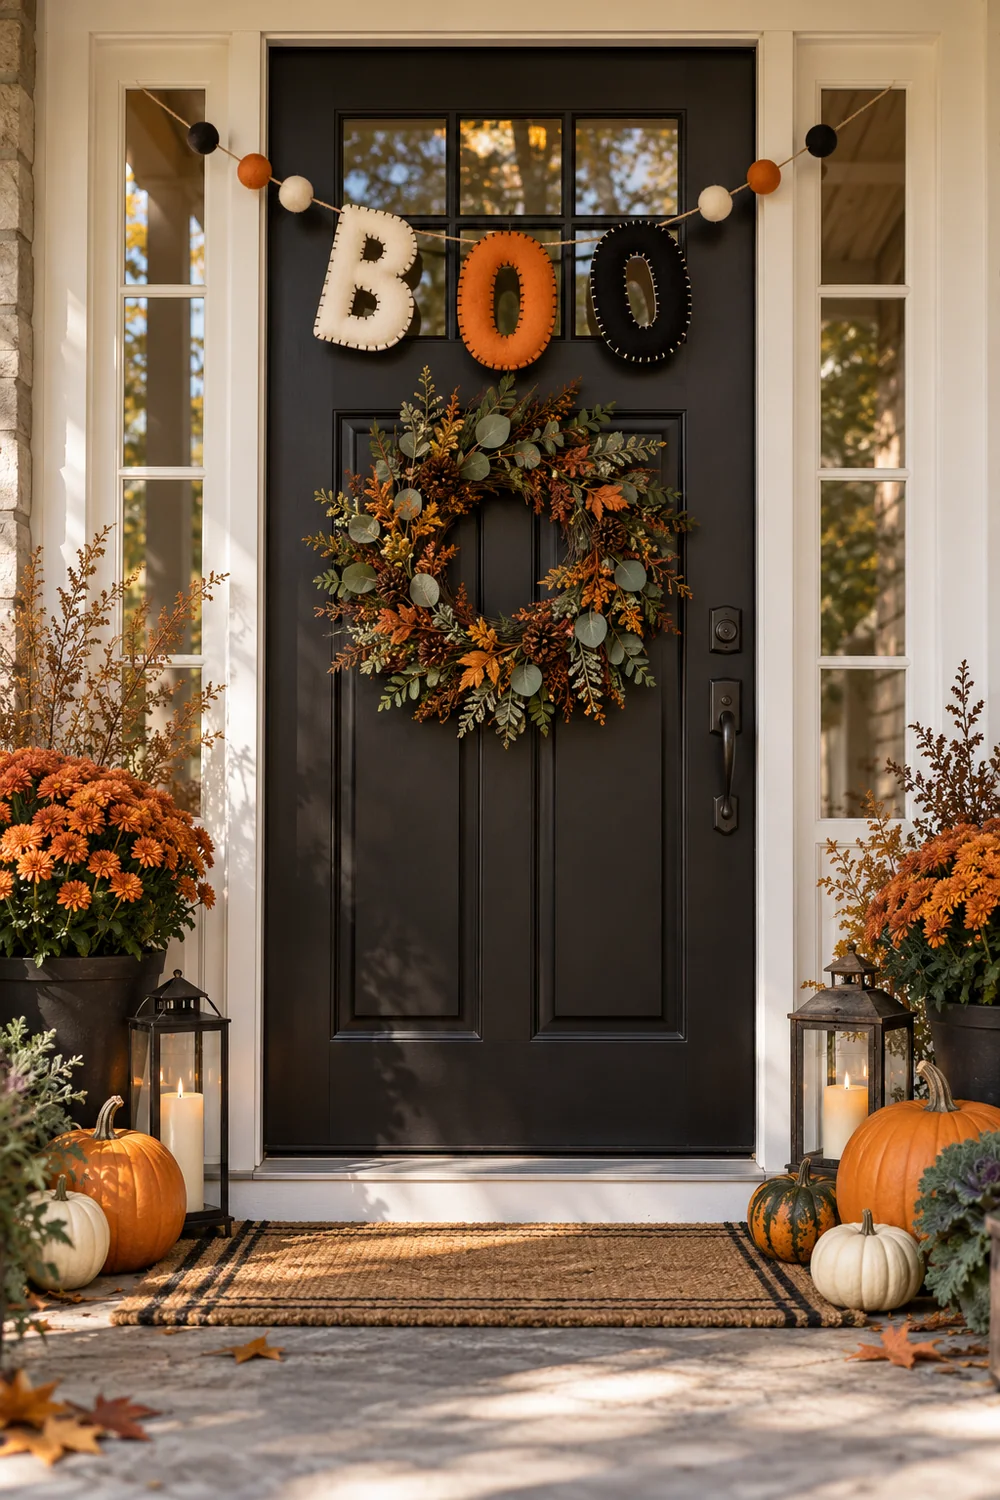
Bunting does not have to be thin paper that curls in the damp. Felt holds its shape and looks more solid, even on a windy porch.
Cut three letters, B, O, and O, from black felt, each about 20 cm tall. Punch a hole in the top corners and thread them onto string or ribbon. Then hang the garland across the top of the frame with a gentle droop in the middle.
Two small choices help:
- Pick black felt for a light door and white felt for a dark one
- Leave a hand’s width of space between the letters
Cut letters at least 20 cm tall so they read from the pavement.
Choose a felt colour that contrasts with the door.
Thin paper letters that curl and sag in damp air.
Tiny letters that vanish against a big door.
8. Let a Skeleton Hand Peek Over the Top of the Door
A full plastic skeleton needs a sturdy hook and a lot of room. A single hand needs neither.
Hang a skeleton hand, bought or cut from white card, over the top edge of the door. Let the fingers curl about 15 cm down the front. Then add a second hand low near the handle, so it looks as if something is climbing in. Check that the door still closes before you tape anything down.
| Whole skeleton | Skeleton hand |
|---|---|
| Needs a strong hook | Hangs over the door edge or from tape |
| Takes up a lot of room | Fits any door size |
| Often costs more | Usually costs less |
9. Hang Cheesecloth Ghost Strips Like a Floaty Curtain
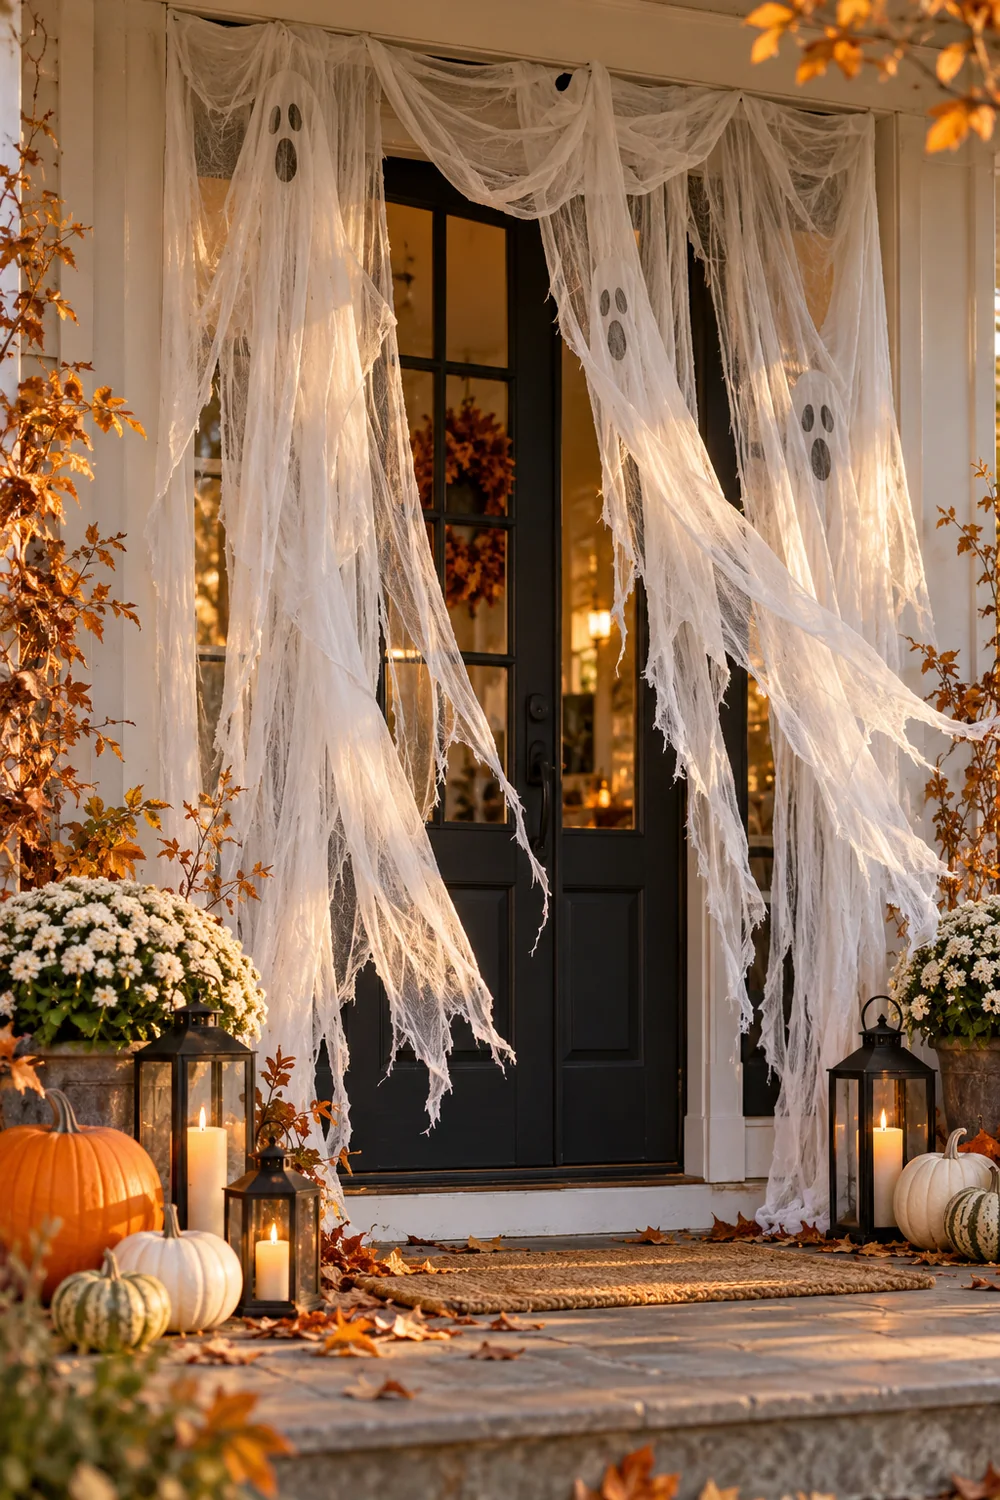
Open the door on a breezy evening and the strips lift as if they have somewhere to be.
Cut white cheesecloth into strips of uneven length, with some reaching the doorstep and some stopping halfway. Tape them to a strip of card, then tape the card above the frame. Add two black paper eyes to a few strips so they read as ghosts. Keep the whole thing well away from candles or any lantern with a real flame.
Uneven lengths look ghostly. Perfectly matched strips look like a shop curtain.
10. Stick Witch Legs Out From the Bottom of the Door
Something about a pair of striped legs under a door makes people laugh before they understand it.
Stuff a pair of striped tights with scrunched newspaper or old carrier bags. Add pointy black card shoes, or slip old boots on the ends. Tape the tops to the bottom edge of the door, then let the legs rest on the doormat with the toes pointing up.
Two small choices help:
- Pick stripes in two strong colours, such as black and purple
- Curl the shoe toes upward so they look pointed
Watch Out
Keep the legs close to the door and tucked to one side. A pair sticking into the walkway is a trip hazard for visitors, especially after dark.
11. Line the Doorstep With Pumpkins at Three Different Heights
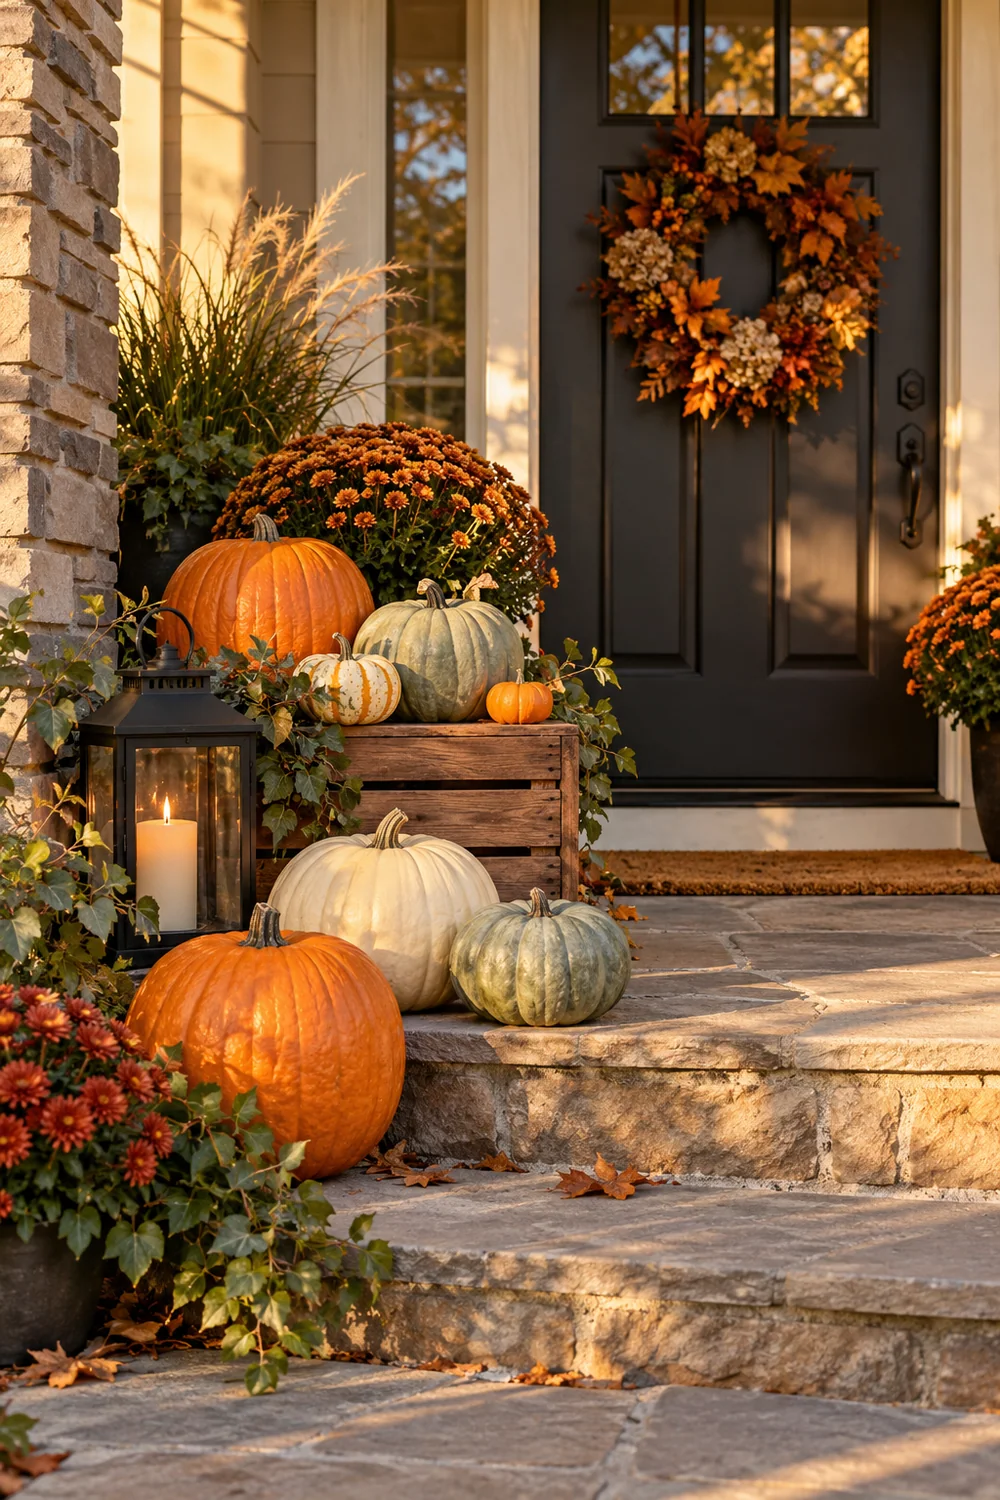
A straight row of pumpkins looks like a shop display. A staggered group looks like it grew there.
Build three levels:
- Put the biggest pumpkins on the lowest step
- Stand the medium ones on an upturned crate or box
- Perch the small ones on the top step or a windowsill
Drape a little black netting or old fabric between them to tie the group together. Odd numbers also look more natural than even ones, so go for five or seven.
12. Draw a Spooky Scene on a Glass Door Panel With Washable Window Markers
The hallway light comes on at dusk, and a drawing on the glass suddenly glows like stained glass.
Window markers make this easy. However, check the label first, because only the washable kind comes off cleanly. Test a small corner before you commit to the whole panel.
Easy things to draw:
- A spiderweb in one corner
- A row of bats along the bottom
- A crescent moon with a single cloud
Sketch the design on paper, tape it to the inside of the glass, and trace over it from the outside.
What to gather
13. Frame the Door With a Black and Orange Balloon Garland
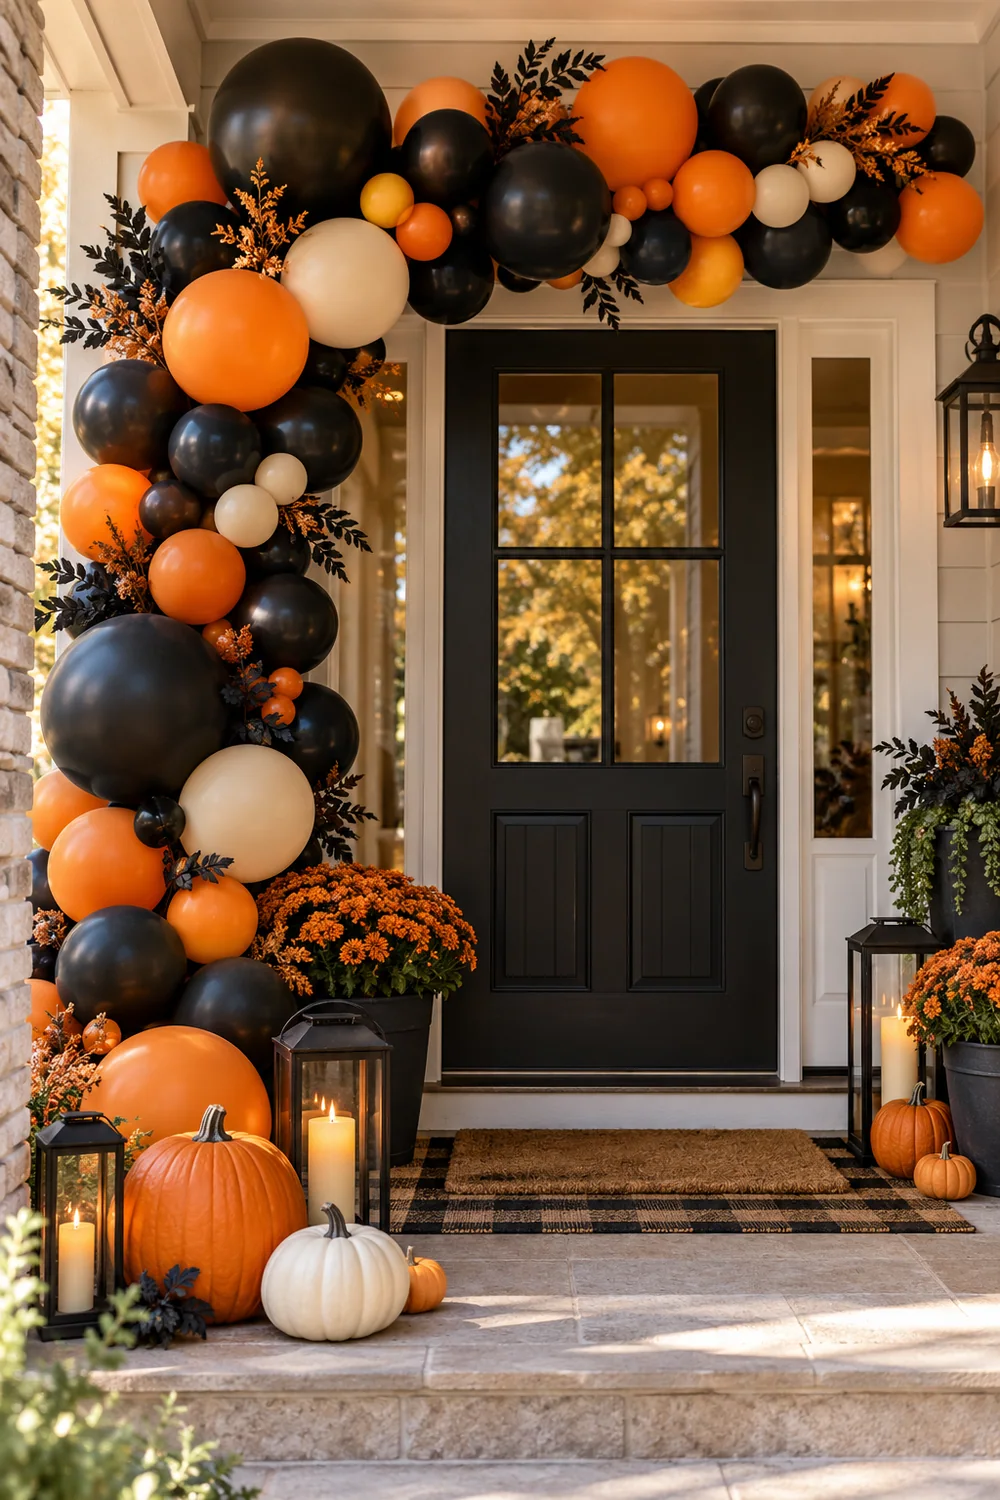
A balloon garland does not need a pump, a frame, or a professional.
Tie the balloons into small clusters of four, with two black, one orange, and one white in each. Then thread the clusters onto a long piece of string and tape both ends above the door frame. Overlap the clusters so no string shows. Also, leave a few balloons slightly smaller than the rest, because the uneven sizes give the garland a natural wiggle.
Take it down when strong wind is forecast, and keep popped pieces away from pets.
14. Make a Potion Bottle Wreath With Handwritten Labels
Rinse out small bottles and jars first, and peel off the old labels.
Then fill each one with a little water and a few drops of green or purple food colouring, and seal the lid tightly. Plastic bottles work best outdoors, because they will not crack if they fall.
Handwritten labels give the wreath its charm. A few ideas:
- Bat Wing Tonic
- Ghost Breath
- Pumpkin Juice
Tie the bottles to a wire ring by their necks, and let a few dangle lower than the rest.
1
Shape a wire coat hanger into a round ring, and wrap tape over the join.
2
Wind thin wire around each bottle neck and twist the ends onto the ring.
3
Write the names on brown paper tags with a dark pen, then loop each tag over a bottle neck.
15. Give the Door a Monster Face With Felt Teeth and a Fuzzy Tongue
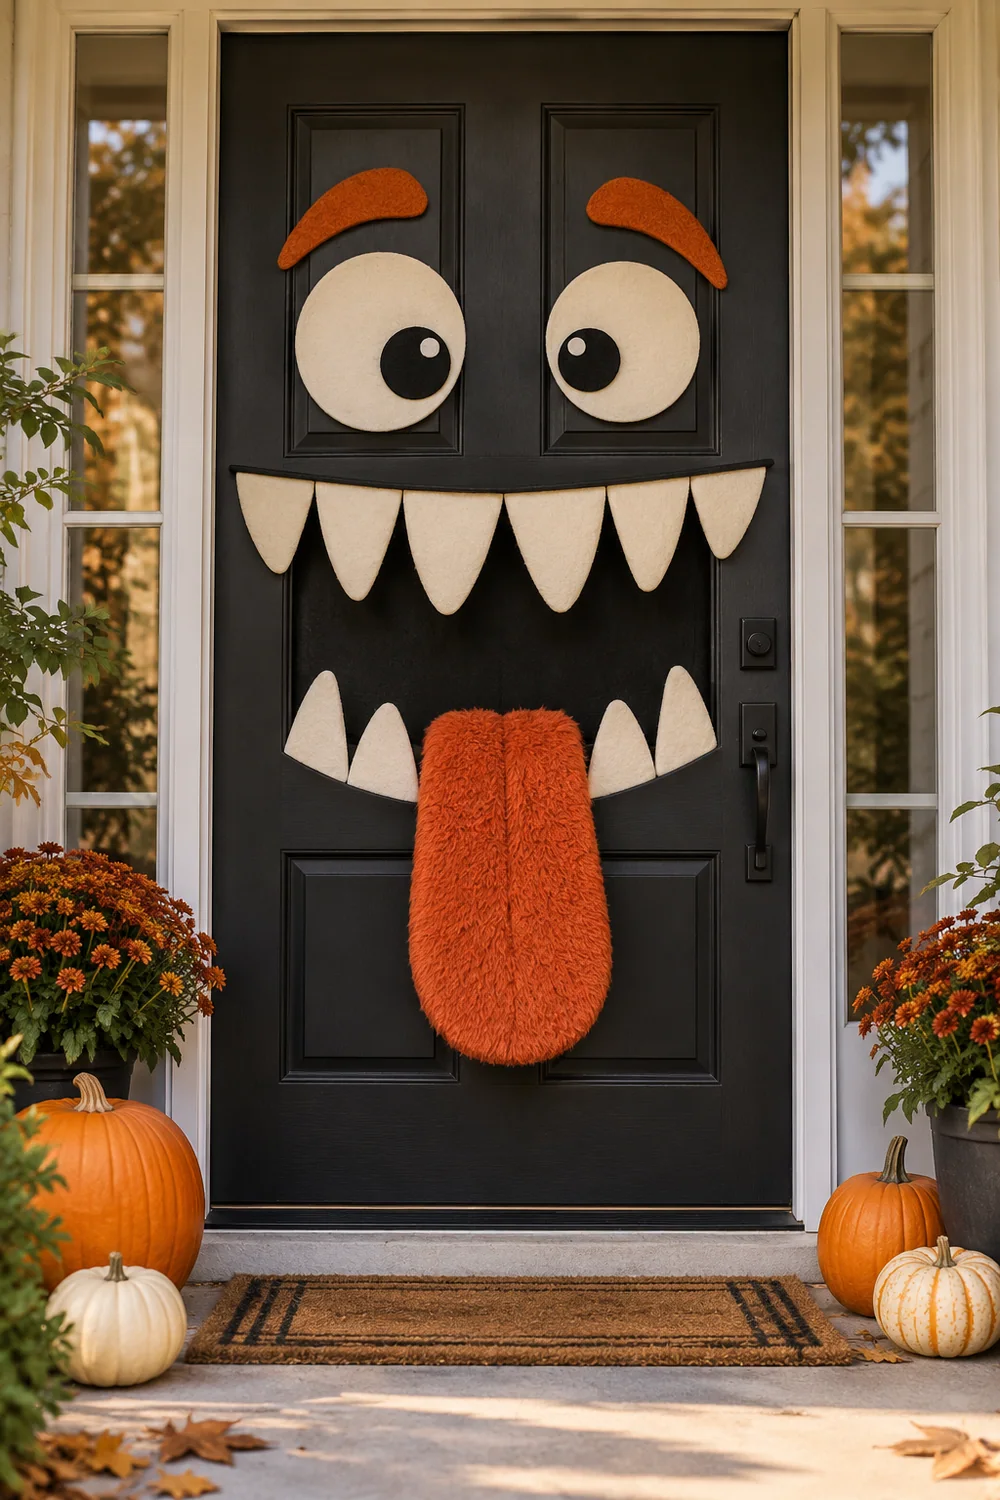
Children point at monster doors long before they notice anything else on the street.
Start with the eyes. Stick two big white circles near the top, and add black pupils that look in different directions. Next, cut a row of white felt triangles for teeth and line them along a wavy mouth shape across the middle. Finally, let a strip of pink or red fuzzy fabric hang down over the handle as a tongue.
This works best on a plain, solid colour door.
A plain, solid colour door that nobody glances at on the way past.
A wide toothy grin, mismatched eyes, and a tongue hanging over the handle.
16. Hang a Haunted House Sign With Removable Hooks
Removable hooks and nails both hold a sign, but only one leaves your door unmarked.
Cut a piece of thick cardboard or a thin wooden plaque, then paint it black. Write “The Haunted House” or your family name in white or orange paint across the middle. Add cracked window shapes and a bat or two in the corners. Before you buy hooks, check the weight rating on the pack, because a heavy plaque needs a stronger hook than a light cardboard one.
Keep the sign at eye level, so passers-by can read it without stretching.
| Removable hooks | Nails or screws |
|---|---|
| Leave the paint intact | Leave holes in the door |
| Best for light signs | Hold heavy plaques well |
| Suit rented homes | Suit doors you own |
17. Wrap Warm White Fairy Lights Around the Frame for a Glow at Dusk
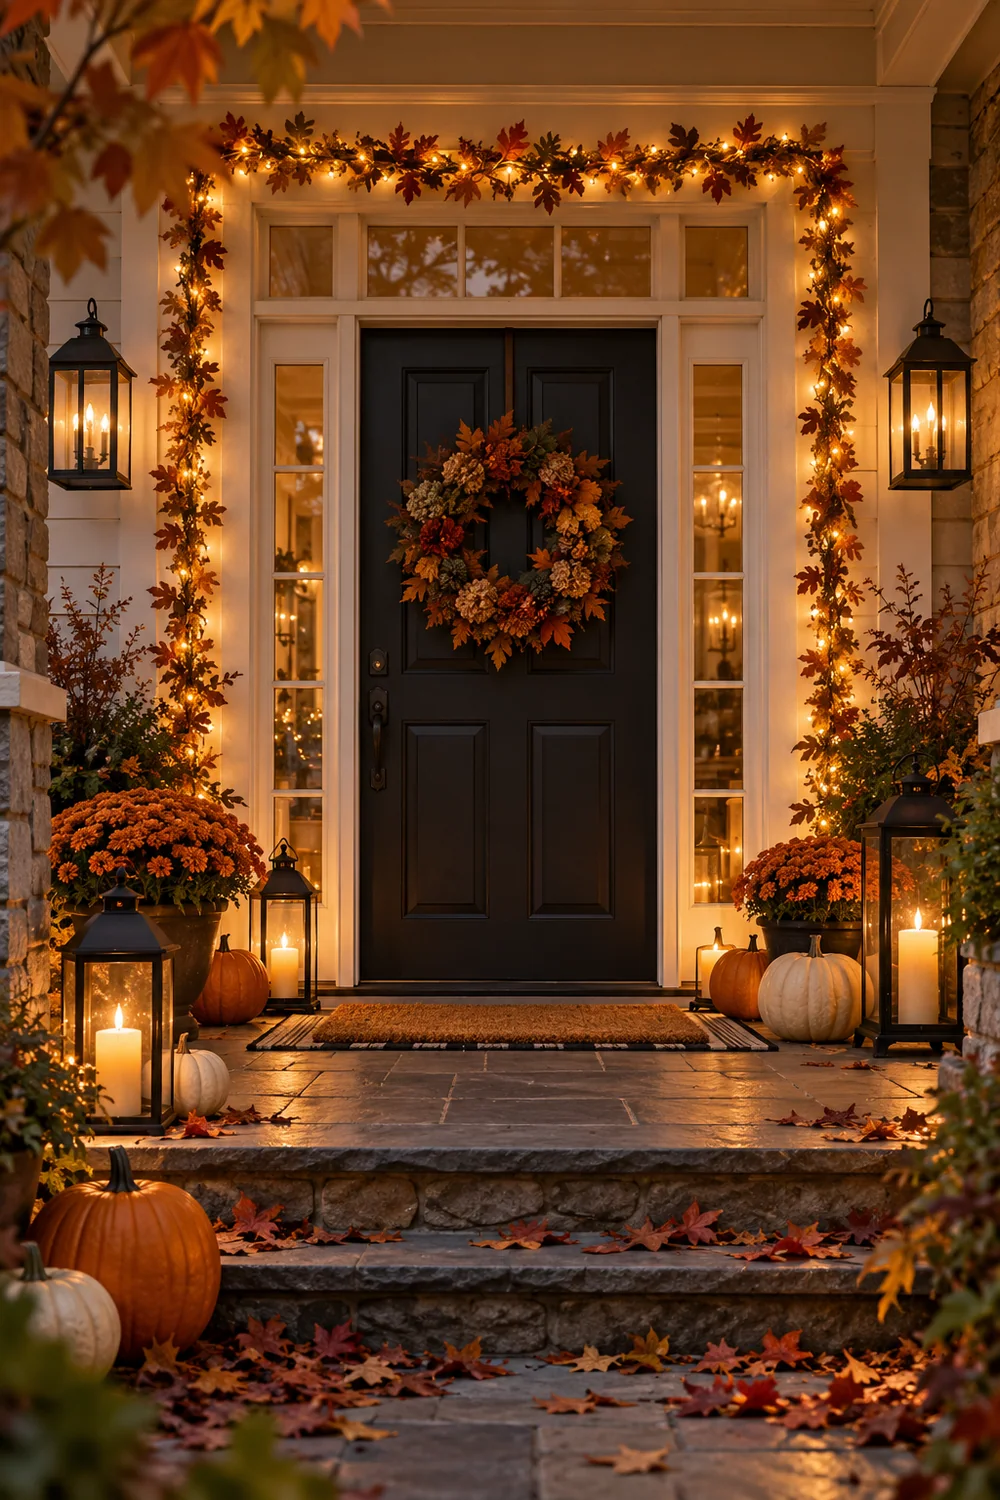
By late October the light fades early, so a door without a glow simply disappears after tea time.
Start at the top corner of the frame and work down one side, then do the other. Warm white bulbs look softer than cool white ones, and they make orange and black decorations look richer. Tape the wire flat every 30 cm or so, so it stays tidy in the wind.
Always pick lights rated for outdoor use, and plug them into a socket that stays dry.
Use lights marked for outdoor use.
Set a timer plug so they switch on at dusk.
Indoor lights left out in the rain.
Real candles near paper or fabric decorations.
18. Dress a Pillowcase Ghost to Hang From the Door Knocker
Scrunch up newspaper into a ball roughly the size of a grapefruit, then drop it into the middle of a white pillowcase. Tie a piece of string under the ball to make the head, and let the rest of the fabric hang down like a robe.
Draw the face with a black marker. Two oval eyes and a round mouth look friendlier than angry ones. Loop the string over the door knocker or a small hook.
A few finishing touches:
- ▸Snip the bottom edge into a zigzag for a ragged hem.
- ▸Add a small paper bow tie for a polite ghost.
- ▸Make a second, smaller ghost to hang beside it.
19. Make a Raven Wreath With Black Feathers and a Bare Twig Base
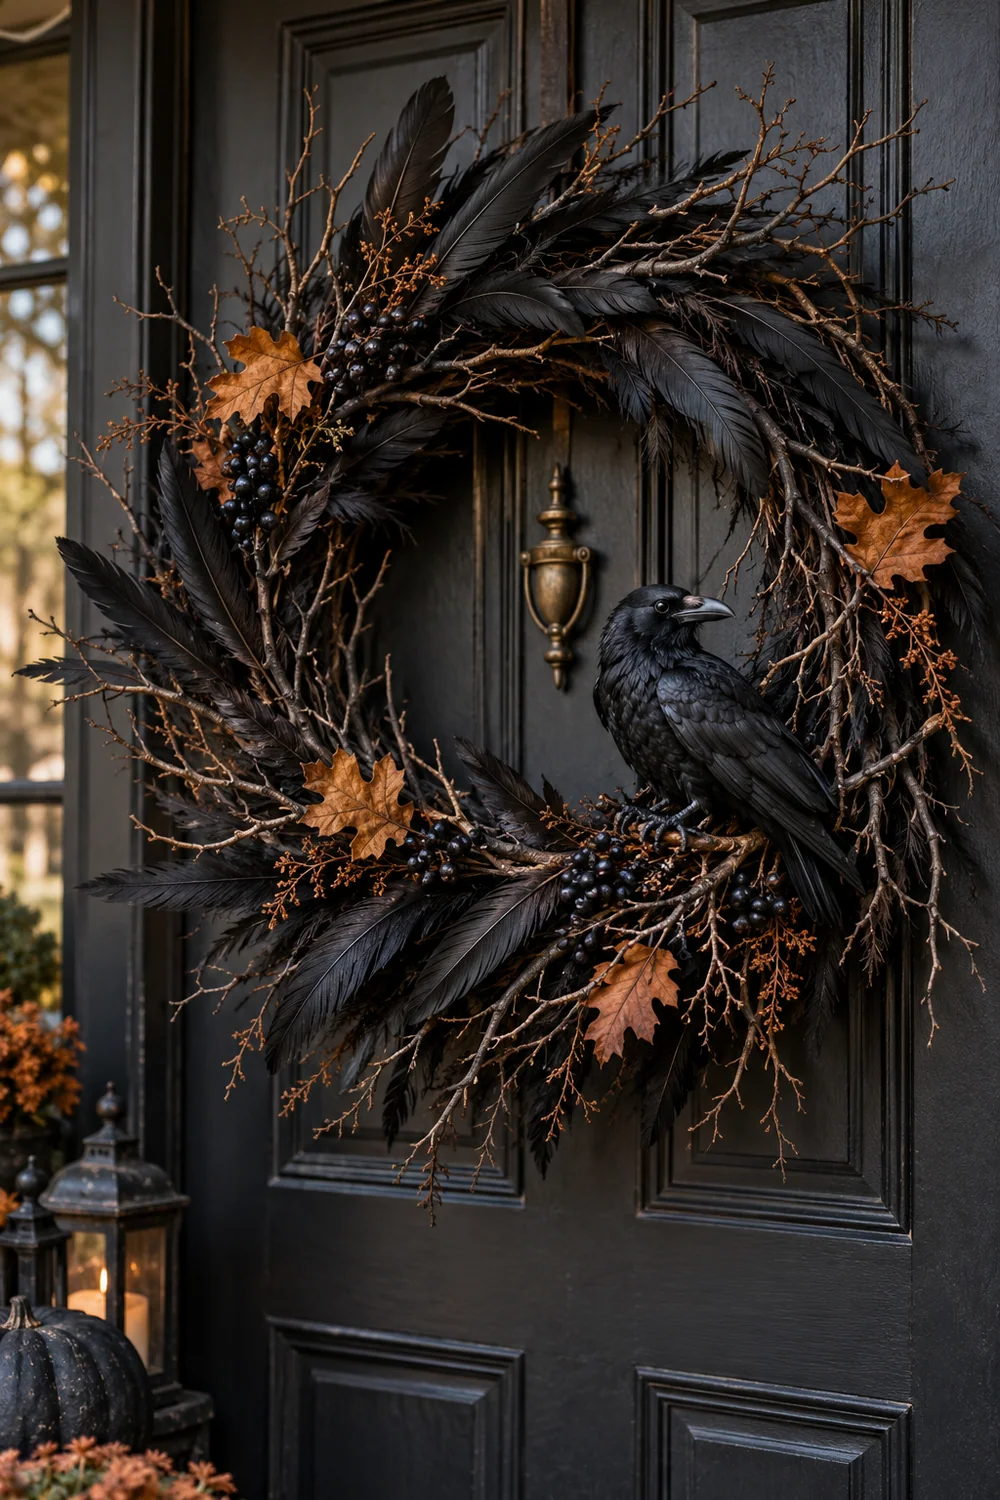
Bare twigs already look a little spooky, so they give you a head start.
Gather a handful of long, bendy twigs and weave them into a loose ring. Then glue black craft feathers along the twigs in different directions, so some stick out and some lie flat. A small black bird from a craft shop, perched at the bottom, finishes the wreath. Keep the shape messy on purpose. A neat circle looks like a shop wreath, while a wild one looks like it blew in from a graveyard.
A wild, uneven shape looks spookier than a neat circle.
20. Finish With a Doormat and Door Sign That Set the Tone
Some people treat the doormat as an afterthought, but it is the first thing visitors see.
Pick a mat with a short, funny message, like “Enter If You Dare” or “Beware of the Cat”. Then add a small sign at eye level that reads “Trick or Treat” or “Candy Here”. That second sign matters on busy streets, because it tells children which houses are welcoming.
If you rent, choose a mat with a rubber base so it grips the floor and does not slide.
Good To Know
Switch the “Candy Here” sign to “Sorry, No Candy Tonight” if you are out. Children then skip your door politely and keep moving.
Conclusion
A good front door does not need a big budget or a free weekend. It needs one clear idea, a few bold shapes, and a little patience with the tape. Whichever of these Halloween door decorating ideas you choose, start small, then step back to the pavement and check how it looks from there. If the door still feels bare, add one more detail.
Most of these ideas fit into an afternoon, and many leave the paint untouched, so you can swap them out next year without a second thought.