
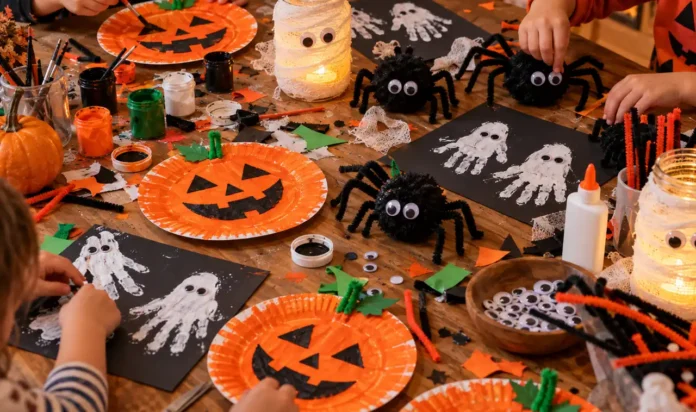


The school party is tomorrow and the craft you pinned needs eleven supplies you do not own. I know that sinking feeling, because I have lived it more than once with glue drying on the wrong thing and a kid asking if we can start over. Last minute does not have to mean sad and rushed. It just means the craft has to be honest about what a tired parent and an excited kid can pull off in under half an hour with stuff already in the house.
These Halloween Crafts for Kids were picked for speed first and cuteness second. Every one uses paper plates, toilet rolls, paint, or other basics from the junk drawer. Most take ten to twenty minutes, and a few take five. The mess stays small, the steps stay simple, and the finished crafts look good enough for the fridge door or the party table.
Pick one, clear a corner of the kitchen table, and start. By the time the glue dries, you will have something to show for it.
1. Paper Plate Pumpkin Faces
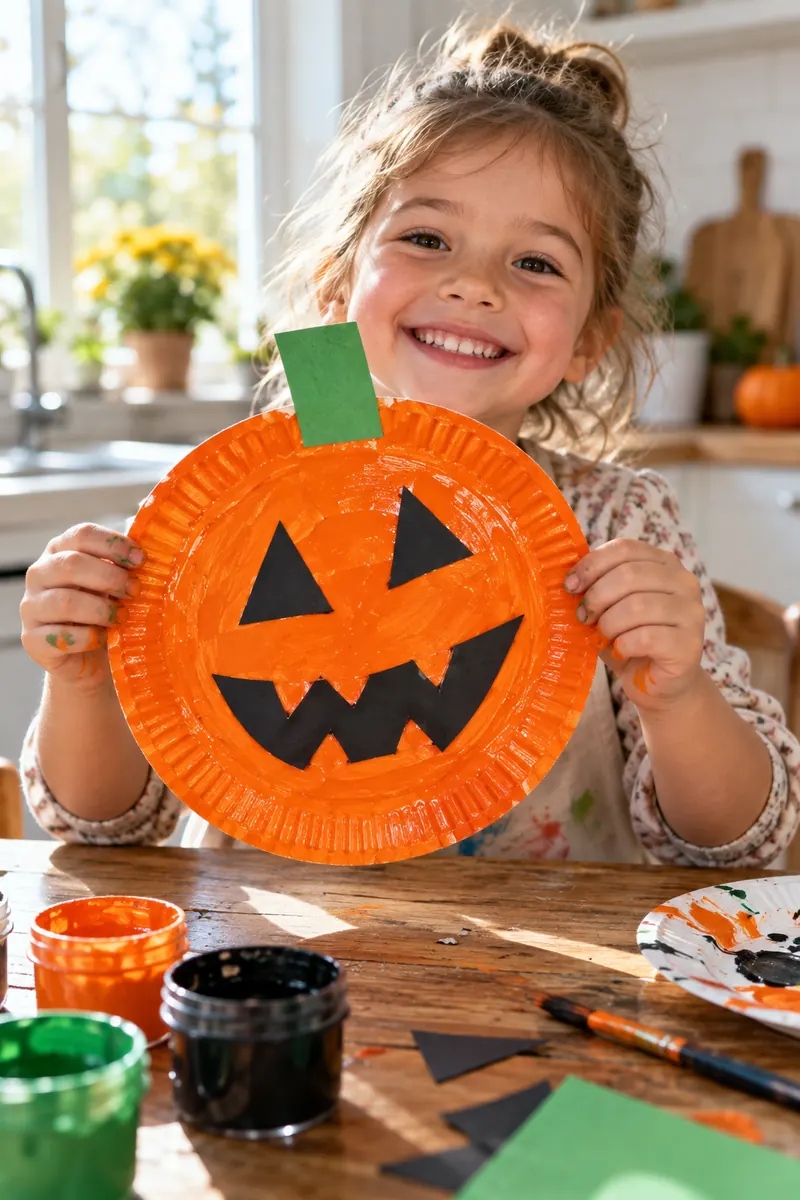
Twenty minutes from now your kid could be holding a pumpkin that never rots and never needs carving.
Hand each child a paper plate and let them paint the whole thing orange. While it dries, cut triangle eyes and a jagged mouth from black construction paper. Glue the face on, add a green paper stem at the top, and tape a loop of string on the back for hanging.
The paint covers mistakes beautifully, so even toddlers end up with something cute. Line the finished pumpkins along a hallway wall or hang them in the window for trick or treaters to spot.
2. Toilet Roll Bats
Save every empty toilet roll this week. They are bat bodies waiting to happen.
Paint a roll black or wrap it in black construction paper. Fold the top edge down on both sides to make little ears. Cut wings from black paper, two scalloped shapes, and glue one to each side. Stick on googly eyes or draw them with white crayon.
Hang the finished bats from doorframes with tape and string. A row of them across a window looks great with the light behind it.
💡 Quick Tip
Paint the rolls the night before. Kids start with dry bodies and jump straight to wings and eyes, which is the part they actually enjoy.
3. Handprint Ghosts on Black Paper
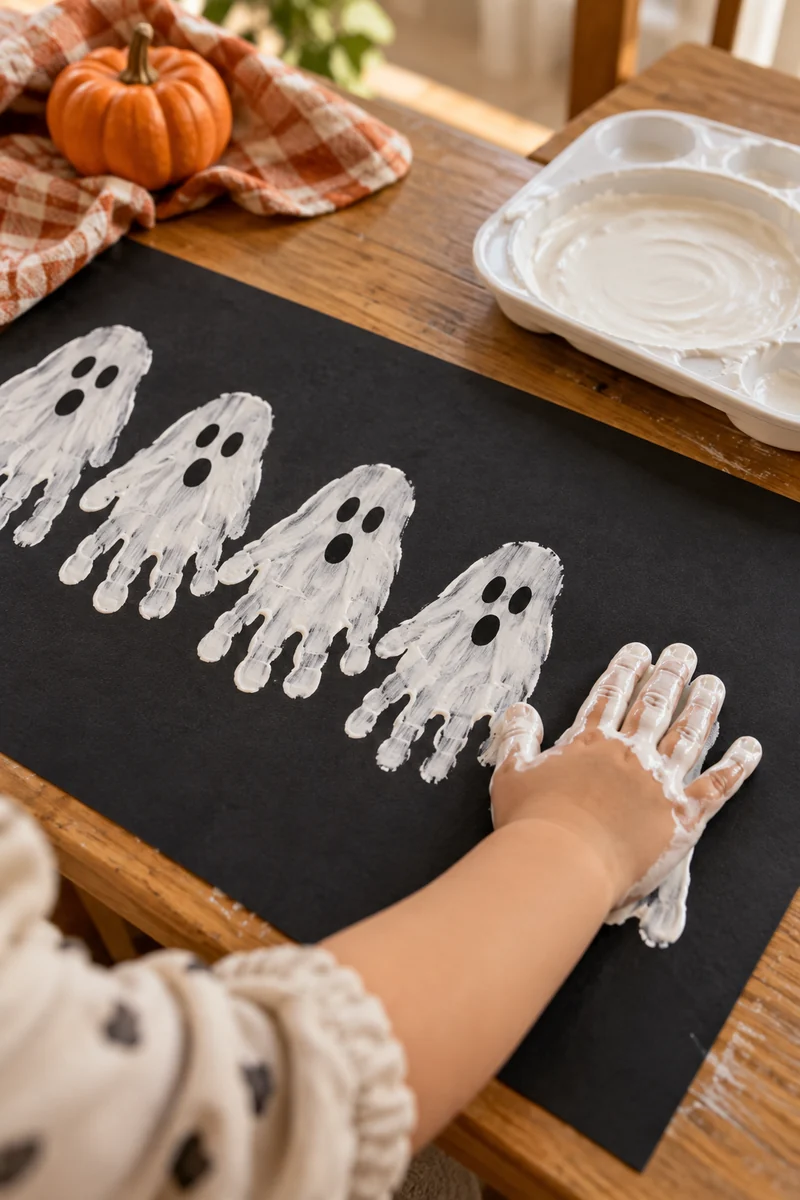
My youngest still remembers the tickle of the paintbrush between her fingers from the first time we made these.
Brush white washable paint onto your child’s palm and press it firmly onto black construction paper. Let it dry, then draw two oval eyes and a round surprised mouth with black marker. The fingers become the ghost’s wavy bottom edge, which is why little hands make the cutest ghosts.
Frame a few in cheap dollar store frames for instant Halloween art. They also make sweet cards for grandparents.
4. Popsicle Stick Spiders
Most people glue the legs on first. That is the mistake that makes wobbly spiders.
Paint three popsicle sticks black and let them dry fully. Fan them into a starburst and glue the center. Only then add eight short pipe cleaner legs, four per side, bending each at the knee. Finish with big googly eyes.
Dry sticks first is the whole secret. Wet paint plus glue equals legs that slide off before the spider is done.
Paint the sticks black and let them dry completely.
Glue them into a starburst shape at the center.
Add pipe cleaner legs and googly eyes last.
5. Paper Bag Monster Puppets
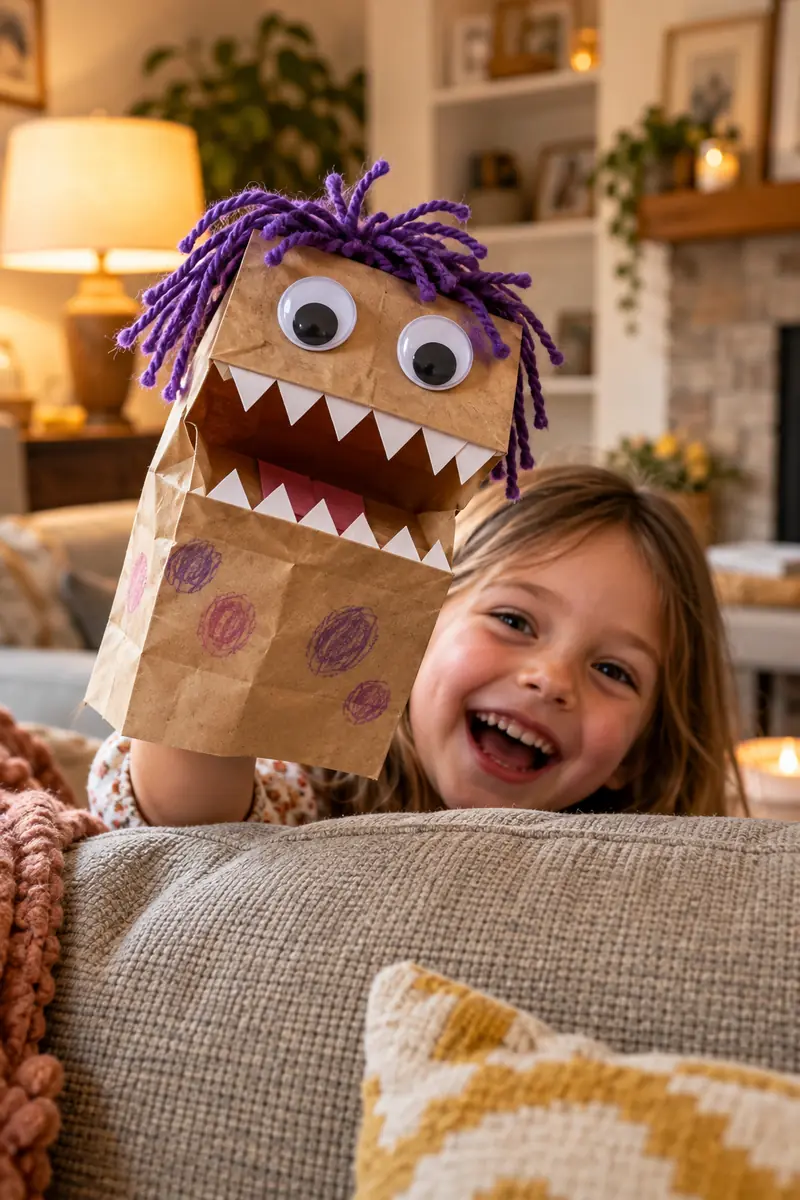
I have watched kids ignore expensive toys for a week straight in favor of a paper bag with teeth.
Flatten a brown lunch bag and glue a white paper mouth with triangle teeth across the flap. The flap becomes the puppet’s moving jaw. Add googly eyes, yarn hair, and spots or stripes with crayons. Every monster looks different, which keeps siblings from fighting over whose is better.
Put on a two minute puppet show behind the couch. It buys you time to clean up the craft table.
Glue the mouth on the flap, not the body. The flap moves, so the monster talks.
6. Footprint Ghost Garland
One rule makes this garland work: paint the foot, not the floor.
Brush white paint on the bottom of your child’s foot and press it onto a long strip of black paper or a cut open paper grocery bag. Repeat down the strip, leaving space between prints. Once dry, draw eyes and mouths on each print with marker, then tape the strip across a doorway.
Tiny feet make the funniest ghosts, and the garland fills a whole doorway in ten minutes.
What to grab first
7. Mason Jar Mummy Lanterns
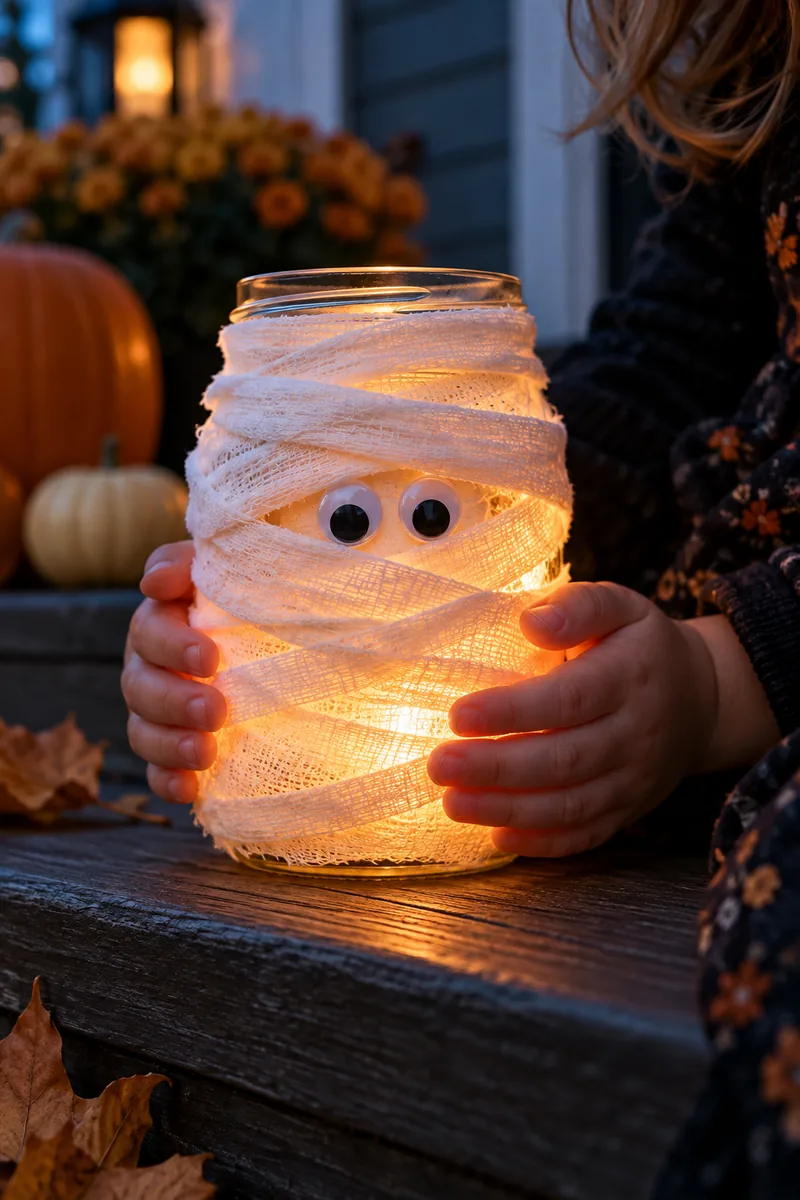
Real candles and kids do not mix, which is why these lanterns use LED tea lights instead.
Wrap a clean mason jar in strips of white gauze or torn fabric, overlapping as you go. Dab the layers with a little glue to hold them. Stick on two googly eyes peeking through the wrap, then drop in a battery tea light.
They glow softly on a porch or windowsill and nothing gets hot.
A plain jar sitting on the shelf, doing nothing for anyone.
A mummy lantern glowing on the porch, with kids proud they made the light.
8. Q-Tip Skeletons
A q-tip skeleton and a drawn skeleton teach the same bones, but only one survives being carried to school.
Glue q-tips onto black paper in a skeleton shape: one vertical for the spine, short ones angled for ribs, longer ones for arms and legs. Add a white paper circle for the skull and draw the face with marker.
Kids love counting the ribs as they glue, which sneaks in a little anatomy lesson without anyone noticing.
| Drawn Skeleton | Q-Tip Skeleton |
|---|---|
| Smudges in the backpack | Travels well |
| Needs drawing skill | Needs only glue |
| Flat on the page | Bumpy texture kids love |
9. Pom-Pom Spiders
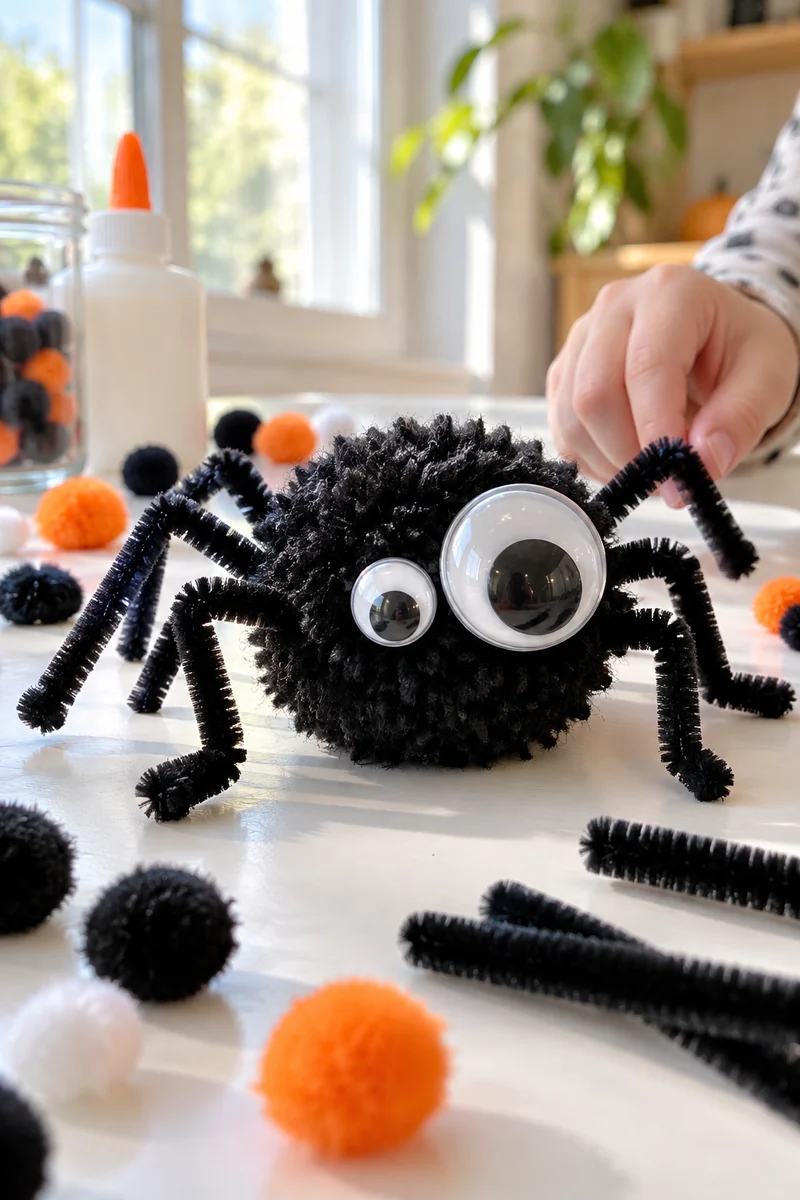
People think spiders need eight perfect legs. Kids disagree, and their lopsided spiders are honestly better.
Glue a large black pom-pom to a smaller one for the body and head. Poke four pipe cleaners through the body, bend them into legs, and add googly eyes. That is the whole spider in under ten minutes.
Hang a few from the ceiling with thread. They bob in the draft like they are alive.
Let kids pick wild eye sizes. Three eyes beats two.
Bend the legs at the knee so spiders stand up.
Trimming legs even. Uneven legs look creepier.
Tiny eyes. Googly eyes should be gloriously big.
10. Paper Plate Spider Webs
White yarn zigzagged across a black paper plate looks like a real web caught in moonlight.
Cut the center out of a black paper plate to make a ring. Punch holes around the ring, then let kids weave white yarn back and forth across the opening. Tape a small pom-pom spider in the middle.
Hang the webs in windows where light shines through the yarn. From outside at dusk they look surprisingly spooky for something made in fifteen minutes.
⚠️ Watch Out
Tie the first knot for younger kids. Loose yarn pulls straight through the holes and the weaving falls apart before it starts.
11. Sticker Face Mini Pumpkins
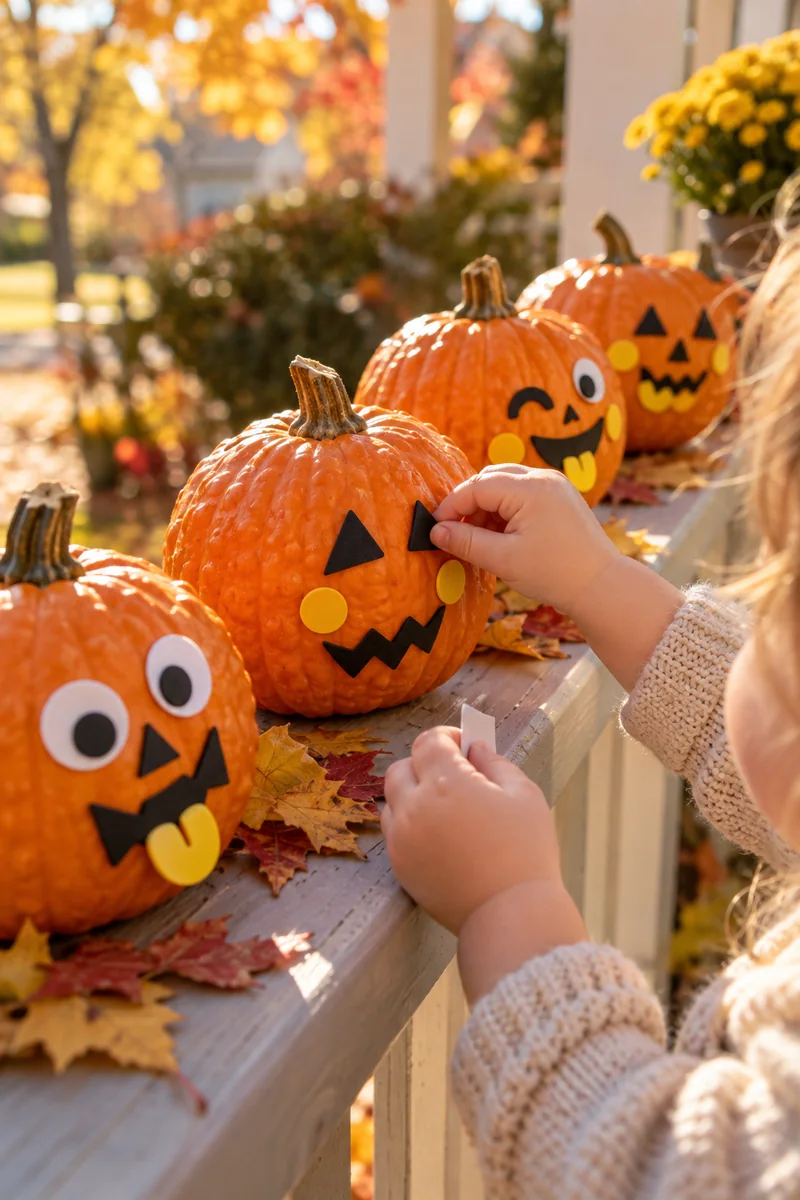
Carving pumpkins with small kids means sharp tools, slimy guts, and a pumpkin that rots in three days.
Skip the knife. Buy mini pumpkins and hand kids foam sticker faces, or cut faces from black felt with adhesive backing. They design, peel, and stick. No mess, no tears, and the pumpkins last for weeks on the porch.
When the stickers peel off next year, the same pumpkins work again, good as new.
12. Ghost Lollipop Covers
I have never seen a kid refuse a craft that ends with candy.
Drape a white tissue or coffee filter over a lollipop. Tie it under the candy with a bit of ribbon or yarn. Draw two eyes and a mouth with marker. Stand the ghosts upright in a cup or jar for an instant centerpiece.
They double as party favors, which means one craft covers the treat bags too.
- ▸Use white tissues, not printed napkins.
- ▸Tie snugly so the head stays round.
- ▸Make a dozen for the class party treat bags.
13. Pinecone Spiders
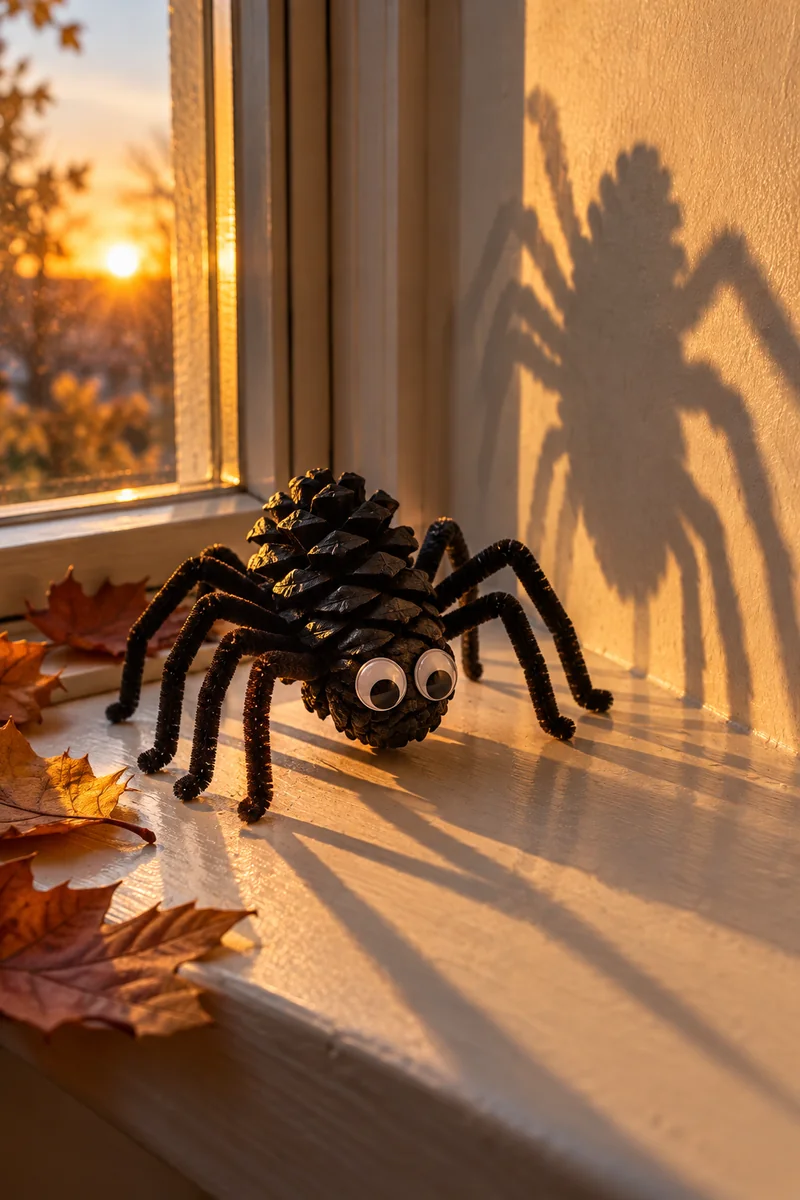
The mistake is gluing the legs to the bottom. Spiders glued underneath cannot stand up.
Paint a pinecone black and let it dry. Wrap four pipe cleaners around the middle of the cone, two per side, and bend them into legs. Glue googly eyes on the narrow end for the face.
Set them along windowsills where they cast long shadows. A pinecone spider in the right light looks ten times its size.
14. Paper Cup Owls
Turn a paper cup upside down and you are looking at an owl body.
Paint the cup brown and let it dry. Glue on two big white paper circles for eyes with black pupils. Cut feather shapes from construction paper and layer them around the cup. Fold two small triangles for ear tufts.
Line up a whole parliament of owls on the mantel. Different feather colors make each one its own character.
Paint the cup brown and let it dry fully.
Add big white eye circles with black pupils.
Layer cut paper feathers around the cup.
Top with folded triangle ear tufts.
15. Fingerprint Bats
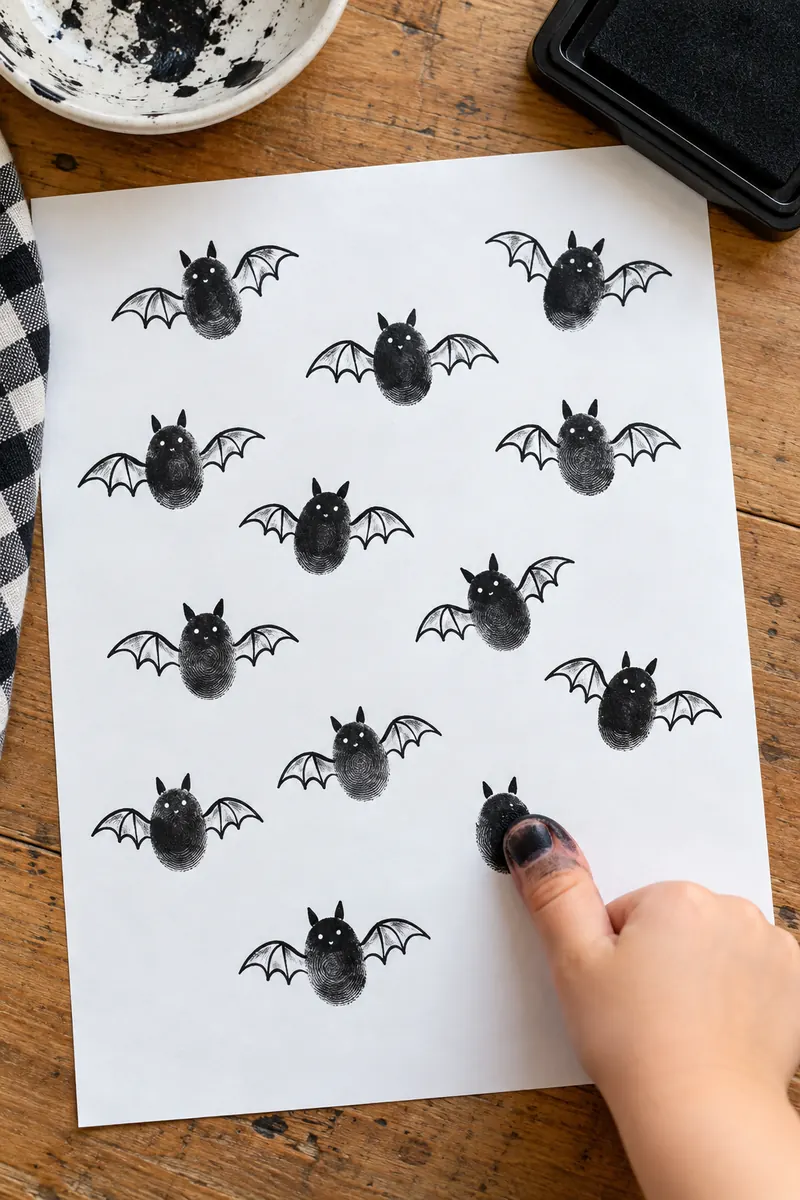
The smallest craft on this list might be the cutest.
Press your child’s thumb into a black ink pad and stamp it onto white paper. Draw two small ears on top of the print and scalloped wings on each side with marker. The thumbprint becomes the bat’s round body.
Make a whole sky of them on one sheet. A dozen thumbprint bats flying across white paper makes a great classroom window display.
A plain thumbprint on paper, just a smudge.
A bat with ears and wings, ready for the fridge door.
16. Coffee Filter Tie-Dye Ghosts
Saturday morning, markers, and a spray bottle of water. That is all this craft needs.
Flatten a coffee filter and let kids color it with washable markers. Spritz lightly with water and watch the colors bleed together. Once dry, scrunch the center and tie it with string to form the ghost’s head. Draw a face.
No two ghosts come out alike, which is exactly why kids want to make six more right away.
What to grab first
17. Egg Carton Pumpkin Patch
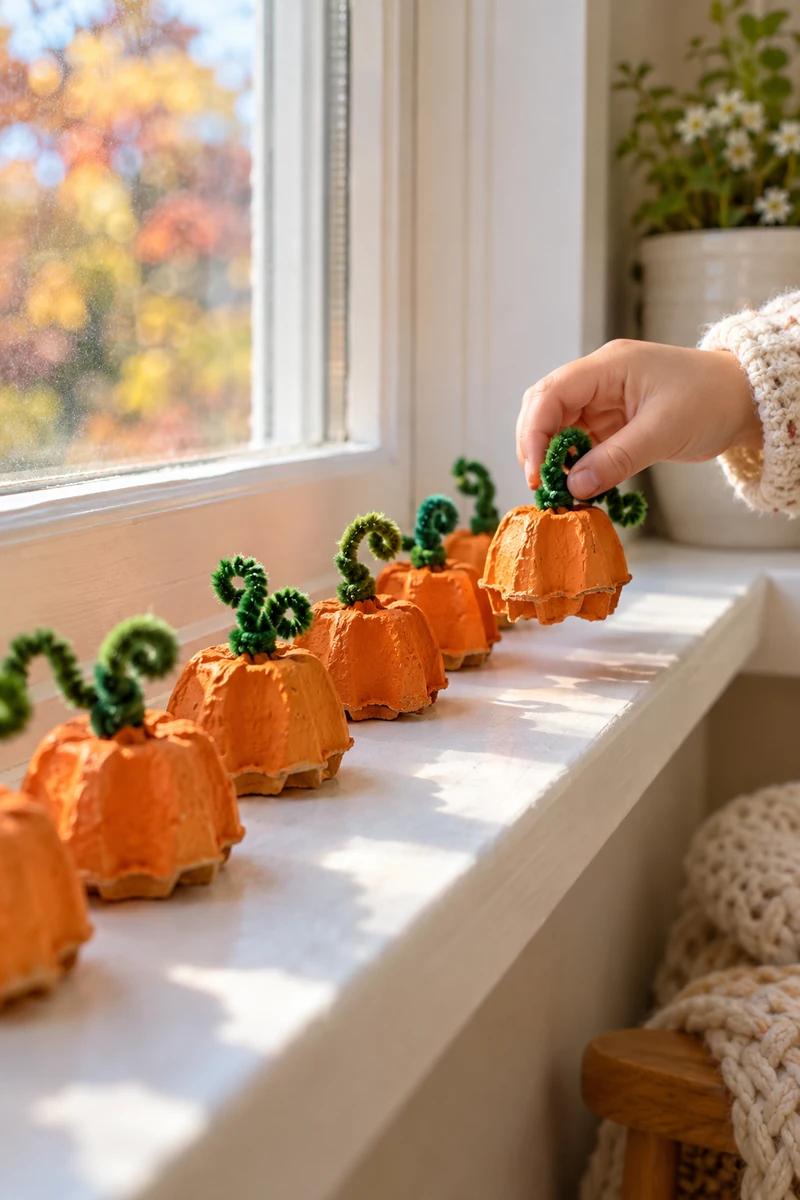
Tiny rule: cut the cups apart before painting, not after.
Cut individual cups from a cardboard egg carton. Paint them orange and let dry. Twist a short green pipe cleaner into each cup for the stem. Set the pumpkins in a row on a windowsill or glue them onto a paper strip as a patch.
A dozen of them lined up looks like a real pumpkin patch shrunk to toy size.
Use cardboard cartons. They hold paint well.
Cut cups apart first for easy painting.
Foam cartons. Paint beads up and peels.
Painting the whole carton. Cups separate better.
18. Paper Chain Bat and Pumpkin Garland
Store bought garlands fall apart by October 30th. Paper chains just get stronger as kids add links.
Cut orange, black, and white construction paper into strips. Loop and glue them into a chain, alternating colors. Cut small bat and pumpkin shapes and glue one onto every fifth link.
Drape it across the mantel or down the staircase rail. Long chains make small rooms feel fully decorated for the cost of scrap paper.
| Store Garland | Fast Make |
|---|---|
| Tears at the folds | Kids fix it in seconds |
| One fixed design | Any color pattern |
| Costs five dollars | Costs almost nothing |
19. Painted Rock Monsters
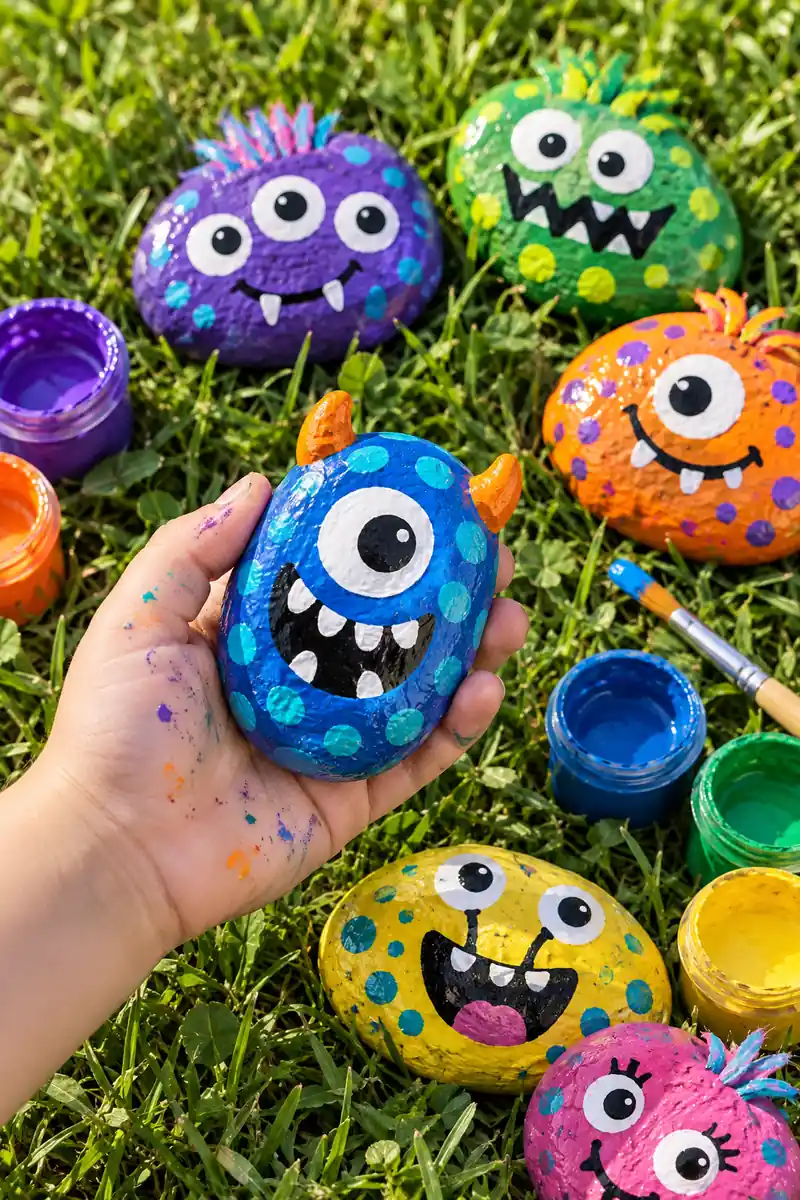
A gray rock with three eyes and purple spots stops looking like a rock at all.
Wash smooth stones and let them dry. Paint them bright colors, then add monster faces with white and black paint: big eyes, tiny eyes, zigzag mouths. A coat of clear sealer makes them last outdoors.
Hide them around the yard for a monster hunt. Kids love finding the one they painted peeking out from behind a flowerpot.
Wash the rocks first. Paint slides right off dusty stones and the faces peel by morning.
20. Paper Fan Pumpkins
The school art drawer still has orange construction paper left from last month. Time to fold.
Accordion fold two orange paper strips and glue the ends into circles. Flatten each into a fan, glue the two fans together, and add a green paper stem and a curly vine. They puff out into perfectly round pumpkins.
Hang them at different heights in a doorway. They spin slowly in the draft and catch the light.
💡 Quick Tip
Use a dab of hot glue for the center if kids get impatient. White glue works but needs a few minutes of holding still.
21. Balloon Ghosts
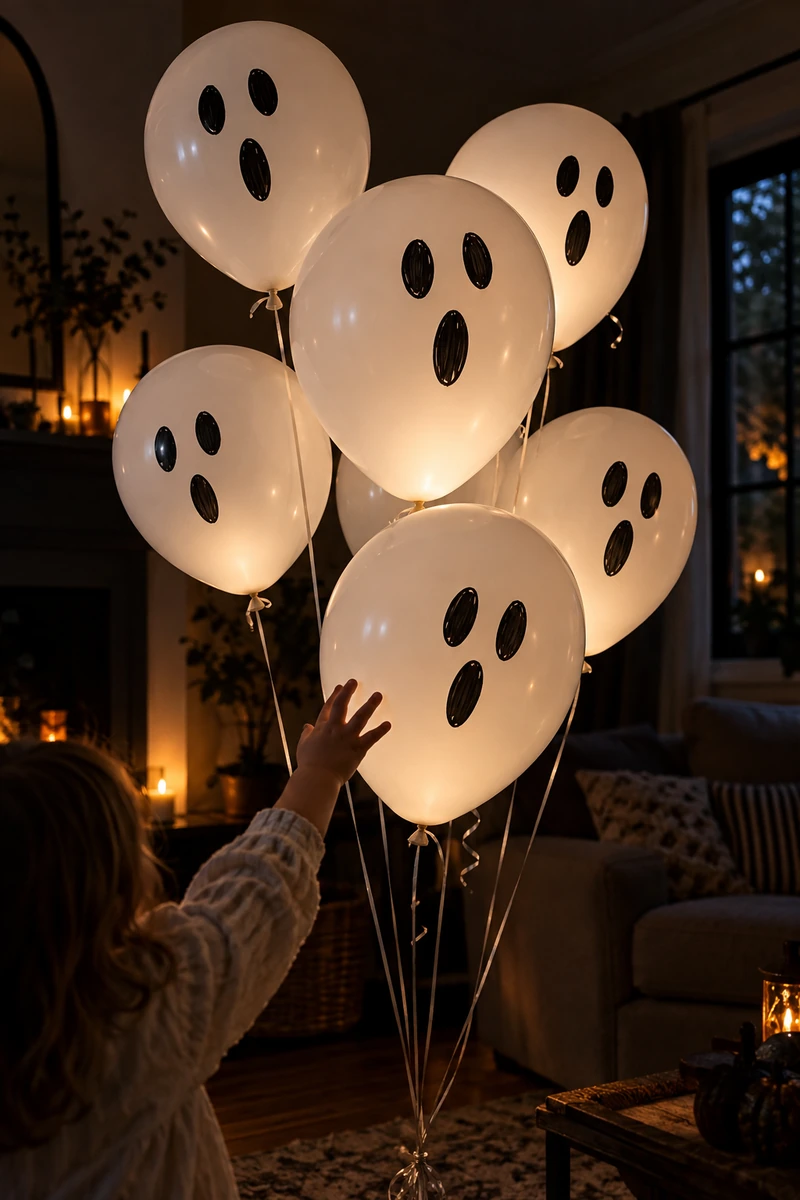
The mistake is drawing the face before inflating. The features stretch into a scream.
Blow up white balloons first, then draw two oval eyes and an open mouth with permanent marker. Tie them to chairs or let them float in a bunch in the corner.
Kids can make a whole haunted corner in the time it takes to blow up ten balloons. A dozen white ghosts bobbing in a dark room does more for the mood than an hour of decorating.
22. Paper Towel Roll Frankenstein
One paper towel roll makes a Frankenstein tall enough to guard the snack table.
Paint the roll green and let it dry. Glue on black paper hair across the top, googly eyes, and a stitched looking mouth drawn with marker. Push two gray paper bolts through the sides for the neck bolts.
Make a whole monster family with different face expressions. The grumpy one always gets the most laughs.
What to grab first
23. Paper Plate Witch Faces
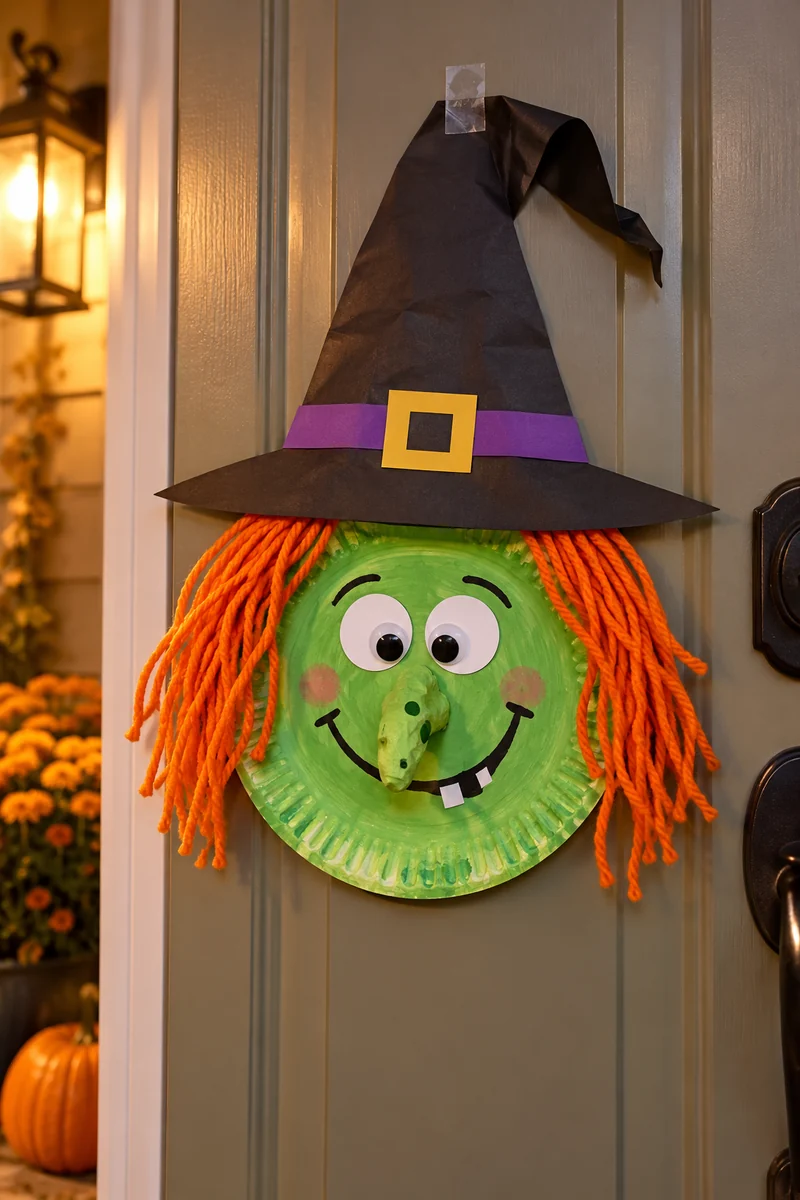
I have never met a kid who can resist giving a witch a warty nose.
Paint a paper plate green for the face. Cut a black triangle hat from construction paper and glue it on top, adding a paper buckle. Draw the eyes, a crooked smile, and that warty nose with markers. Glue yarn on the sides for hair.
Tape them to the front door at kid height. Trick or treaters love a row of silly witches greeting them.
24. Popsicle Stick Mummies
Tiny rule: wrap the sticks before gluing them together.
Lay five popsicle sticks side by side and wrap them in white yarn or torn fabric strips, leaving a gap near the top. Dab glue to hold the wrap. Glue the sticks to a backing strip, then stick on two googly eyes in the gap.
They stand up on their own leaned against a bookshelf. A row of tiny mummies makes a great mantel guard.
Wrap the sticks, leaving a gap for the eyes.
Glue the wrap ends down so nothing unravels.
Mount the sticks on a backing strip.
Add two googly eyes in the gap.
25. Candy Corn Paper Garland
A candy corn garland and a store bought one both say fall, but only one costs nothing and keeps kids busy.
Cut triangles from white, orange, and yellow paper and glue them into candy corn shapes. Punch a hole in the top of each and string them on yarn.
String it across the kitchen window. The light shining through the paper makes the colors glow like almost real candy. It is the fastest garland on this list.
Layer the colors in the right order: white on top, orange in the middle, yellow at the bottom. Backwards candy corn bothers everyone.
Twenty five crafts, and not one of them needed a special shopping trip. That is the whole point of last minute making: grab what is in the drawer, keep the steps short, and let the kids lead. The crooked ghosts and lopsided spiders are the ones you will remember anyway.
These Halloween Crafts for Kids work because they respect a busy October schedule. Pick two or three for the weekend, save the rest for the next rainy afternoon, and pin this list to your Halloween board so it is ready when you need it. For more easy seasonal ideas, you will find plenty waiting at insightsjournal.co.uk.