
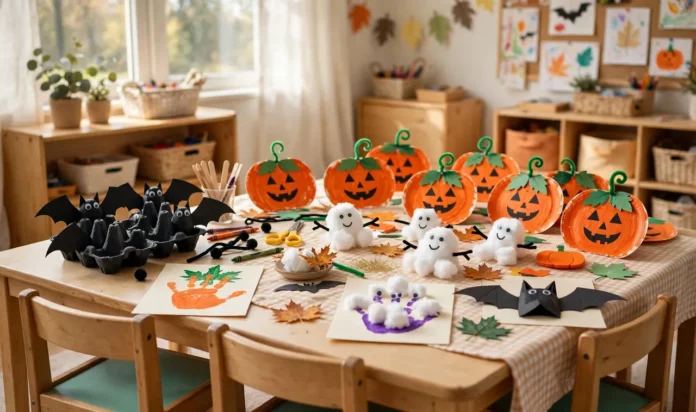


October with a preschooler is equal parts magic and chaos. The moment you hang one paper pumpkin on the fridge, they want to make forty more, and somehow glitter ends up in the cereal bowl. That is exactly why Halloween crafts for preschoolers work best when they are short, forgiving, and built around things little hands already love to do.
Every craft on this list takes about twenty minutes of actual making time, uses cheap and washable supplies, and leaves room for the crooked, the blobby, and the gloriously lopsided. Those imperfect details are the ones you will treasure in the photo album years from now.
You do not need craft talent to pull these off, and your child does not need to sit still. Pick one or two for a rainy afternoon, lay newspaper on the table, and let the making be the fun part. Here are twenty five to choose from.
For older kids, try our last-minute Halloween crafts for kids.
Paper Plate Pumpkin Faces
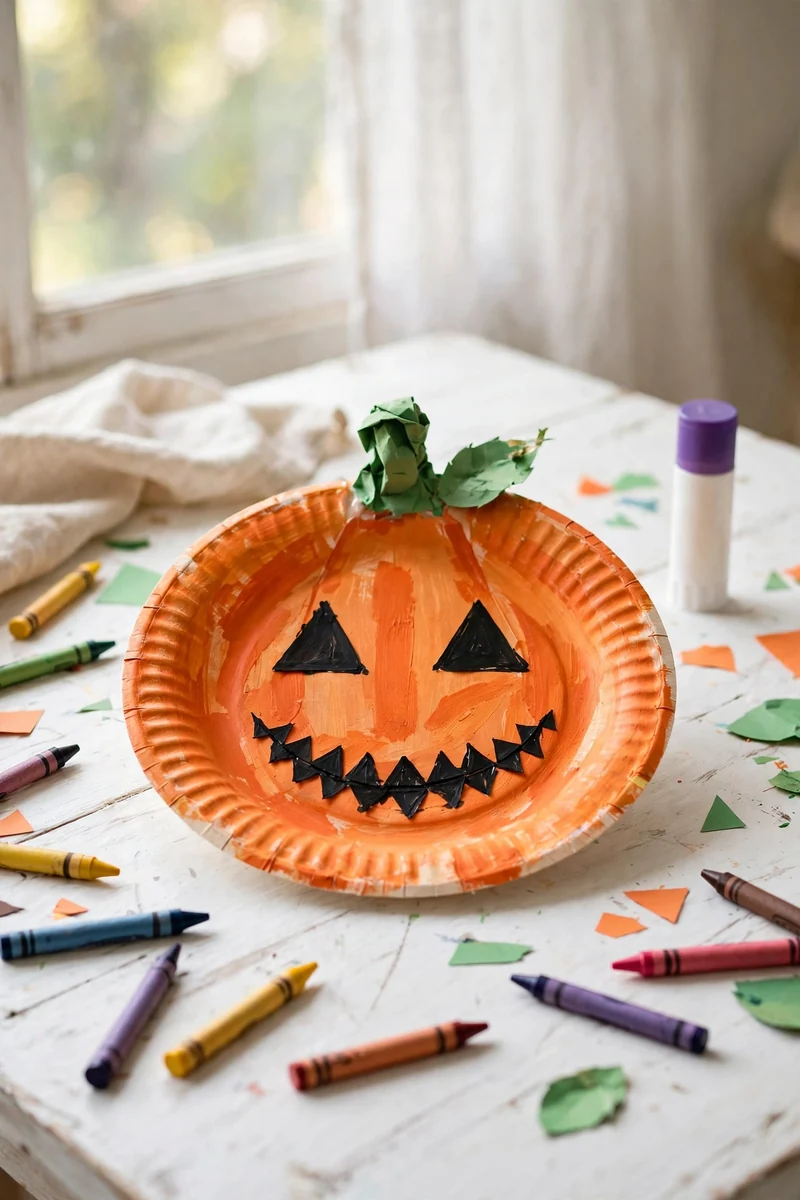
Every preschooler knows exactly what to do with a paper plate and a cup of orange paint. Hand them the plate, a big brush, and washable paint, and let them cover the whole thing edge to edge. While it dries, you cut triangle eyes and a jagged mouth from black construction paper.
- Glue the face pieces on crooked on purpose. Crooked reads as charming, not wrong.
- Twist a brown pipe cleaner into a curly stem and tape it to the top.
- Add a green paper leaf for kids who want extra detail.
Line the finished pumpkins along a hallway wall and let your child rank them by silliness.
Handprint Ghost Garland
White handprints on dark cardstock look instantly like little ghosts, and preschoolers enjoy the paint on their palms more than the finished art. Keep the prints small and the paint thin.
- Paint your child’s palm with white washable paint, not too thick.
- Press the hand firmly on black or navy cardstock, then lift straight up.
- Add two oval eyes in black paper once the print is dry.
- Cut around each print, punch a hole at the top, and string them on yarn.
Hang the garland where your child can reach it. They will rearrange the ghosts daily.
💡 Quick Tip
Paint the palm in the kitchen near the sink. The first thing your preschooler will do after pressing is touch their own face.
Cotton Ball Ghost Pops
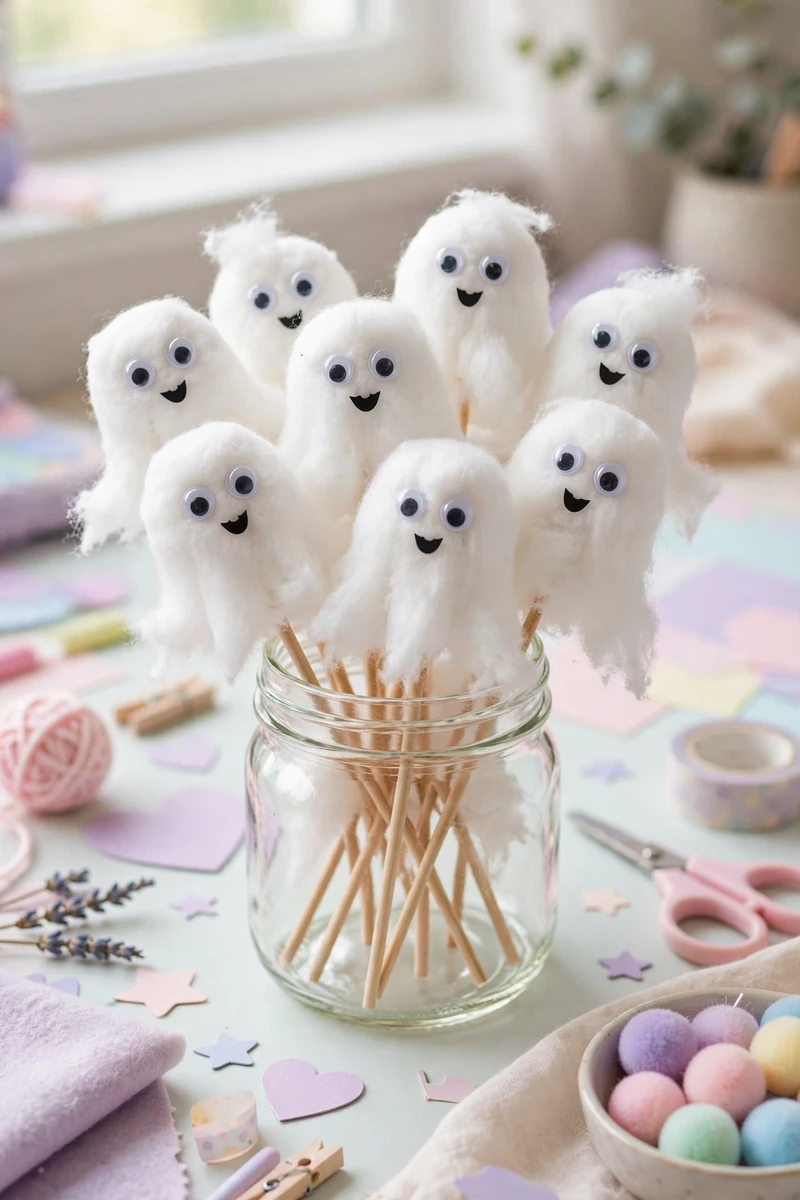
Small hands love squishing cotton balls, which means this craft nearly assembles itself. Wrap a puffy wad around the top of a lollipop stick and tie it with white yarn, and you have a ghost.
- Tear two or three cotton balls into one puffy wad.
- Wrap the wad around the stick top and tie it snugly with yarn.
- Glue on two googly eyes. For under threes, draw the eyes with a marker instead.
- Stand the finished ghosts in a cup of rice until the glue sets.
Stick a row of them in a pumpkin bucket by the front step for a sweet welcome.
Egg Carton Bats
An egg carton has the perfect bumpy shape for a bat body, and cutting it apart is the only job that needs an adult. Your preschooler handles the painting and the wings.
Cut a row of three cups from the carton and trim the edges. Hand it over with black washable paint and a stiff brush. While it dries, cut two wing shapes from black cardstock, then glue on the wings and eyes.
Hang the bats from the ceiling with thread and they spin slowly in the draft.
What to grab first
Popsicle Stick Haunted Houses
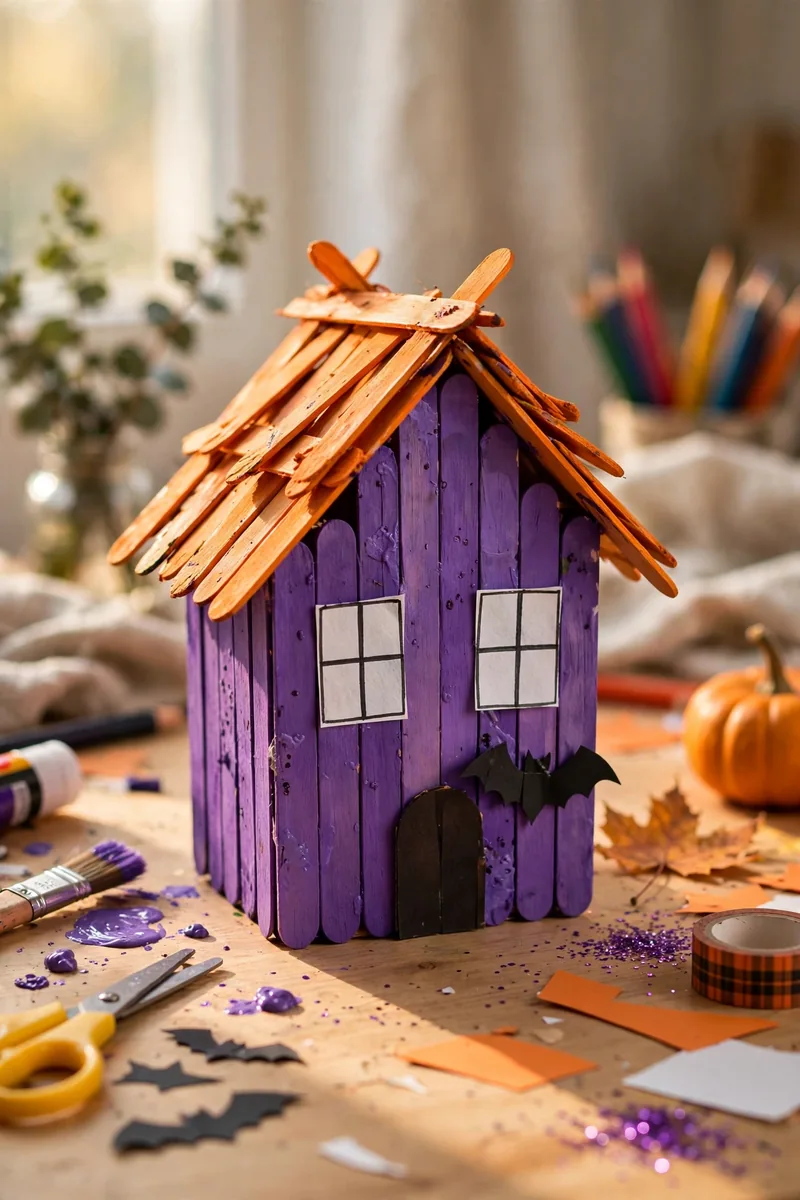
Six craft sticks glued into a square become the bones of a tiny haunted house. Your preschooler paints and sticks while an adult handles the hot glue.
- Paint the sticks orange, purple, or black and let them dry fully.
- Glue four sticks into a square and two more into a roof triangle.
- Cut a black paper moon and stick bat shapes around it for the sky behind.
Tape the finished house to a window. When the sun is behind it, the whole thing glows.
Loose craft sticks scattered on the table, sliding apart every time someone breathes near them.
A stiff little house frame standing on its own, ready for windows, a door, and one paper ghost tenant.
Footprint Frankenstein Cards
Footprint art is a classic for a reason. One green footprint becomes Frankenstein’s head, and the cuteness factor is high enough to make grandparents tear up.
Paint the bottom of your child’s foot green with washable paint.
Press it onto white cardstock and lift straight up.
Once dry, glue black paper bolts on both sides of the heel.
Draw the flat hairline and stitched mouth with a black marker.
Fold the card in half and write the greeting inside. It mails flat in a normal envelope.
Toilet Paper Roll Mummies
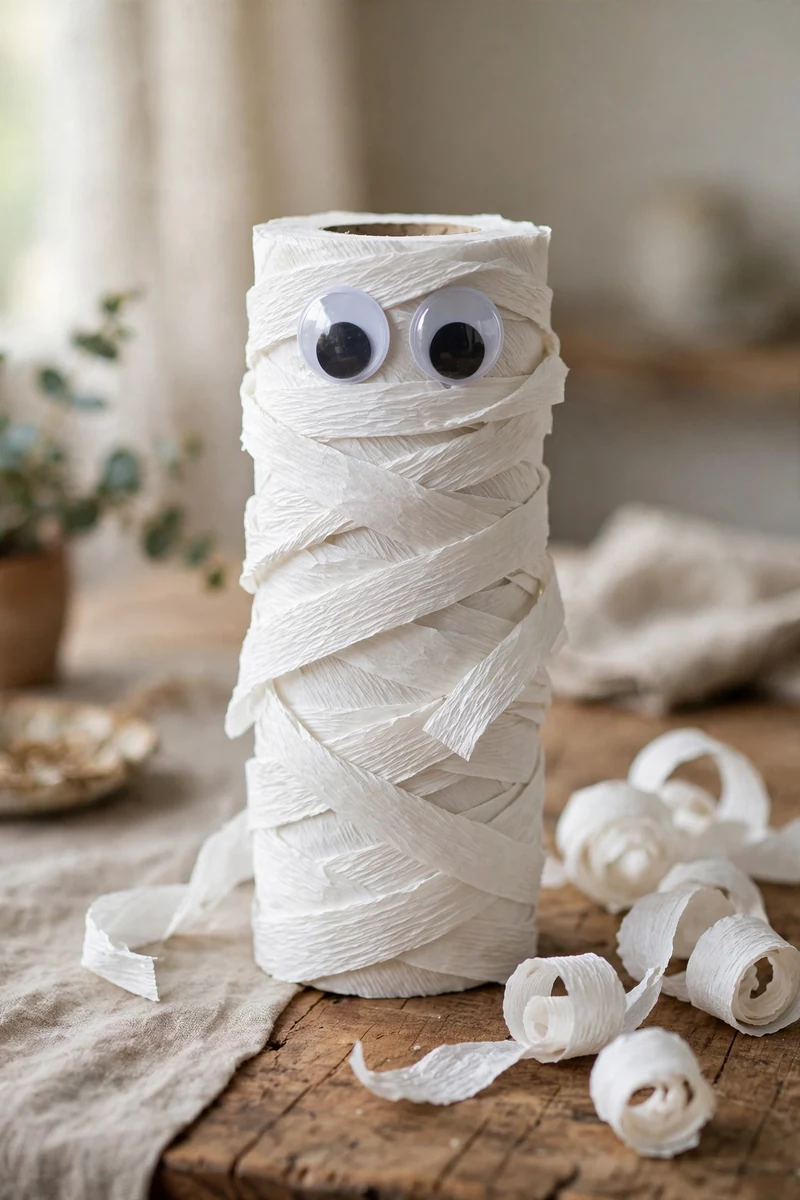
A cardboard tube, white crepe streamers, and googly eyes turn into a mummy in ten minutes flat. Preschoolers are surprisingly good at wrapping, and wrapping is the entire job here.
- Wrap torn white paper strips or gauze around the tube, overlapping as you go.
- Leave a gap near the top for the eyes.
- Dab glue on each layer so the wrapping stays put.
Stand three mummies together at different heights and call it a family.
Use gauze or torn white paper. It grips the tube better than crepe.
Dab glue every few wraps so nothing unwinds overnight.
Skip real toilet paper. It tears on the second wrap.
Avoid small button eyes for under threes. They can come loose.
Bubble Wrap Spider Web Prints
Bubble wrap is irresistible to preschoolers, and this craft turns all that popping into art. Paint the bubble side white or silver and press it onto dark paper. Every print comes out looking like a spider web.
| Press and Lift | Roll and Print |
|---|---|
| Press the painted wrap straight down, then lift | Lay paper over the wrap and roll with a rolling pin |
| Sharp starburst web lines | Softer, messier webbing |
| Best for toddlers with short attention spans | Best for older preschoolers who like process art |
Once the web dries, add a plastic spider on a thread and the print becomes a whole scene.
Paper Bag Monster Puppets
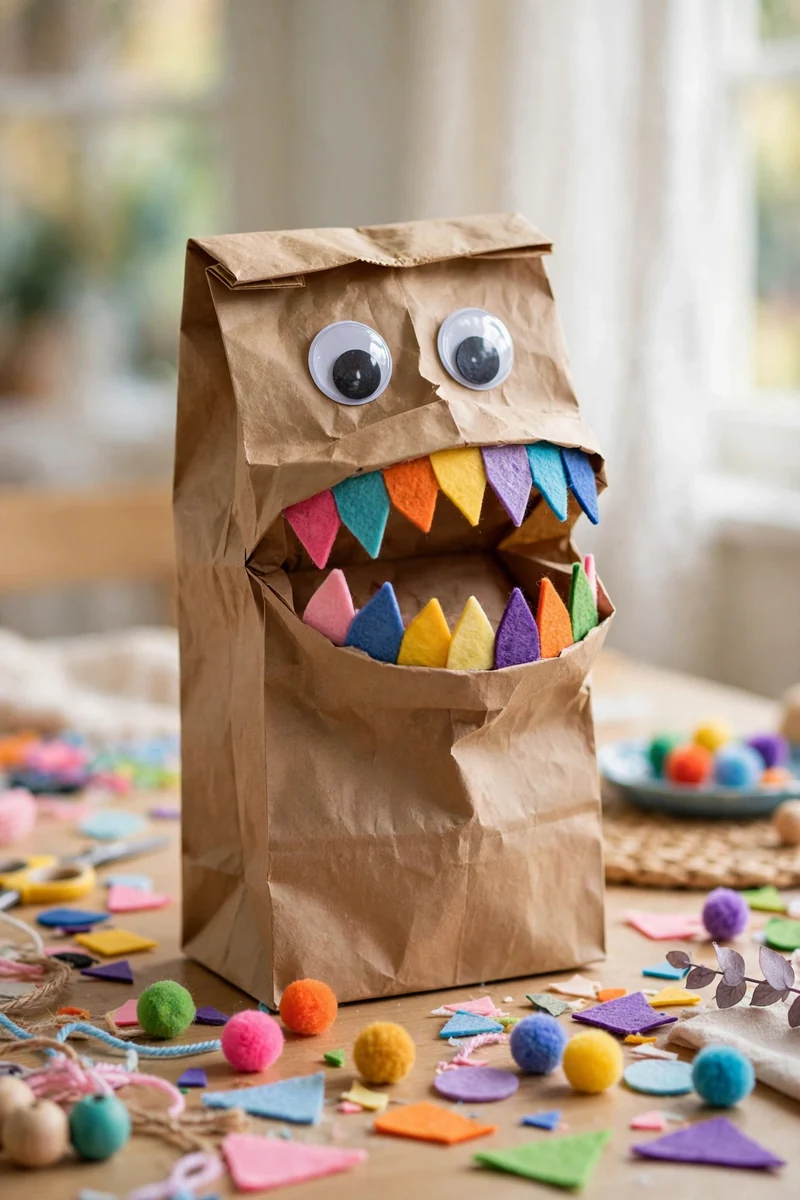
A paper lunch bag is already a puppet waiting to happen. The folded flap at the bottom becomes the mouth, and that is the only part you need to explain.
- Cut felt teeth and glue them inside the mouth flap first.
- Stick on googly eyes, or draw them with marker for younger kids.
- Add paper horns, yarn hair, or extra arms from scraps.
Let the monster eat a cracker at snack time and watch your child light up.
Glue the teeth inside the mouth flap before anything else goes on. Every other detail sticks around them.
Fingerprint Pumpkin Patch Art
Thumbprints in orange paint make the sweetest little pumpkins. This one works for the youngest preschoolers because the only skill involved is pressing a thumb down.
- ▸Stamp rows of thumbprints across white paper, leaving space between them.
- ▸Add green stems and curling vines with a marker once the paint dries.
- ▸Fill the sky with a few yellow thumbprint stars for a night patch scene.
Frame it exactly as is. Thumbprint art is the kind grandparents ask for by name.
Coffee Filter Bats
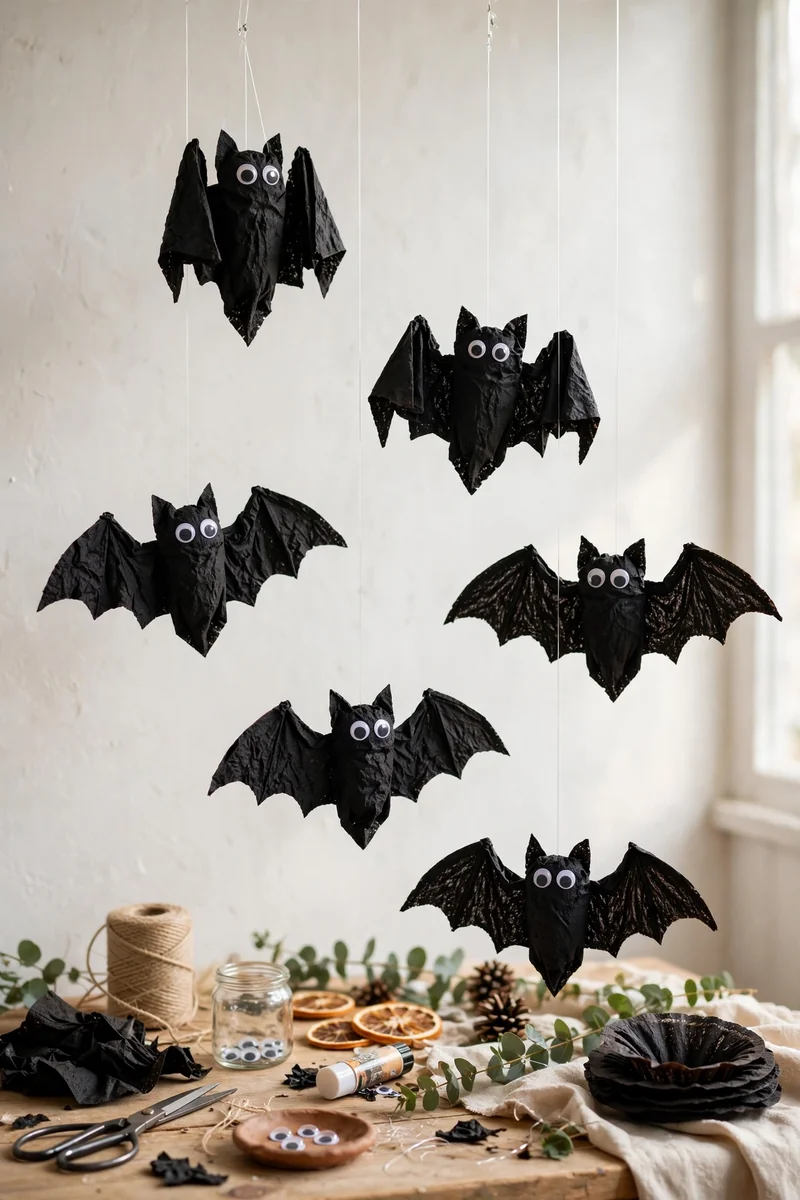
Coffee filters drink up watercolor paint and scrunch into bat wings with one squeeze. Clip the middle with a clothespin and the wings spread out on their own.
- Paint the coffee filter with watercolors and let it dry.
- Scrunch the middle and clip it with a clothespin.
- Glue on eyes and tiny paper fangs.
Hang the bats from thread in the window. They spin and flutter in the draft.
Paper Chain Ghost Links
Paper chains are a preschool classic, and white strips with ghost faces turn a familiar craft into a Halloween garland. Little hands are great at the glue and loop part with a little practice.
- Cut white paper into strips before you start, about one inch by eight inches.
- Draw a simple ghost face on each strip first, so no face ends up upside down.
- Loop, glue, and link until the chain is as long as your child wants.
Drape the finished chain across the mantel or a doorway.
💡 Quick Tip
Draw all the faces before any looping starts. Once the chain gets long, it is hard to add faces to the middle links.
Pinecone Owls in Costume
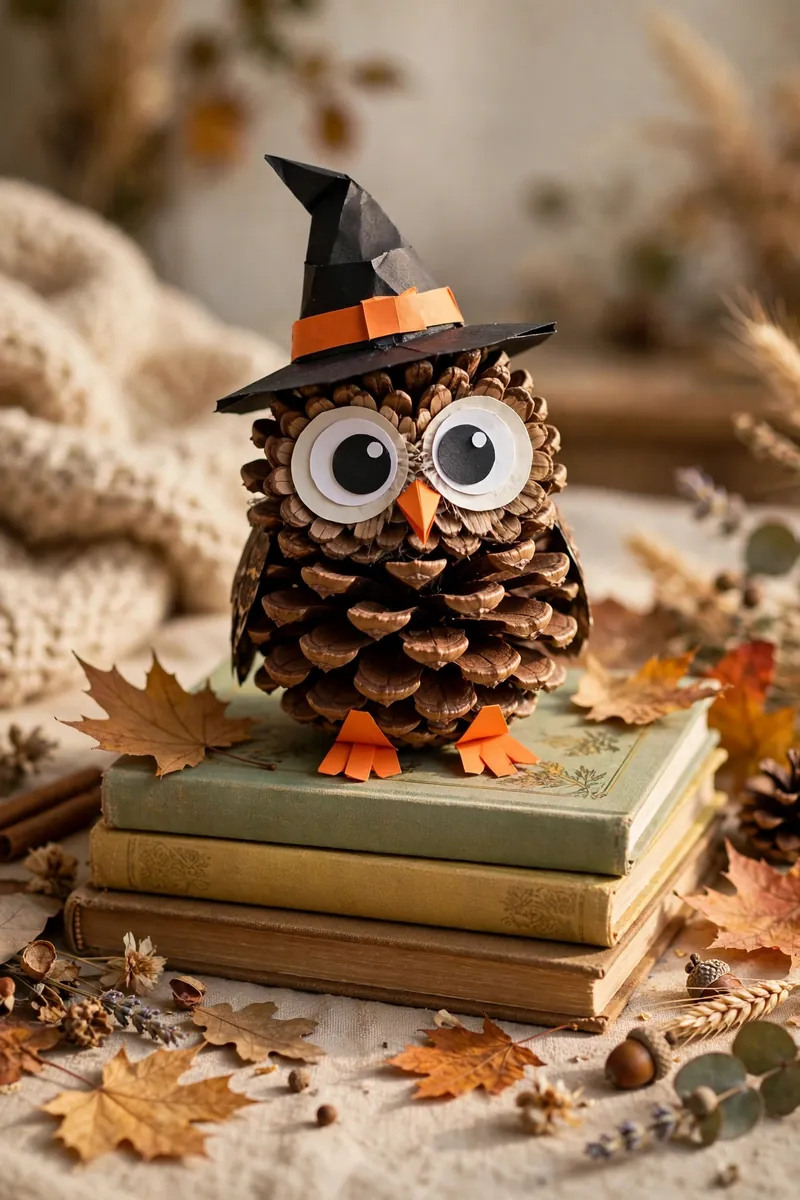
A pinecone picked up on a nature walk becomes an owl with two felt wings and two big eyes. Add a tiny paper witch hat and your preschooler will be completely smitten.
- Glue two felt triangles on the sides as wings.
- Stick on two big white felt circles with black centers for eyes.
- Cut a small cone from black paper, add a brim, and perch it on top.
Set the owl on a bookshelf where its eyes catch visitors by surprise.
Woven Paper Strip Pumpkins
Strips of orange paper woven over and under make a pumpkin with real texture. The pattern is simple enough for a four year old to follow, and the result looks far fancier than the effort.
Cut a pile of orange strips and one green strip for the stem. Show your child the over, under rhythm once, then let them take over. Glue the finished weave onto cardstock, trim it into a pumpkin circle, and add a curly vine.
Make three in different sizes for a little patch on the fridge.
What to grab first
Sponge Painted Pumpkin Patch
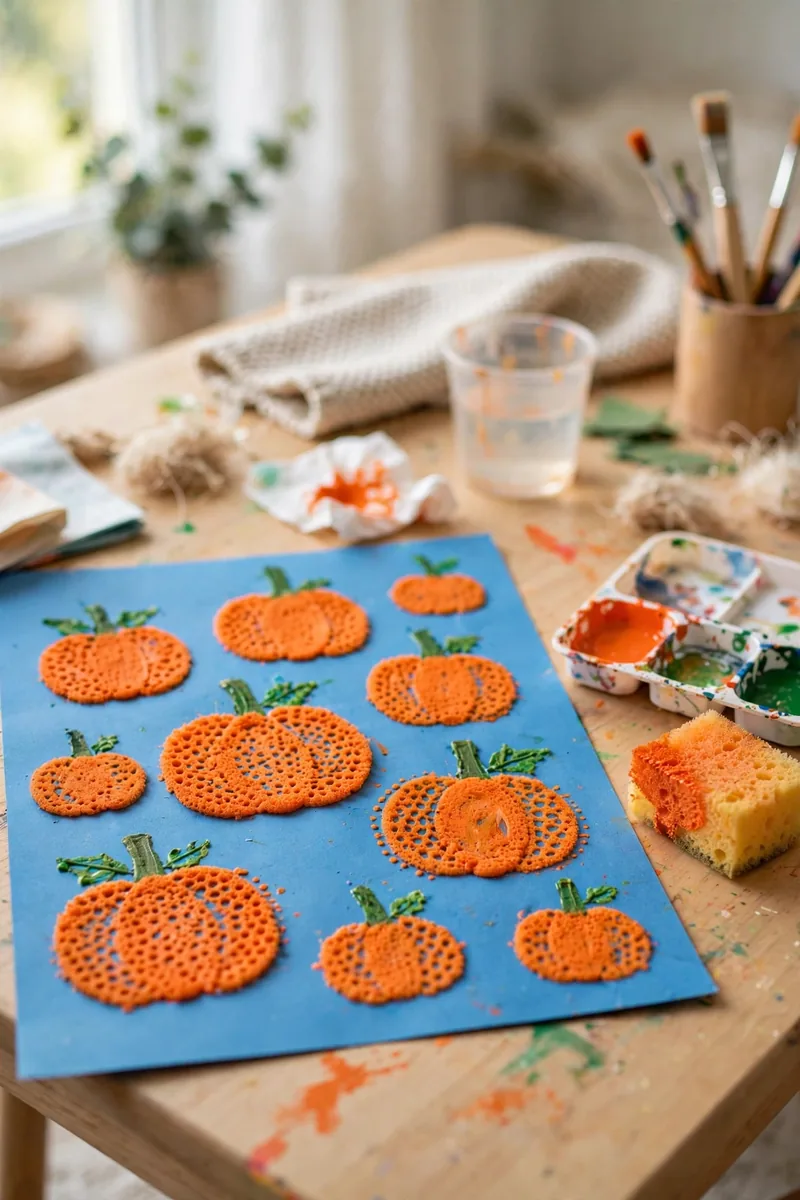
A kitchen sponge cut into a pumpkin shape stamps the easiest pumpkin patch you will ever make. Dab it in orange paint and press, and the rough sponge edge gives each pumpkin a natural, ragged look.
- Cut a sponge into a simple pumpkin shape, with a grown up handling the scissors.
- Dab it in orange washable paint, not too thick.
- Stamp a whole row across blue or black paper.
- Paint green stems and vines once the pumpkins dry.
Fast enough to do twice, which your child will ask for.
Flat orange fingerprints on paper that smudge into blobs before they dry.
A row of pumpkins with ragged sponge edges and layered color that looks like real patch light.
Paper Cup Ghost Lanterns
White paper cups make the speediest ghost lanterns around. Draw a face, drop in a battery tea light, and the whole cup glows from the inside.
Draw a simple ghost face on each white paper cup with a black marker.
Poke a small hole in the bottom of each cup for the string.
Drop in a battery operated tea light. Never use a real flame.
Hang the lanterns in a doorway with string.
Switch them on at dusk and the hallway fills with friendly little ghosts.
Leaf Ghost Collages
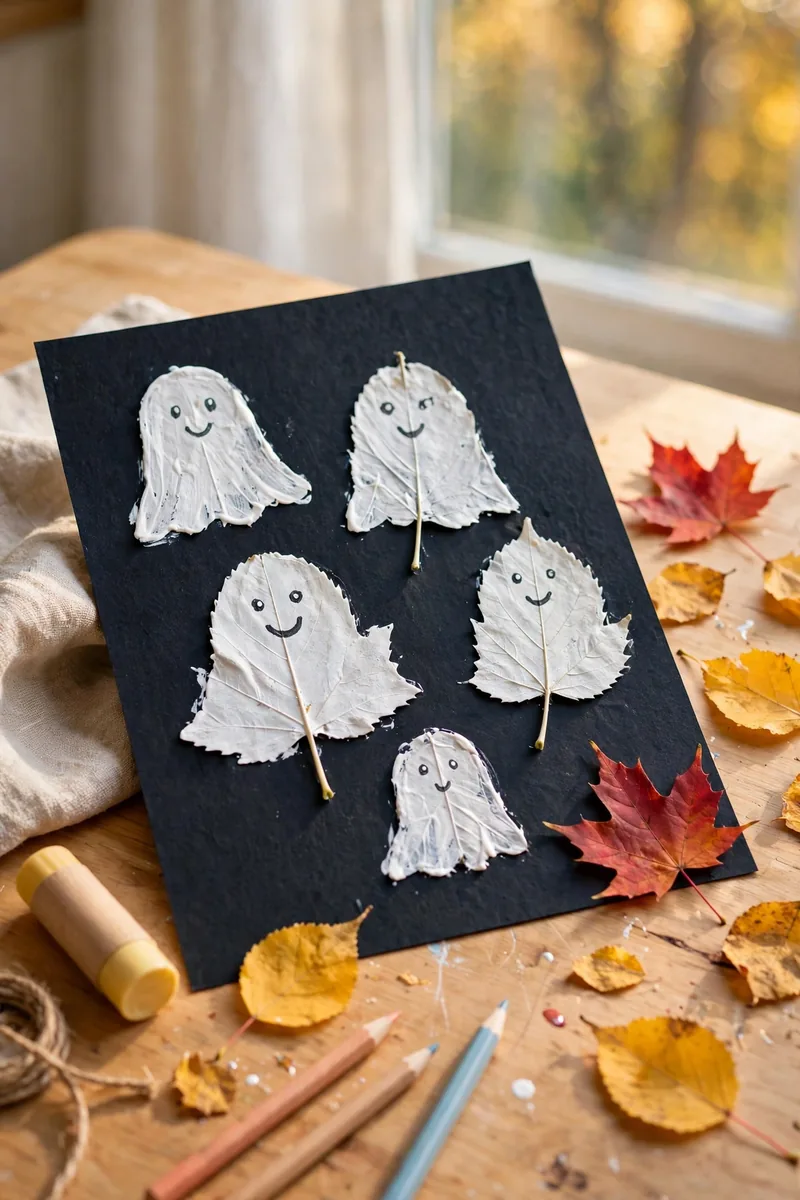
Fall leaves are free craft supplies scattered all over the yard. Painted white, they turn into a whole family of ghosts with zero cutting involved.
Press the leaves flat under a heavy book overnight first. Paint the smooth side white with washable paint and let them dry. Draw or glue on simple black eyes, then arrange the leaf ghosts on dark blue paper like a night sky collage.
Glue the collage onto a paper plate frame for instant wall art.
Press leaves flat under a book overnight before painting.
Paint the smooth side. It holds paint far better.
Skip wet or curled leaves. The paint slides right off.
Keep dried leaves away from real candles.
Doily Spider Webs
A paper doily is a spider web waiting to be discovered. Fold it, snip a few notches, and unfold it to gasps. There are two good ways to fold, and each gives a different web.
| Triangle Fold | Square Fold |
|---|---|
| Fold the doily into quarters | Fold it in half twice into a square |
| Snip small triangles along both folded edges | Snip along one edge only |
| Classic round web with even holes | Lacy web with a bold border |
Tape a black paper spider to the middle and hang the web in the window. An adult should handle the snipping if the scissors are sharp.
Handprint Black Cat Cards
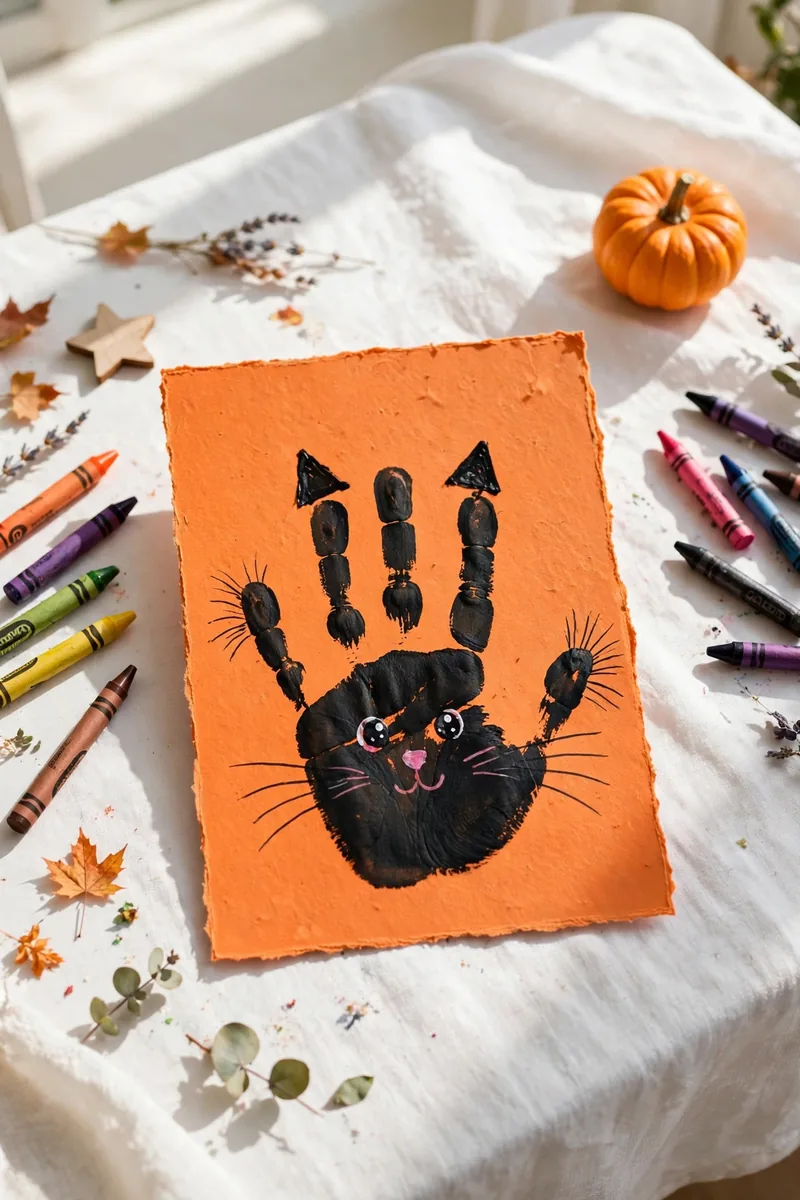
A black handprint with pointy ears becomes the friendliest black cat you have ever seen. This one doubles as a card, which makes it grandparent mail gold.
- Paint your child’s palm black with washable paint and press it on white cardstock.
- Add two triangle ears at the top of the print with black paper.
- Glue on eyes and draw whiskers once the paint dries.
Fold the card in half and let your child sign the inside with a crayon.
Print the hand first and add the cat parts second. Details added before the print dries will smudge.
Q-Tip Skeleton Art
A handful of cotton swabs glued in a row makes a skeleton that is equal parts silly and spooky. No drawing skill needed, which makes this one very forgiving.
- ▸Glue swabs in a vertical line down black paper for the spine.
- ▸Add shorter swab pieces sideways for ribs, arms, and legs.
- ▸Glue a white paper circle on top and draw a simple skull face.
Label it with your child’s name and the year. Dated skeleton art is a fun tradition.
Torn Paper Frankenstein Faces
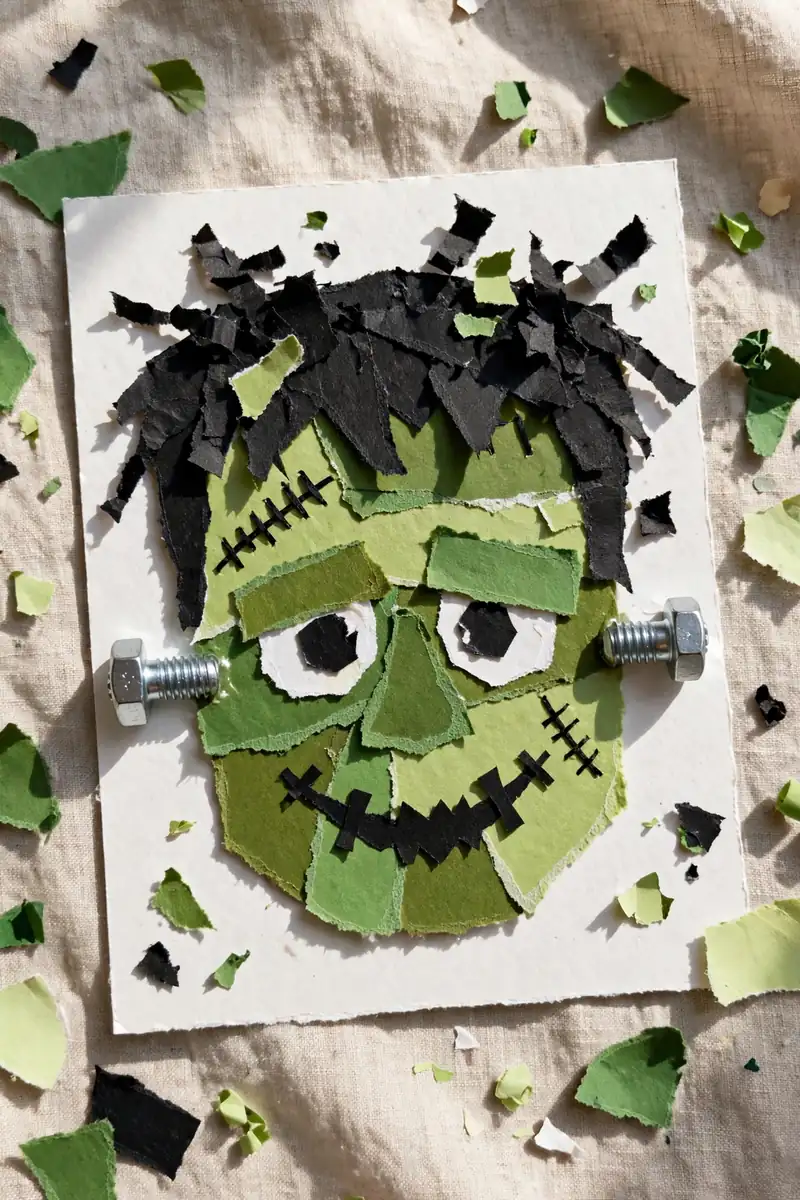
Tearing paper is a great preschool skill, and no scissors are required. Torn green pieces glued into a rough rectangle become Frankenstein’s face, and the ragged edges are the whole point.
- Tear green construction paper into strips and small pieces.
- Glue them onto cardstock in a rough rectangle shape.
- Add black paper hair, bolts, and a stitched mouth.
The messier the tearing, the better Frankenstein looks. This craft rewards chaos.
Pom-Pom Spider Rings
A black pom pom with pipe cleaner legs becomes a spider ring in about three minutes. This is the craft to pull out when you need something fast before a playdate.
Twist a pipe cleaner around the pom pom to make eight legs, then bend the leftover ends into a ring shape that fits your child’s finger. Glue on tiny eyes if you like, or leave the spider plain. Keep an eye on the wire ends, which can be pokey for little hands.
Make one for every finger and your child has a whole spider family.
📌 Good To Know
Use the biggest pom poms you can find. Small ones roll off the table and frustrate little fingers.
Paper Fan Bats
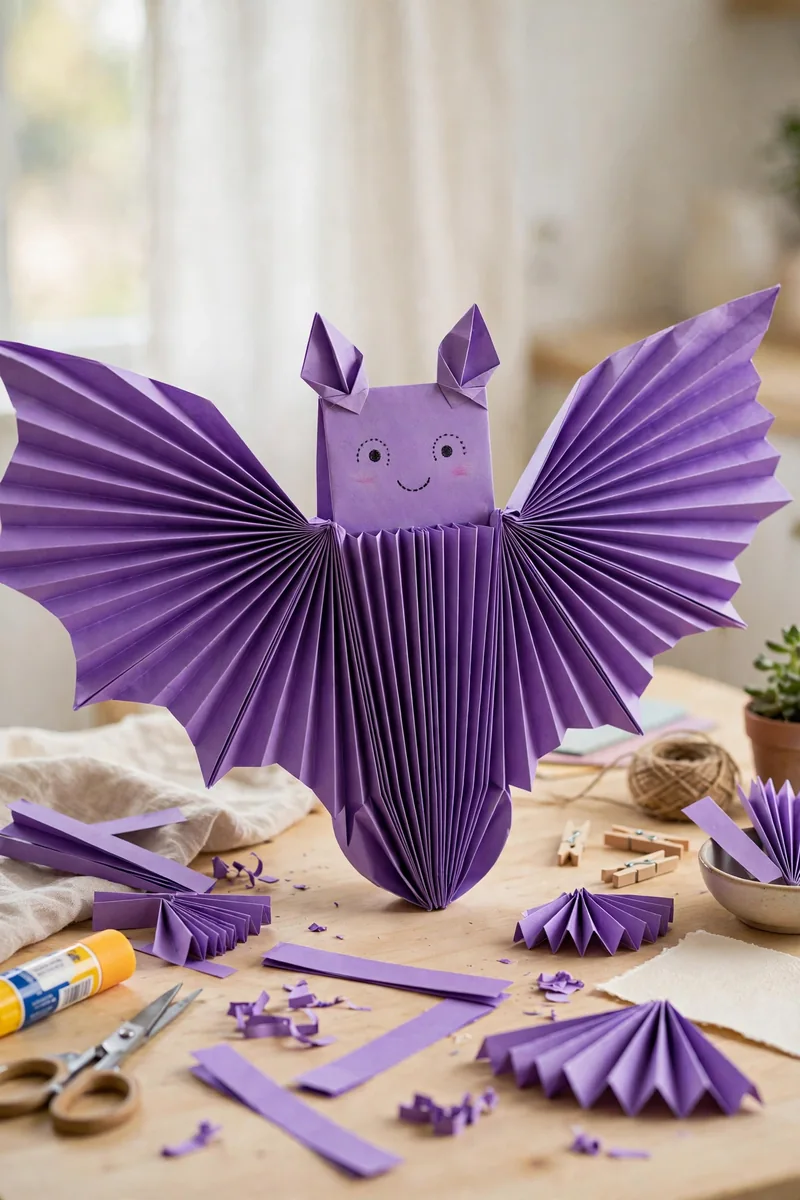
Accordion folding is a great fine motor workout, and one folded strip of black paper becomes a bat with flapping wings. Pleat, pinch, and done.
- Fold a strip of black paper back and forth into accordion pleats.
- Pinch the middle and wrap it with a short pipe cleaner.
- Spread both sides out into wings.
- Glue on eyes and hang the bat with thread.
Fan the wings open wide before hanging. Flat bats look like bookmarks.
Sticker Haunted House Scenes
Some days you just need a craft with zero drying time. Sticker scenes deliver. Hand your preschooler a black cardstock background and a sheet of Halloween stickers, and the haunted house builds itself.
Start with a big haunted house sticker as the anchor, then let your child fill the sky with bats, moons, and ghosts. Crayons fill the gaps, like a yellow moon or an orange path to the door. A tray underneath catches the sticker backs.
Slip the finished scene into a sheet protector and it survives the trip to grandma’s.
What to grab first
Marshmallow Ghost Skewers
Edible crafts are the best kind, and these ghost skewers last about five minutes once they are made. Thread marshmallows onto blunt skewers or paper straws, then draw the faces.
- Use blunt wooden skewers or sturdy paper straws, never sharp ones.
- Thread three marshmallows onto each skewer.
- Draw two eyes and a mouth with an edible food marker.
Make them the day of the party. Kids enjoy eating something they built themselves.
A bag of marshmallows that slowly disappears while the craft supplies are still on the table.
A row of ghost skewers with drawn faces, gone even faster than the raw bag.
That is twenty five ideas, and not one of them asks your preschooler to sit still for an hour. The best Halloween crafts for preschoolers are the ones where the mess is part of the plan and the finished piece looks proudly handmade. Snap the photos, because a crooked jack-o-lantern grin on a paper plate beats a store bought mask every single time. For more seasonal ideas like these, you will find plenty waiting at insightsjournal.co.uk. Save this list to your Halloween board so it is ready the next time a rainy afternoon calls for something fun.
After craft time, pick a costume from our easy Halloween costume ideas.
Find more edible projects in our Halloween treat ideas for school parties.