
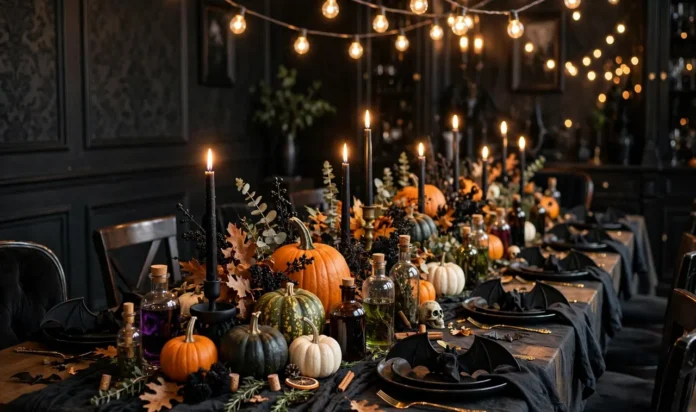


Your guests are arriving at seven and your dining table still looks like any ordinary Tuesday. That is the problem with Halloween dinner parties: everyone plans the costume and the food, and the table gets ten tired minutes before the doorbell rings. Here is the thing, though. A table that feels spooky does not need a big budget or an afternoon of crafting. Most of the ideas on this list use things you already own, plus one or two dollar store finds.
I have hosted enough Halloween dinners to know what actually works when candles are lit and drinks are flowing. The best Halloween Table Decor Ideas are the ones that look dramatic from across the room but take five minutes to set up. They also hold up to real life, spilled cider, crowded plates, kids grabbing for candy.
Below you will find twenty ideas you can mix and match. Pick three or four and your table is done. Pick more and you have a full haunted feast scene. Either way, you are about to look like the host who planned it all weeks ago.
For the rest of the house, browse our DIY Halloween decorations.
1. Black Lace Runner Over Bare Wood
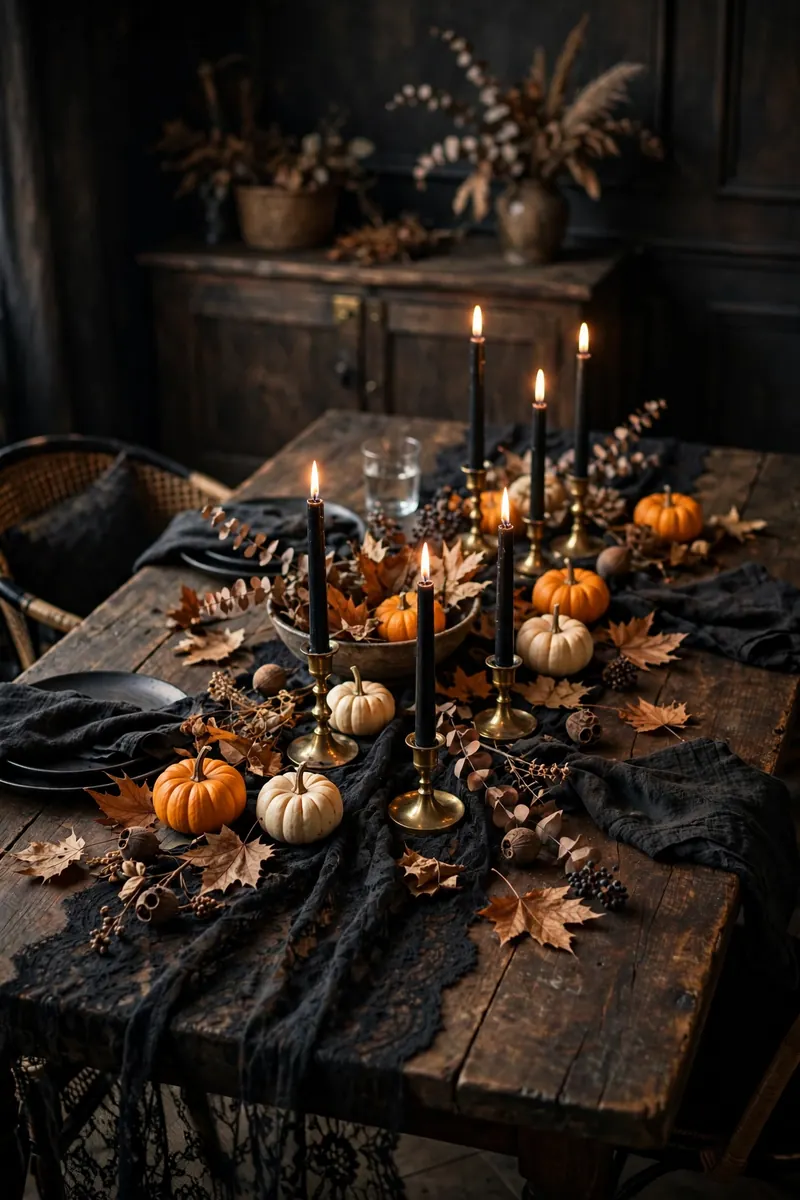
Leave the tablecloth in the drawer.
Lay a wide strip of black lace down the middle of a bare wood table and watch the whole surface change. The lace lets the wood grain show through, which gives you texture without clutter. Cut the runner long enough to hang six inches past each end, then set candles and small pumpkins right on top. Wood plus lace reads old and haunted in the best way. It also costs almost nothing when you buy lace by the yard at a craft store.
2. Cauldron Punch Bowl Centerpiece
Put the punch where a cauldron belongs: in the center of the table.
A small black cauldron makes a better punch bowl than any dish you own. Fill it with red punch and float gummy eyeballs on top for a creepy finish. Set the ladle across the rim and stack cups on a dark tray beside it. Guests serve themselves, and the table gets a focal point that actually does a job. Line the cauldron with a clear food safe liner first, so plastic never touches the drink.
Pair it with these:
- Red punch with ginger ale for fizz
- Gummy eyeballs floating on top
- Cups stacked on a dark tray nearby
💡 Quick Tip
Chill the punch in the fridge for an hour before guests arrive. Cold punch stays cold longer, and the cauldron will not sweat onto your table.
Fill it with something from our Halloween treat ideas for school parties.
3. Mini Pumpkin Place Card Holders
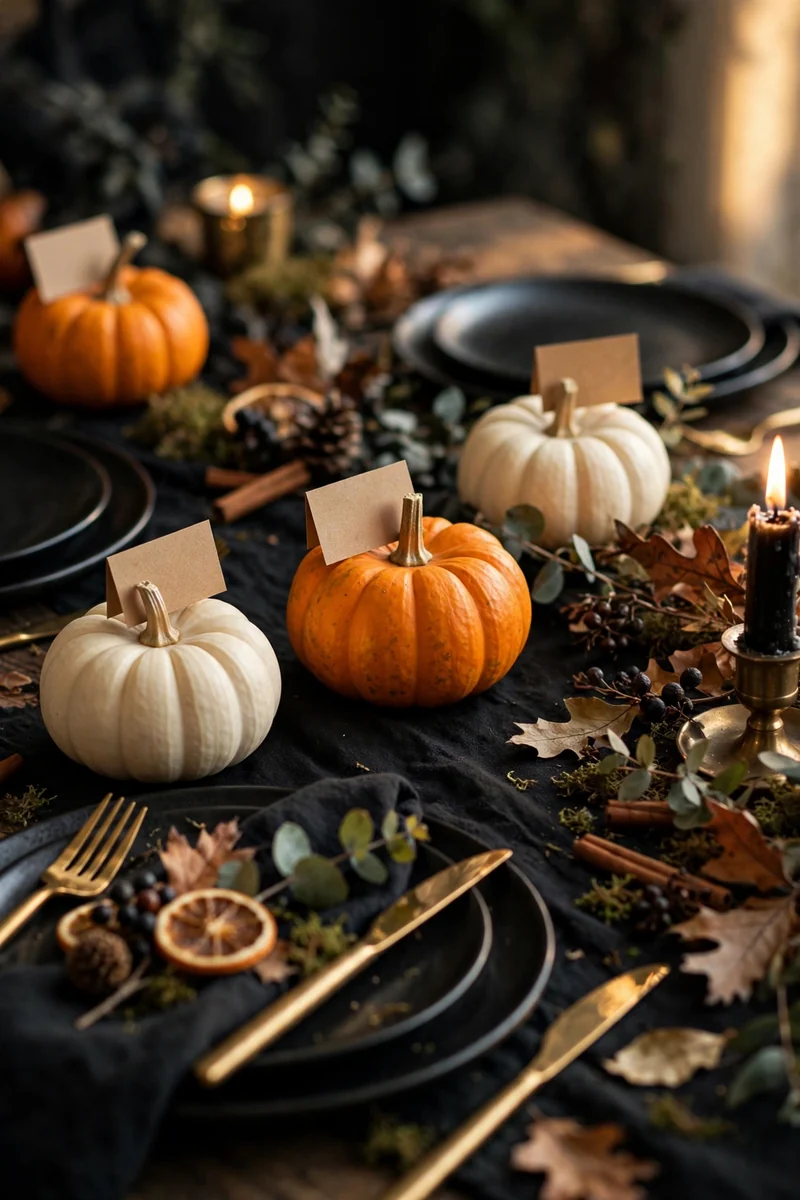
Paper place cards tip over, slide under plates, and end up unread.
Mini pumpkins fix all of that. Cut a small slit in the top of each pumpkin and slide a folded name card inside. They are heavy enough to stay put, and guests can take them home after dinner. Write names with a gold paint pen so they show up on the orange skin. Set one pumpkin at each plate a few hours before guests arrive, and you are done with seating and decor in a single move.
Kids love finding their own pumpkin waiting for them.
4. Dripping Blood Wine Glasses
Plain glasses look instantly haunted with one cheap trick.
Buy red gel icing from the baking aisle and let it drip down the outside of each wine glass. The thick gel holds its shape and looks like fresh blood against the glass. Let it set for an hour before the party so it does not smear on hands. Fill the glasses with dark red juice or wine, and the whole table looks like a vampire dinner party.
Keep the drips on the outside only, never near the rim.
What to grab first
5. Apothecary Bottle Table Cluster

The middle of the table looked empty until I grouped old bottles together.
Collect glass bottles in different heights and fill them with colored water, dried beans, or twigs. Print small labels that say things like Spider Venom, Bat Wings, or Witch Hazel and stick them on with tape. Group five or six bottles tight in the center so they read as one display. A tea light tucked behind the bottles makes the colored water glow. This is the kind of decor that costs nothing if you save jars through the year.
A bare table middle with one lonely candle that gets lost among the plates.
A tight cluster of labeled bottles that glows from behind and fills the whole center with interest.
6. Spiderweb Cheesecloth Tablecloth
One rule for fake spiderwebs: less is more.
Cheesecloth makes the best creepy table cover because it is thin, cheap, and full of holes already. Drape it over the table and pull it gently so the weave stretches into web shapes. Let the edges hang uneven and torn. Tuck a few plastic spiders into the folds. The table looks abandoned and haunted, and cleanup takes about thirty seconds since you just gather it up.
Drape cheesecloth over the table with extra hanging on the sides.
Pull gently in spots so the weave opens into web shapes.
Tuck plastic spiders into the folds and step back.
7. Floating Candle Hurricane Vases
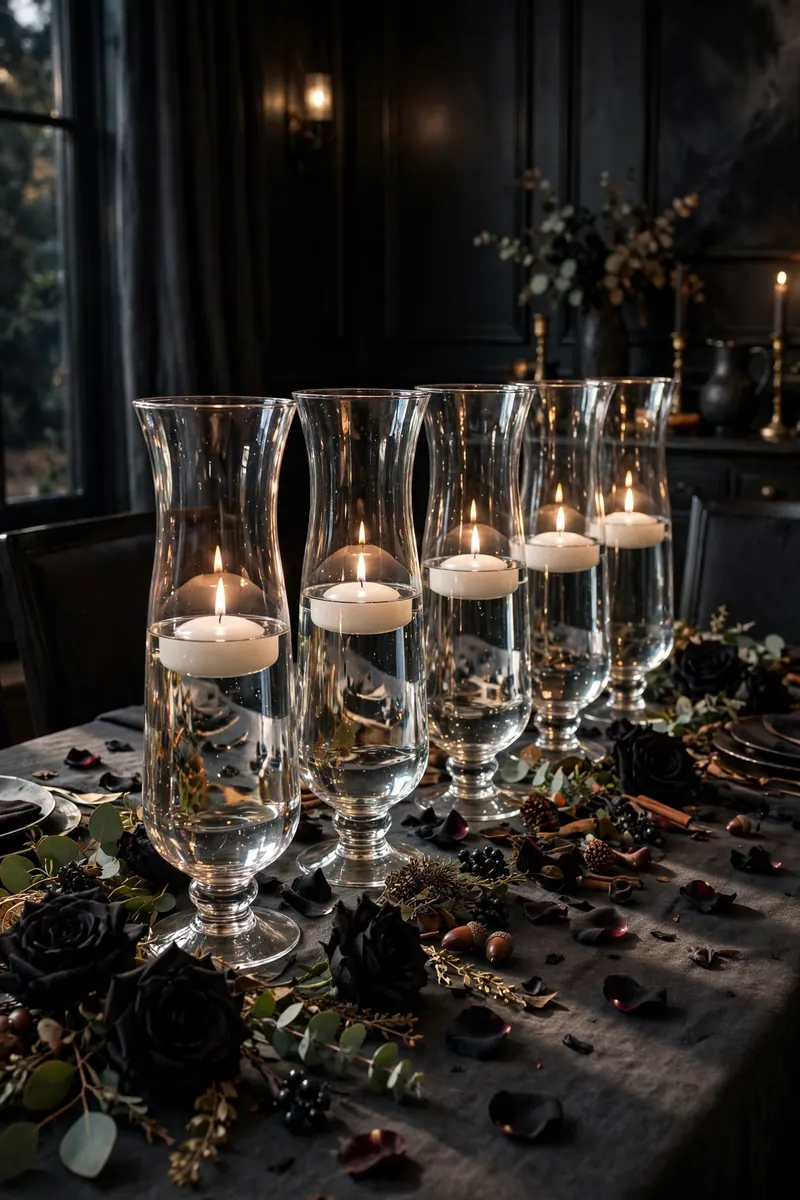
Most people set hurricane vases out empty, which is a missed chance.
Fill each tall glass vase halfway with water, drop in a floating candle, and scatter a few fake rose petals or plastic eyeballs around the base. The water bends the candlelight and throws soft shapes across the table. Use real floating candles for the glow, or LED ones if kids will be near the table. Either way, they burn for hours without any attention from you.
The table does the flickering. You do the hosting.
Use wide, heavy vases so they cannot tip.
Trim wicks short for a cleaner flame.
Tall thin vases near table edges.
Scented candles that fight with dinner smells.
8. Skull Candle Cluster Centerpiece
You have two good choices for a skull centerpiece, and both are cheap.
Wax skull candles look real and melt into creepy shapes as they burn. Plastic skulls with tea lights inside are sturdier and safer around kids. Either way, cluster three or five together at different heights for a display that fills the middle of the table. Add dried leaves or black sand around the base to finish it.
Odd numbers look better than even ones, so stick with three or five.
| Wax skull candles | Plastic skulls plus tea lights |
|---|---|
| Melt into creepy shapes as they burn | Stay neat all night long |
| Keep away from kids and loose sleeves | Fine around little hands |
| Cost: low | Cost: low |
9. Bat Wing Napkin Fold
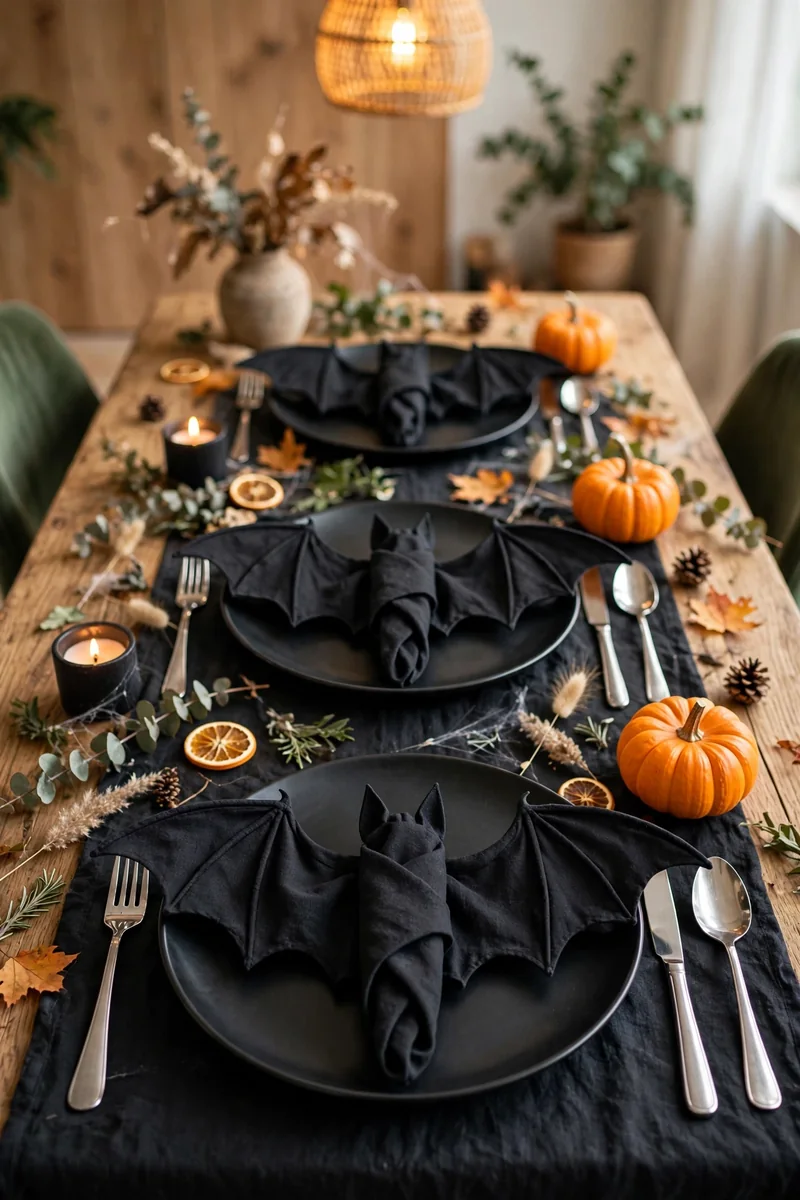
I folded these for a party once and guests kept them instead of using them.
Fold a black napkin into a simple bat shape and rest it on each plate. You only need two folds to suggest wings, and there are free diagrams all over Pinterest if you want a guide. The napkins look sharp against white plates and need zero extra supplies. Tuck a small candy under each bat as a surprise for guests who unfold them.
Fold the bat wings wide. Small tight folds disappear on the plate, but wide wings read as a bat from across the table.
10. Mossy Forest Floor Runner
This runner makes the table smell like the woods and look like a forest floor.
Lay a strip of burlap down the center, then scatter preserved moss, pinecones, and small twigs along it. Tuck in a few tiny mushroom picks or plastic toads for surprise details. The mix of green moss and rough burlap feels like a witch’s cottage table. Spray the moss lightly with water before guests arrive so the color stays rich.
- ▸Preserved moss from the craft store, since it keeps its color
- ▸Burlap runner as the base layer
- ▸Pinecones, twigs, and mushroom picks
- ▸A light mist of water before the party
11. Potion Bottle Favors at Each Plate
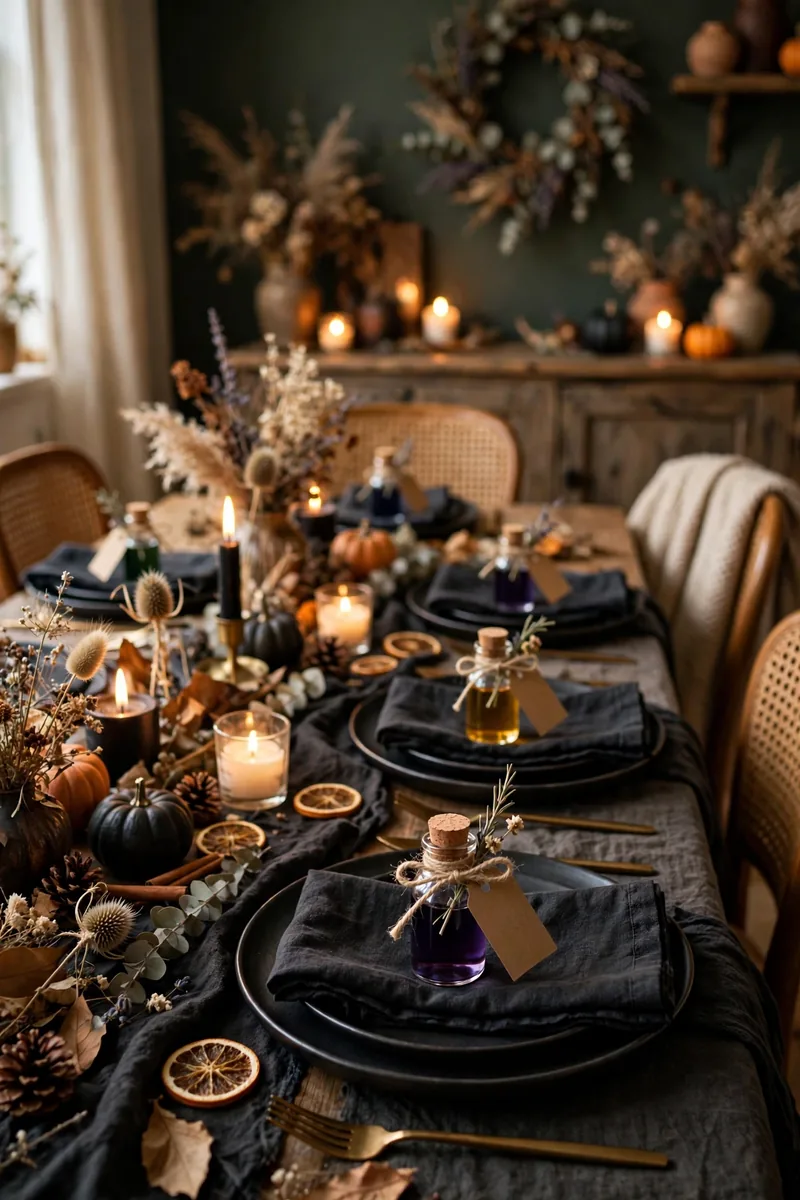
Guests sat down, spotted the tiny bottles, and started shaking them before dinner.
Fill small corked bottles with candy, colored bath salts, or layered sugar. Tie a tag to each one with the guest’s name so it doubles as a place card. Set one bottle on every plate before guests arrive. The table looks dressed before anyone sits down, and people love taking theirs home.
Bath salts look like real potions, just label them clearly so nobody eats them.
12. Haunted Mirror Charger Plates
You do not need real silver to get a haunted mirror look.
Thrift stores sell round mirrors for a dollar or two, and they make unreal charger plates. Set one mirror under each dinner plate so it peeks out around the edges. The reflections catch candlelight and make the whole table glow. Smudge the mirrors lightly with fake cobweb spray for an aged look, but keep the center clear where the plate sits.
💡 Quick Tip
Check the mirror edges for sharp spots before the party. A quick line of black tape around the rim fixes rough edges and adds to the spooky look.
13. Graveyard Cake Table Display
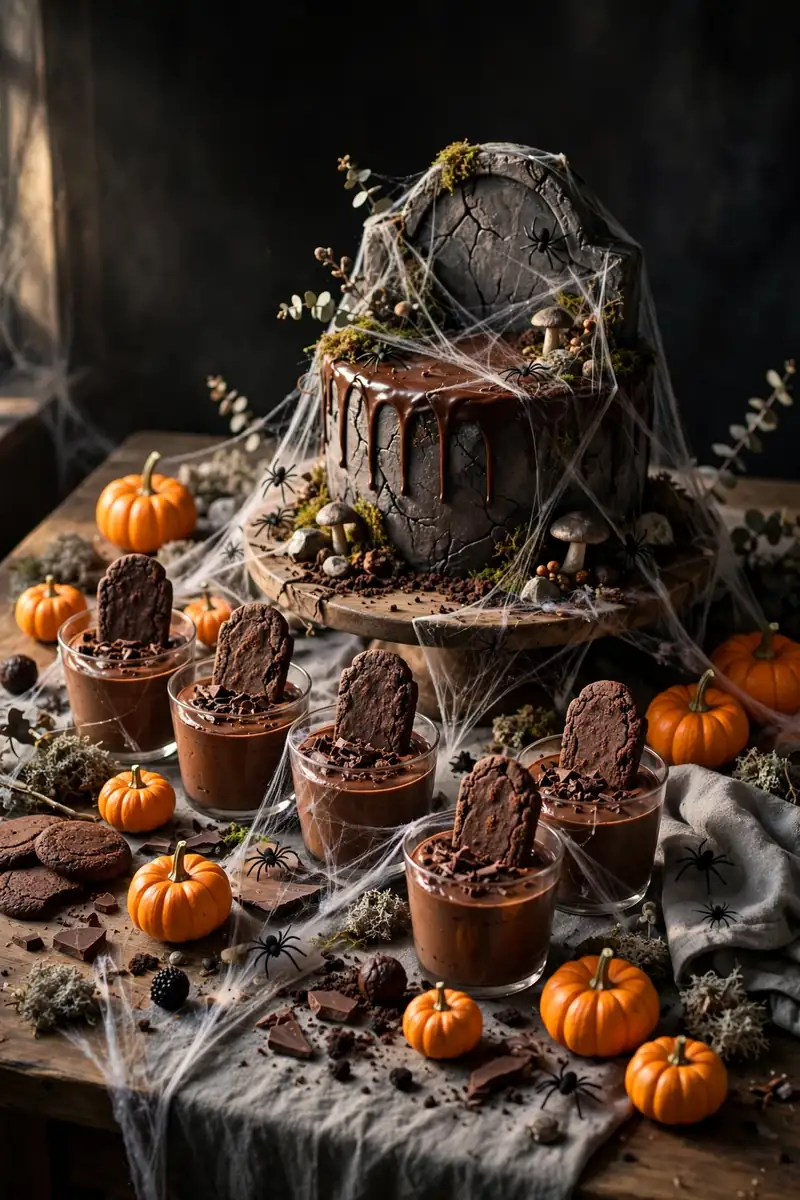
Dessert tables look sad when the cake just sits there alone.
Turn the cake into a graveyard scene. Frost it dark, stick in cookie tombstones, and scatter crushed cookie dirt around the base. Set the cake on a raised stand so it towers over the table. Surround it with small pumpkins and a few candy skeletons half buried in the crumbs. Guests will photograph it before they cut it, so give it a full five minutes of fame.
Cookie tombstones, crushed cookie dirt, candy skeletons: that is the whole recipe.
14. Witch Hat Cone Favors
Cone favors take five minutes each and look like you hired a party stylist.
Roll black cardstock into cones and glue on a wide brim to make tiny witch hats. Fill each hat with wrapped candy and set one at every seat. A gold star sticker on the front hides the glue seam and adds a little shine. Kids carry them around all night, so make a few extra for the ones that get crushed.
What to grab first
15. Blood Drip Tablecloth Edge
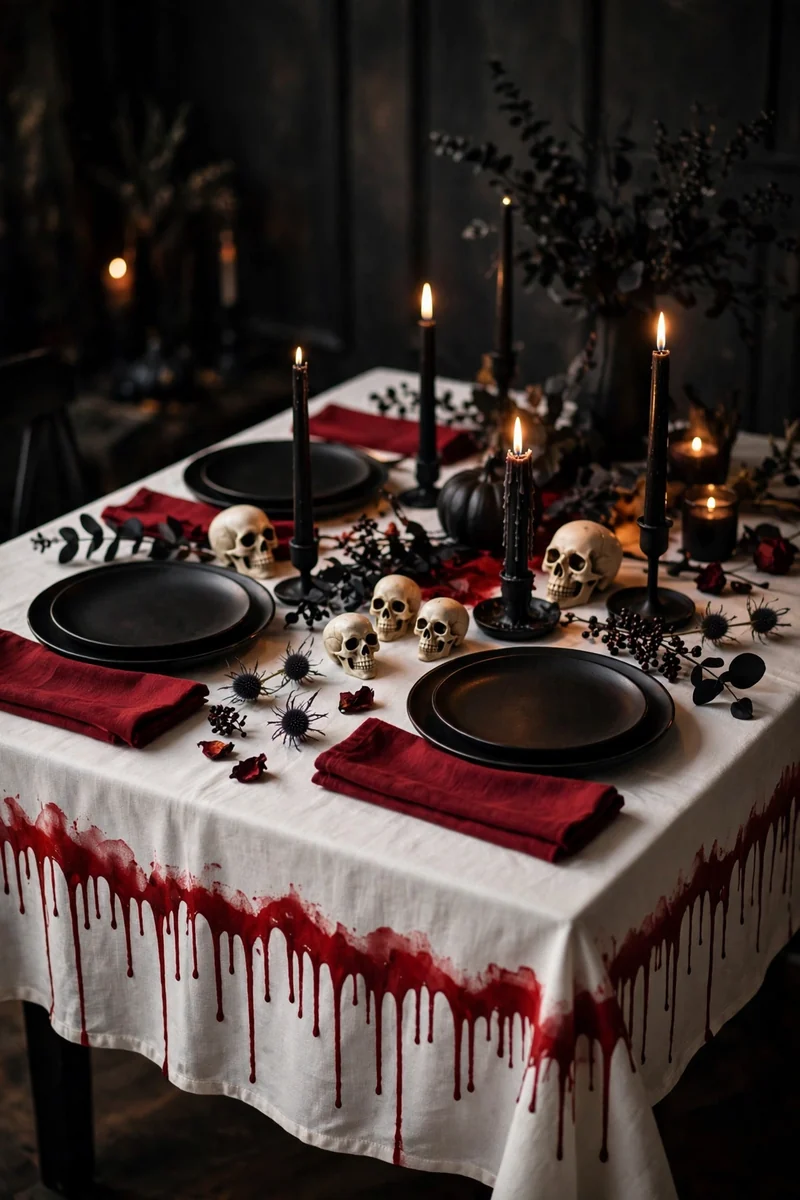
A plain white tablecloth looks boring until the edges start to bleed.
Paint red drips along the bottom edge of a white tablecloth with fabric paint. Start each drip at the hem and let it run downward so it looks like blood pooling off the table. Use a cheap cloth you do not mind keeping as a Halloween only piece. The white background makes the red pop, and guests notice it the second they walk in.
- Fabric paint, not acrylic, since it stays soft
- Drips of different lengths look more real
- Let it dry flat overnight before the party
A plain white cloth that could belong to any dinner party in any season.
A white cloth with red drips running off the hem that guests spot from the doorway.
16. Eerie Blue Fairy Light Runner
I tried warm lights first, and the table just looked like Christmas.
Cool blue fairy lights give the table a moonlit, haunted feel that warm lights cannot match. Weave a long string of battery lights down the center of the table, tucking the wire under pumpkins and bottles so only the glow shows. Turn off the overhead lights and let the blue do the work. The food still looks fine, and the whole room feels like night.
Blue light, dark room, instant haunting.
Lay the light string down the center of the table.
Tuck the wire under decor so only the glow shows.
Turn off the overhead lights and check the effect.
17. Pumpkin Vase with Black Roses
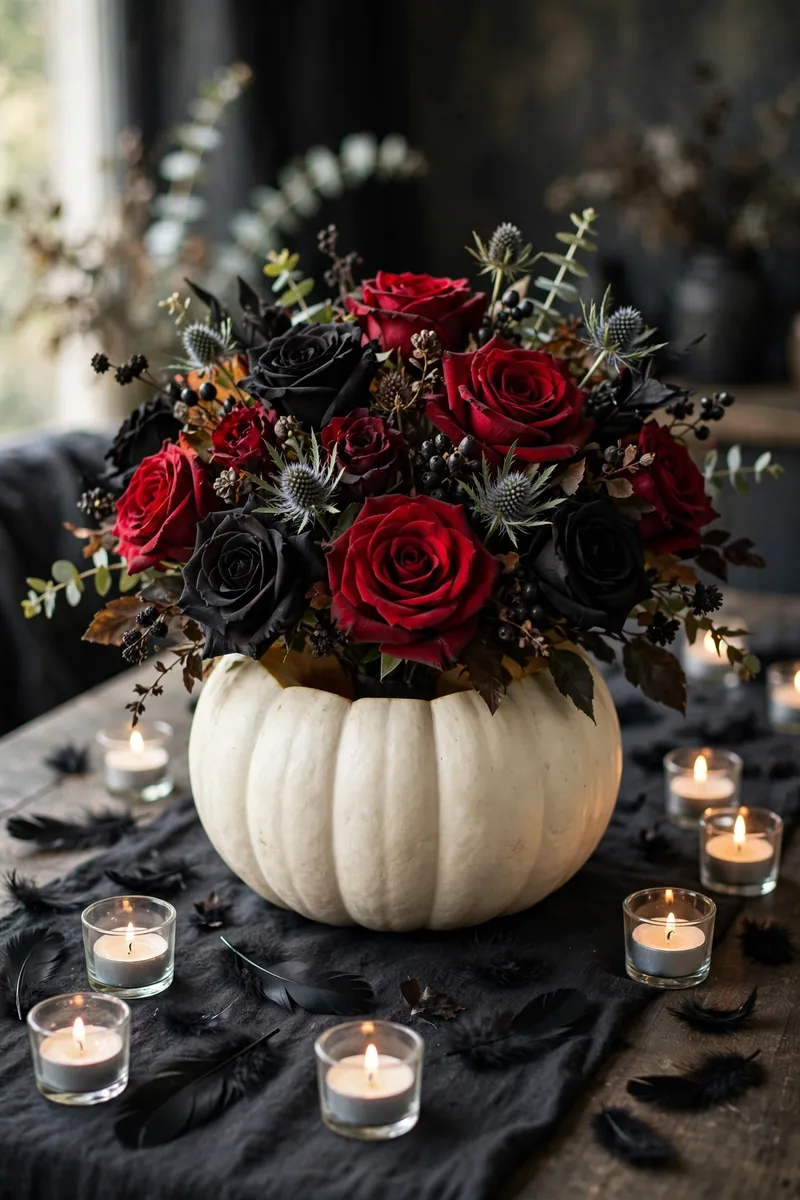
This centerpiece looks expensive and takes ten minutes.
Hollow out a white pumpkin and drop a jar of water inside to make a vase. Fill it with black roses, real or fake, and let a few stems hang low over the edge. The white pumpkin keeps it from looking too dark, while the black roses bring the drama. Set it in the center and build the rest of the table around it.
Use a white or pale pumpkin for contrast.
Keep a jar of water inside so real roses stay fresh.
Orange pumpkins with black roses, since it turns too dark.
Tall stems that block guests from seeing each other.
18. Skeleton Arm Serving Platter
Serve the snacks with a hand that is not yours.
Plastic skeleton arms make hilarious serving platters for candy, cookies, or wrapped treats. Lay the arm flat on a dark tray and pile the snacks along it. Guests grab food right off the bones. Wipe the plastic down first and stick to wrapped snacks so everything stays clean. This one always gets a laugh, and it costs less than a bag of candy.
| Buy the prop | Make it from cardboard |
|---|---|
| Cost: low | Cost: free from the recycling bin |
| No time needed | An afternoon of cutting and painting |
| Sturdy and detailed | Rougher, but fun for kids to help make |
19. Tarot Card Scatter Decor
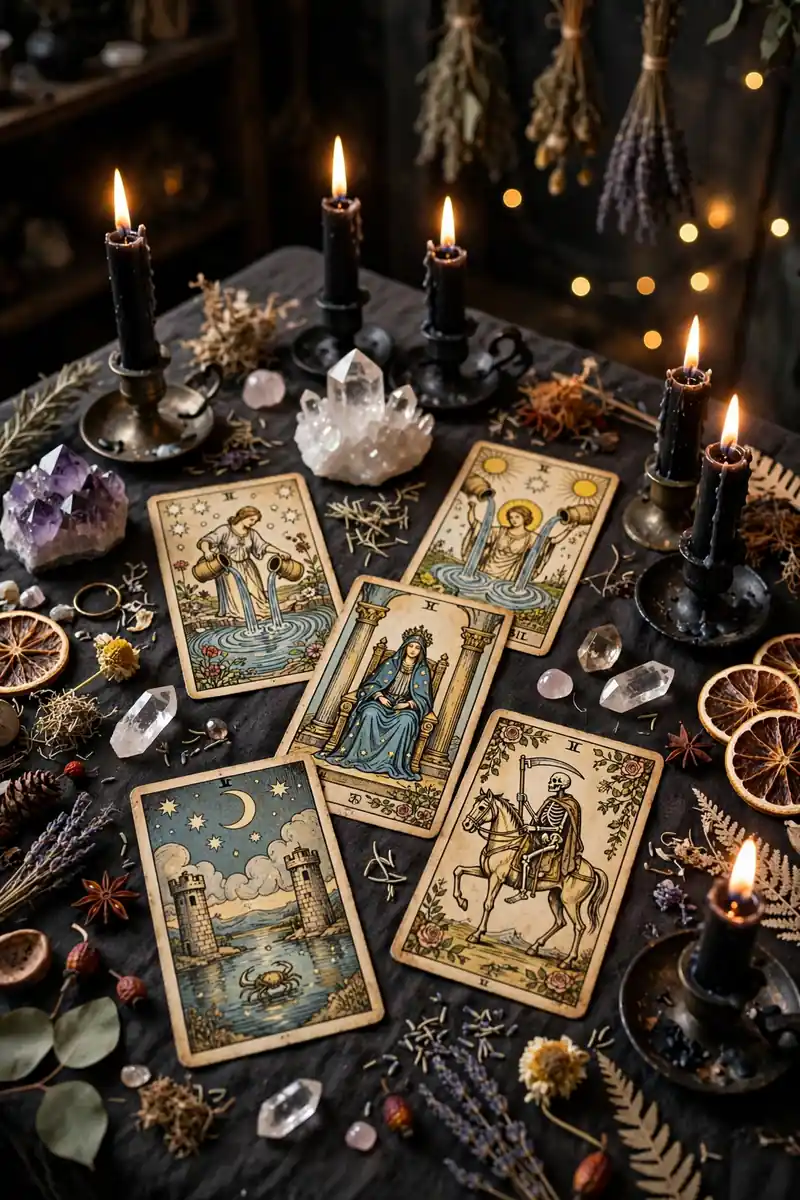
A deck of tarot cards might be the cheapest table decor ever made.
Scatter tarot cards across the table between the plates and let them overlap at odd angles. The dark artwork does all the decorating for you. Tuck a few cards upright into pumpkin slits or lean them against bottles. Guests will pick them up and read them, which gives the table something to talk about.
Best spots for cards:
- Between plates, slightly overlapping
- Leaning against candle holders
- One tucked at each place setting
Let the cards overlap at odd angles. Neat rows look like a card game, but messy scatter looks like a fortune teller’s table.
20. Foggy Dry Ice Punch Station
People treat dry ice like regular ice, and that is where the trouble starts.
Dry ice makes punch bubble and fog like a witch’s brew, but it needs respect. Set up a separate punch station at the end of the table so the fog rolls across the surface. Use tongs to handle the dry ice and keep it in a vented container behind the bowl. The effect lasts about an hour, which is plenty for the start of the party.
Adults handle the dry ice. Kids watch from a safe distance.
⚠️ Watch Out
Never touch dry ice with bare hands, and never drop chunks straight into drinks. Keep it in a separate vented container behind the punch bowl so guests get the fog without the risk.
You do not need all twenty ideas to pull off a great Halloween table. Three or four done well will beat a crowded table every time. Start with the runner, add candles for glow, and finish with one surprise at each plate. That formula works for a small dinner or a big crowd. Save this list of Halloween Table Decor Ideas on Pinterest so it is ready when party week rolls around. For more easy seasonal styling, keep an eye on insightsjournal.co.uk. Now go light those candles.