
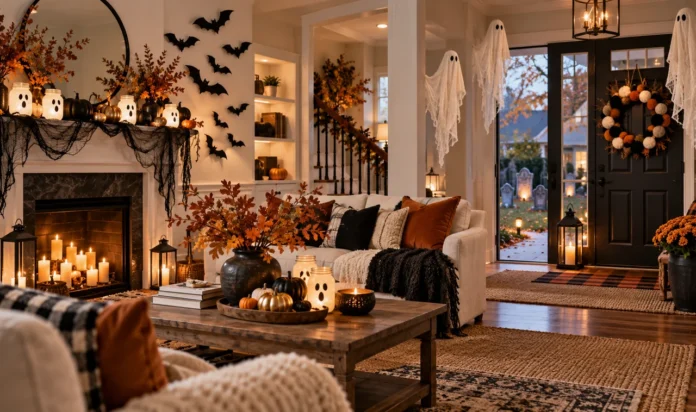


Store-bought Halloween decorations add up fast, and half of them look just like the ones on your neighbor’s porch. You buy a pack of plastic skeletons, hang them once, and they spend the rest of the year in a bin.
The good news is that the best spooky decor often starts with things you already own. Glass jars, black cardstock, old sheets, and cardboard boxes do most of the work. You do not need a craft room or a pile of fancy tools.
This list has 20 easy projects for the porch, windows, tables, and walls. Some take ten minutes. A few take an afternoon. Every one uses low cost supplies and plain skills, so you can pick two or three that fit your week and start tonight.
Each idea comes with a quick visual to help you plan, like a supply checklist, a steps guide, or a before and after look. Save the ones you like and make your house look like it took weeks to plan, even if it took a Saturday.
1. Turn Dollar Store Mason Jars Into Glowing Ghost Lanterns
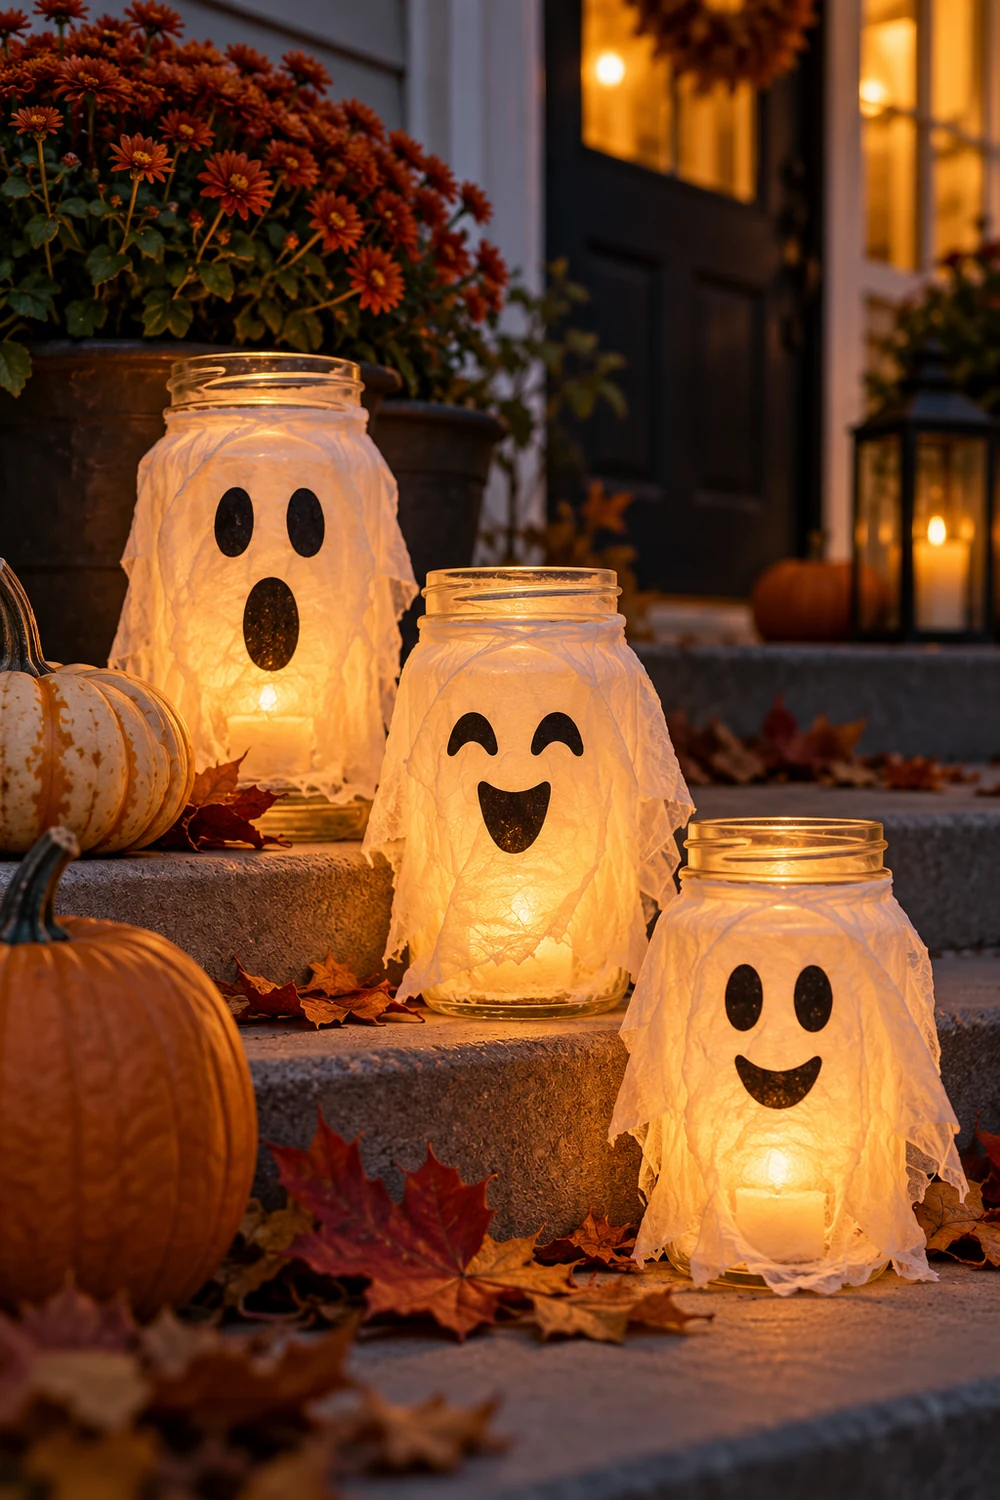
Glowing ghost lanterns cost almost nothing, and the jars are probably in your recycling bin already.
Peel the label off a pasta sauce or jam jar and rub away the sticky leftovers with a little cooking oil. Brush a thin coat of craft glue over the glass, press on a sheet of white tissue paper, and leave the wrinkles. They look like fabric folds.
Then draw the face with a black marker. Small changes give each jar its own personality:
- Two round eyes and a tiny “o” mouth for a surprised ghost
- Long sleepy slits for a calm one
- A crooked grin for a cheeky one
Drop in a battery tea light and group three jars of different heights on the porch steps.
2. Cut a Bat Colony From Black Cardstock and Fly It Up Your Wall
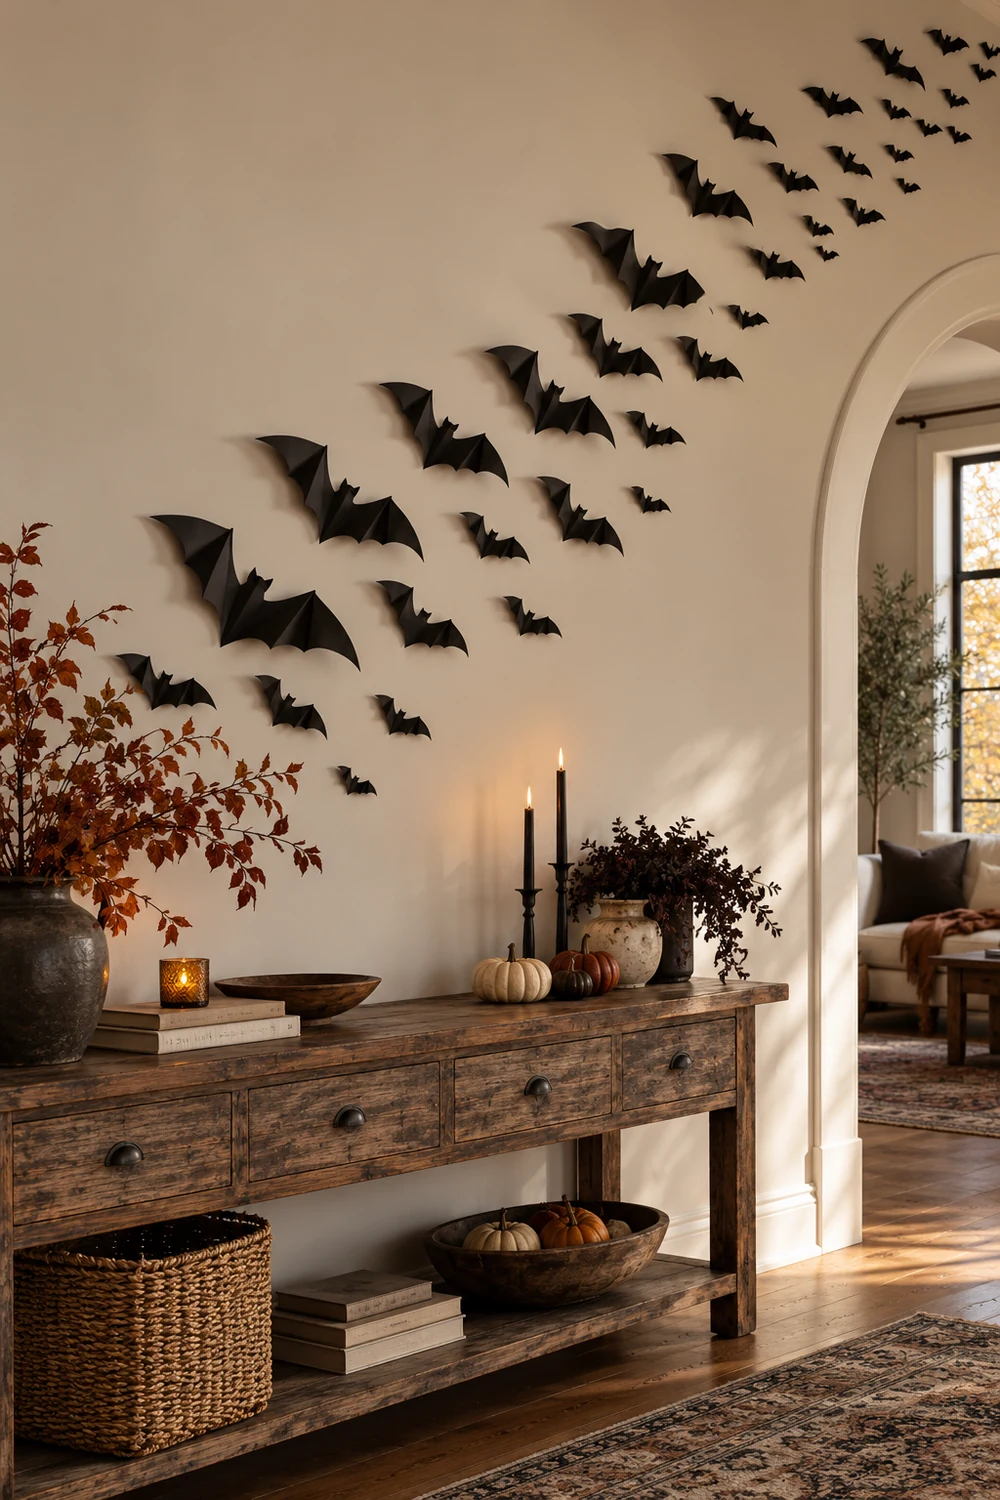
Bats look best in a crowd.
Fold a sheet of paper in half, draw one wing along the fold, and cut it out. Open it up and you have a bat that is the same on both sides. Make the template in three sizes, because a mix of big and small makes the swarm look like it is moving.
Skip glue dots on painted walls, since they can peel the paint. A small roll of painter’s tape on the back is safer.
Trace your templates onto black cardstock and cut out 15 to 20 bats.
Pinch the center of each bat and bend the wings forward a little so they lift off the wall.
Place the biggest bat near a ceiling corner first, then trail smaller ones down in a loose curve.
Step back and move any two bats that sit side by side.
3. Wrap Plain Windows in Toilet Paper Mummy Eyes
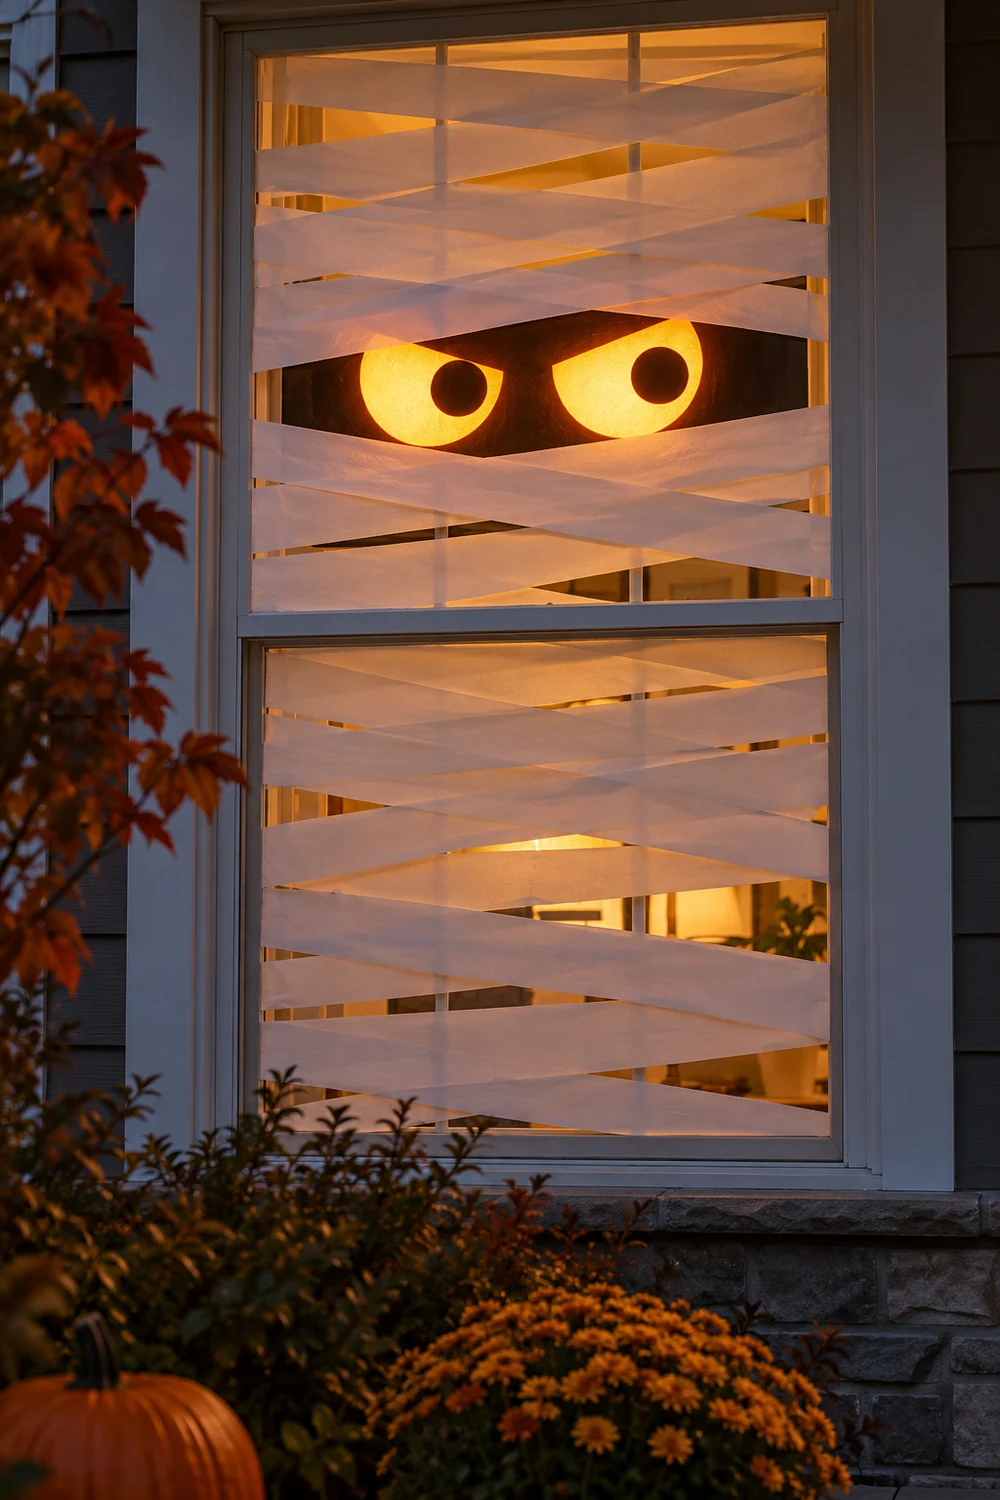
A dark window facing the street looks empty after sunset.
Tape strips of toilet paper across the glass at slightly different angles, letting them overlap and hang a little loose. Leave a gap about the width of your hand near the middle. Low tack painter’s tape peels off glass cleanly, so use that instead of regular tape.
Cut two circles from white paper, add black dots for pupils, and tape them behind the gap. With a lamp on inside, the eyes glow. A single window is enough, and a row of three looks great on a porch.
A plain window facing the street, with nothing to look at once the sun goes down.
White strips across the glass and two round eyes peeking out. It reads as a mummy from the sidewalk.
4. Make a Garland From Paper Bags Painted Like Jack-o’-Lantern Faces
Brown lunch bags are the cheapest pumpkins you can buy.
Paint each bag orange and let it dry. Then glue on black paper shapes for the eyes, nose, and toothy grin. Stuff each bag lightly with crumpled newspaper so it holds a round shape, fold the top over, and punch a hole through the fold.
Thread the bags onto string with a few inches between each one. Hang the garland across a mantel, a doorway, or along the stair rail.
Give every face a slightly different expression. A row of identical faces looks flat.
What to grab first
5. Paint Dollar Store Pumpkins With a Matte Black and Gold Finish
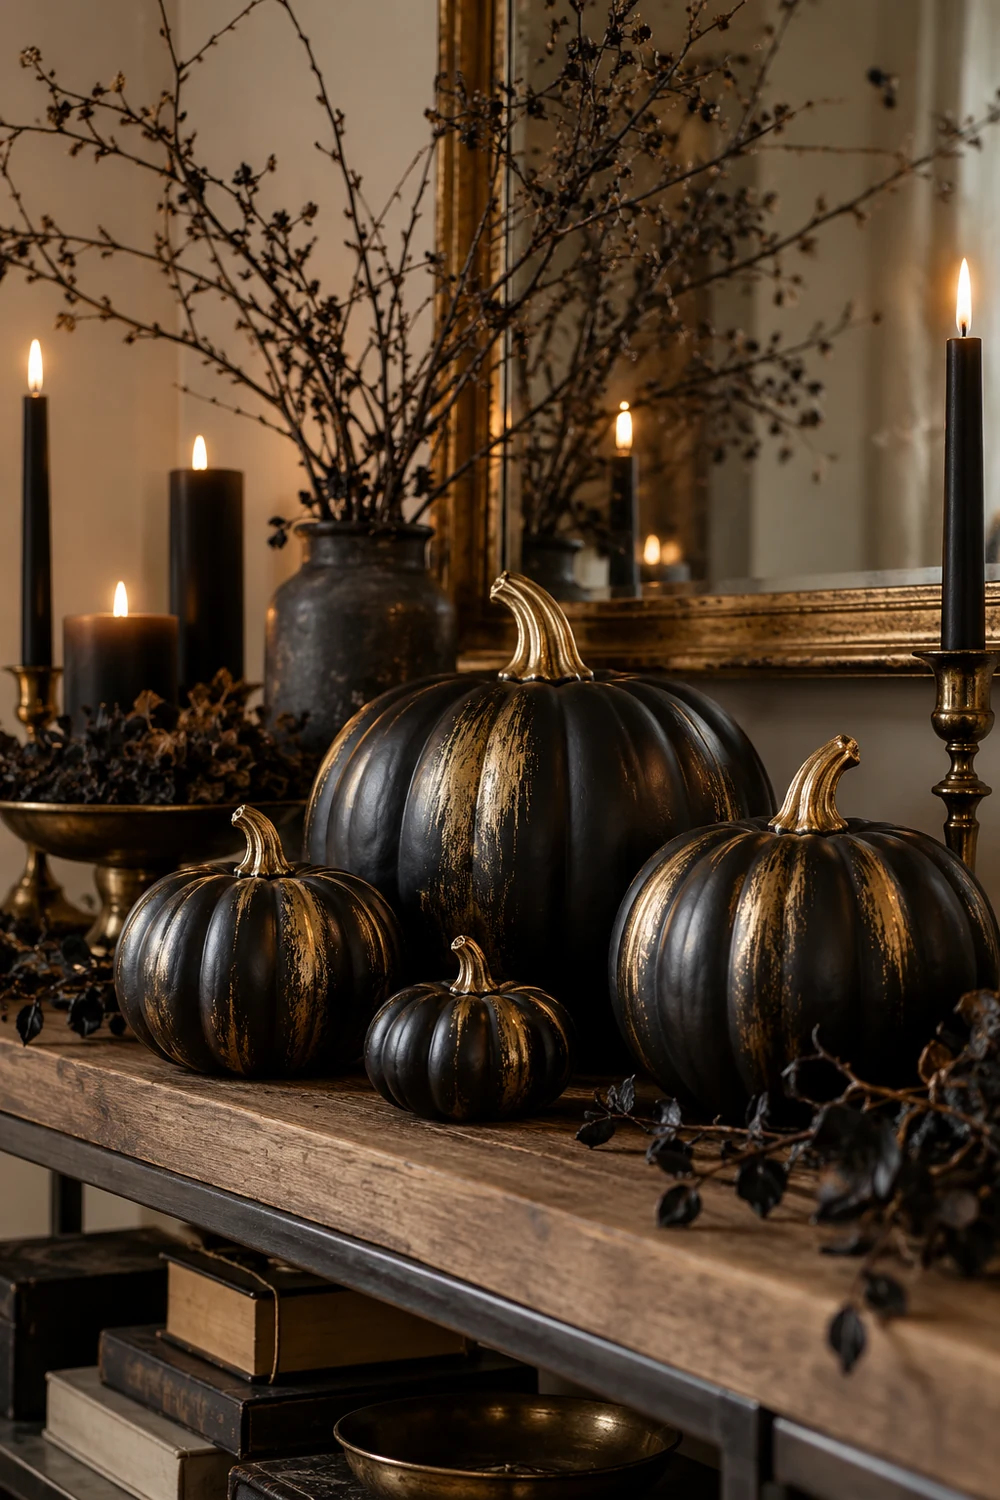
Cheap pumpkins look cheap mostly because of the shine.
A coat of matte black spray paint fixes most of that. Once it dries, dab a little gold paint on a dry brush and sweep it over the ridges, so the metallic only shows where the light would hit. The pumpkin ends up looking like it came from a boutique.
Finishing touches that work well:
- Gold on the ridges only
- A gold stem for one bright highlight
- A small black ribbon tied around the stem
Spray outdoors on cardboard or newspaper.
Wipe most of the gold off the brush before sweeping.
Glossy spray paint, which brings the plastic shine right back.
Covering the whole pumpkin in gold.
6. Fill a Wine Bottle With Fairy Lights for a Witchy Candle Stand
Real candles in a bottle neck drip wax down the glass and blow out in the first breeze. A string of battery fairy lights skips both problems.
Pick a dark green or brown bottle and peel off the label. Feed a copper wire light string in through the neck, leaving the battery pack hanging out the top. Then wrap the pack in a scrap of black fabric and tie it with twine, so it looks like part of the display.
Group two or three bottles of different heights on a shelf or window ledge.
⚠️ Watch Out
Use battery lights only and never real flames inside the bottle. Glass traps heat, and a lit candle near paper decor is a fire risk.
7. Build Cheesecloth Ghosts That Hold Their Shape With Fabric Stiffener
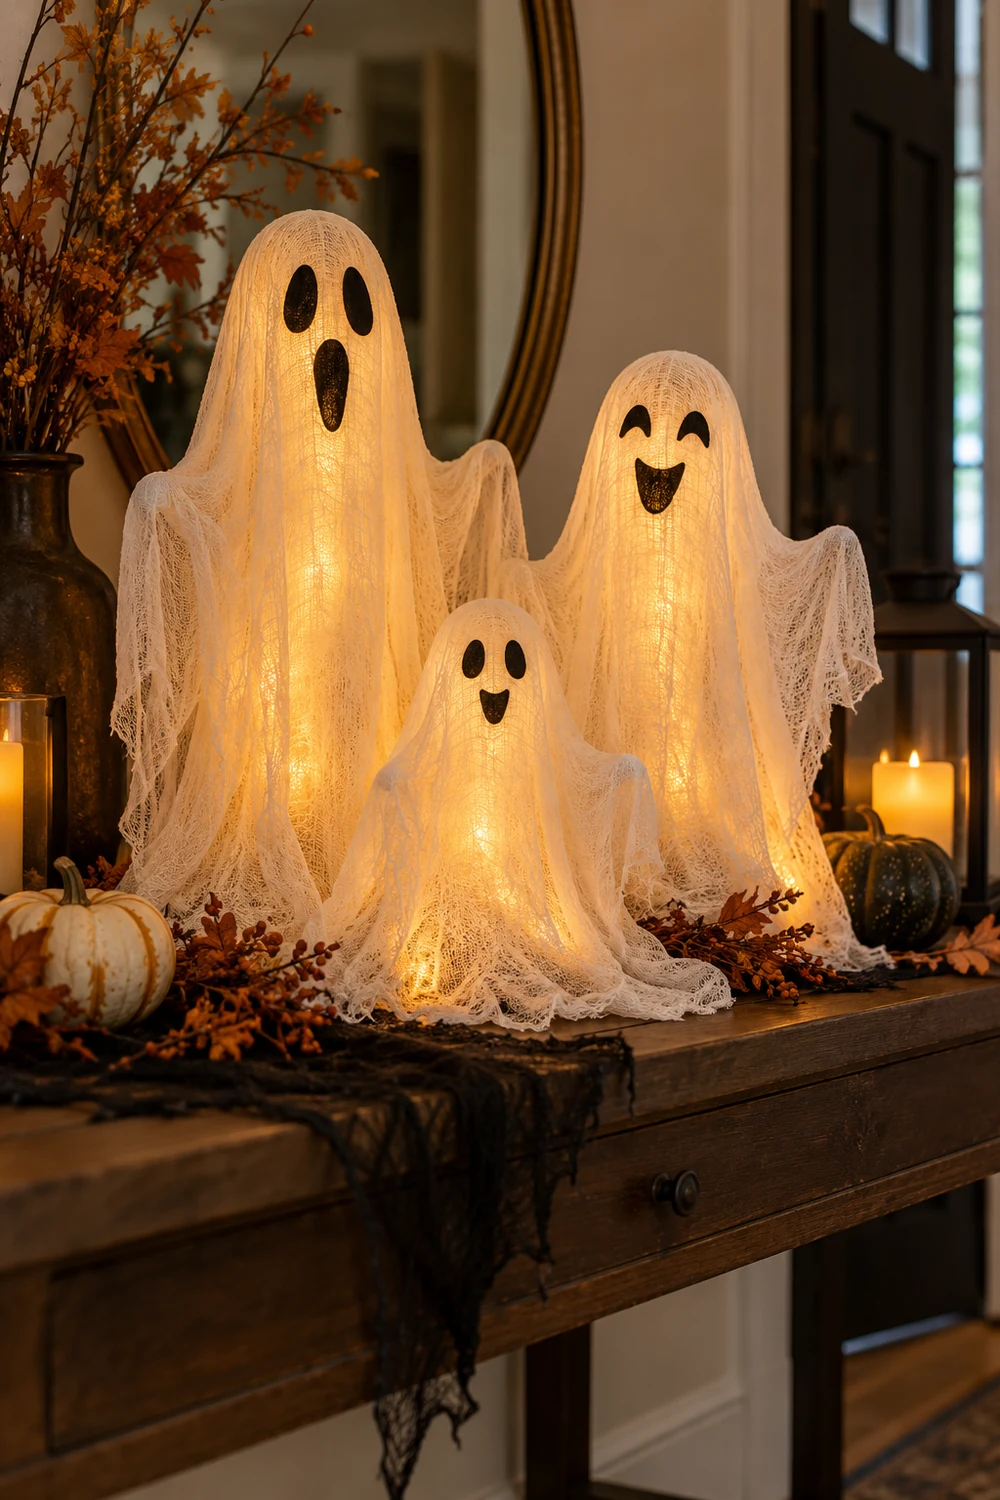
These ghosts stand on their own, so no hooks or fishing line are needed.
Wrap a plastic bottle in foil and top it with a crumpled ball of newspaper for the head. Dip a square of cheesecloth in liquid fabric stiffener, wring out the extra, and drape it over the form. Let it dry overnight, then slip the ghost off the bottle.
Two small tips help:
- Press the folds into place with your fingers while it is still wet
- Dab on two black felt dots for eyes once it is dry
Make a few in different sizes and they look like a small family.
8. Stack Old Books Into a Spell Book Pile
A thrift store book and a cardboard one look almost the same once they are painted. What changes is the weight and the price.
Real books feel more convincing, especially when you open the top one on a stand. Cardboard boxes cut and glued into book shapes are lighter and free. Either way, paint the covers dark brown or black and rub a little gold along the edges. Glue a few leftover buttons or a plastic gem on the front for a magical touch.
Stack three or four with the biggest at the bottom. Rest a bat or a small ghost on top.
| Thrift store books | Cardboard books |
|---|---|
| Cost: a few dollars each | Cost: free from your recycling |
| Feel: heavy and sturdy | Feel: light, easy to move |
| Effort: paint and done | Effort: cut, glue, then paint |
9. Write Spooky Messages on Your Front Steps With Washable Chalk
Keep it short. A message has about two seconds to be read from the sidewalk.
Use thick sidewalk chalk in white and orange, and write each word in big block letters. Short lines work best:
- “Enter if you dare”
- “Beware of ghosts”
- “Trick or treat”
Draw the messages on the risers, the vertical part of each step. Chalk on the flat part gets slippery when it rains. Stand at the bottom of the steps to check that every word reads clearly.
Big letters and few words. If you cannot read it from the street, it is too small.
10. Hang Tea-Stained Paper Cobwebs Over Doorways
Tea turns plain white paper into something that looks like it spent years in an attic.
Fold a sheet of copy paper like you would for a snowflake and snip small triangles along the folds. Open it up and you get a lacy, web style pattern. Soak it in a bowl of strong black tea, lay it flat on a baking tray, and let it dry. The edges curl a little, which helps the look.
Use a few small rolls of painter’s tape to hang it in a doorway corner. Add a plastic spider in the center for a finishing touch.
Fold the paper in half three times and cut small triangles and curves along the edges.
Brew 4 strong tea bags in a shallow dish and let the water cool.
Unfold the paper, soak it for a minute, and lay it flat on a tray to dry.
Tape the web into a doorway corner and set a plastic spider in the middle.
11. Cut Cardboard Tombstones for the Front Lawn
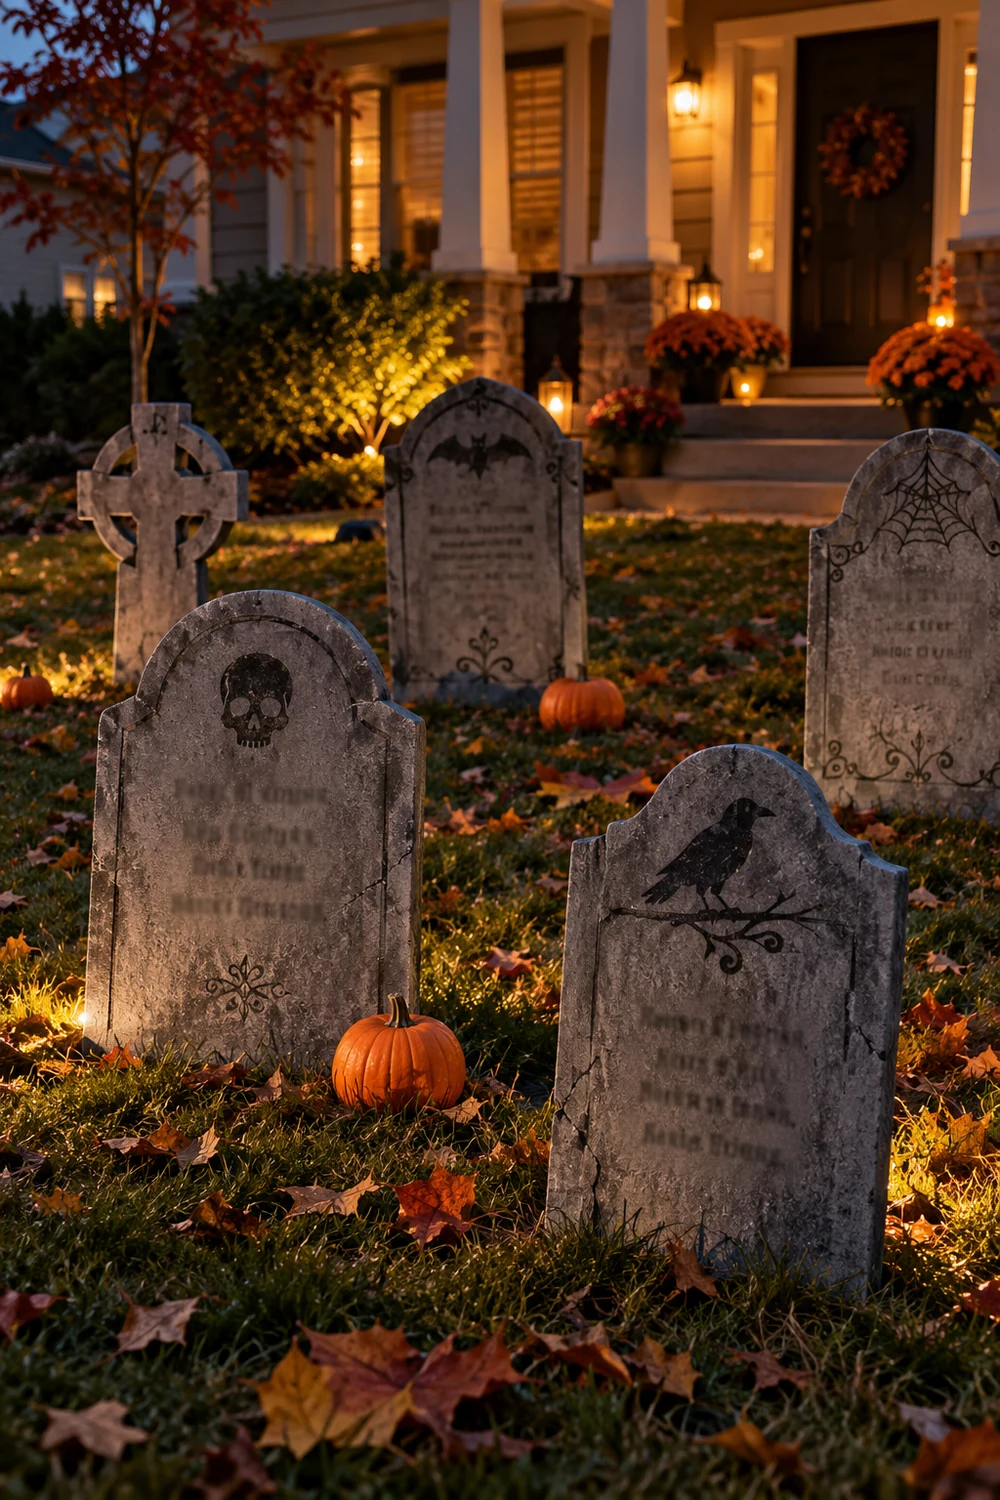
Tall and narrow beats short and wide. An arched top on a skinny slab reads as a grave from across the street, while a wide rectangle looks more like a sign.
Cut the shapes from a big appliance box. Dab gray paint on with a dry sponge, so the surface looks like rough stone, then add black in the corners to age it. Write the words with a thick marker:
- “R.I.P.” for the classic look
- “Here lies the last clean sock” for a laugh
- A made up name and a date from 1823
Tape a wooden dowel to the back and push it into the ground. Set a few rocks at the base if your yard gets wind.
12. Make a Pumpkin Wreath From Craft Felt and a Foam Ring
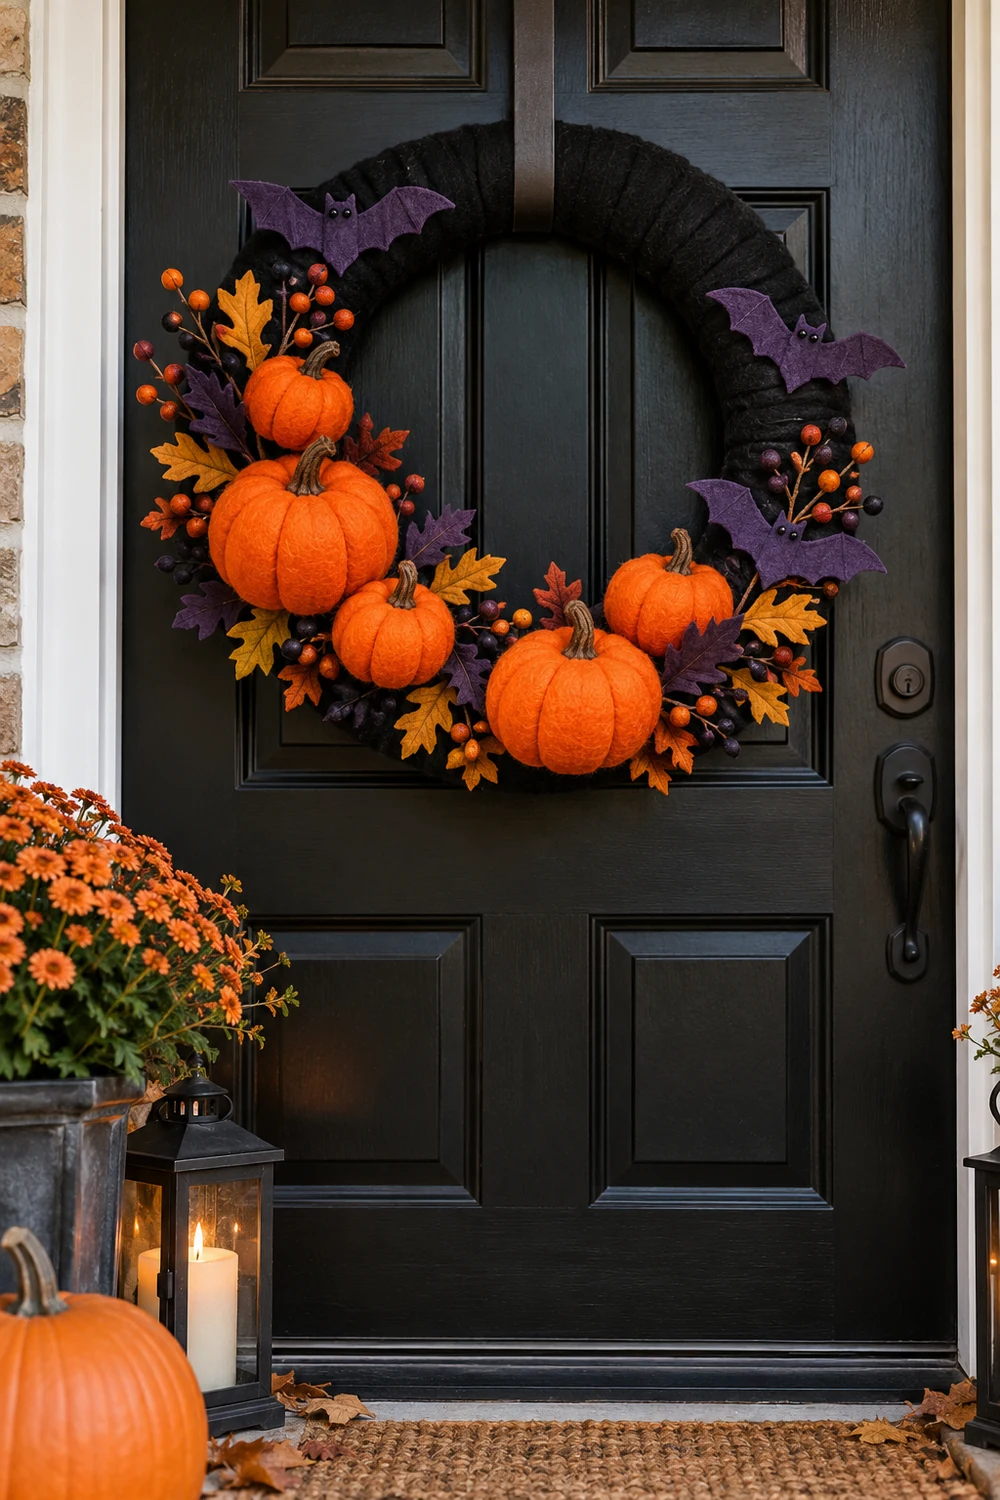
Real pumpkin wreaths are heavy, pricey, and gone by November. A felt one weighs almost nothing and goes back in the closet next year.
Wrap a foam ring in black felt and secure it with hot glue on the back. Cut a dozen small pumpkins from orange felt, glue them around the ring, and add a tiny brown stem to each one. Overlap a few so the ring looks full.
Hang it with a loop of ribbon over a hook on the front door.
- ▸Orange felt for the pumpkins, in two slightly different shades
- ▸Black felt to cover the foam ring
- ▸Brown and green scraps for stems and curly leaves
- ▸Two or three purple felt bats for a bit of contrast
13. Float Battery Candles Over a Table With Fishing Line
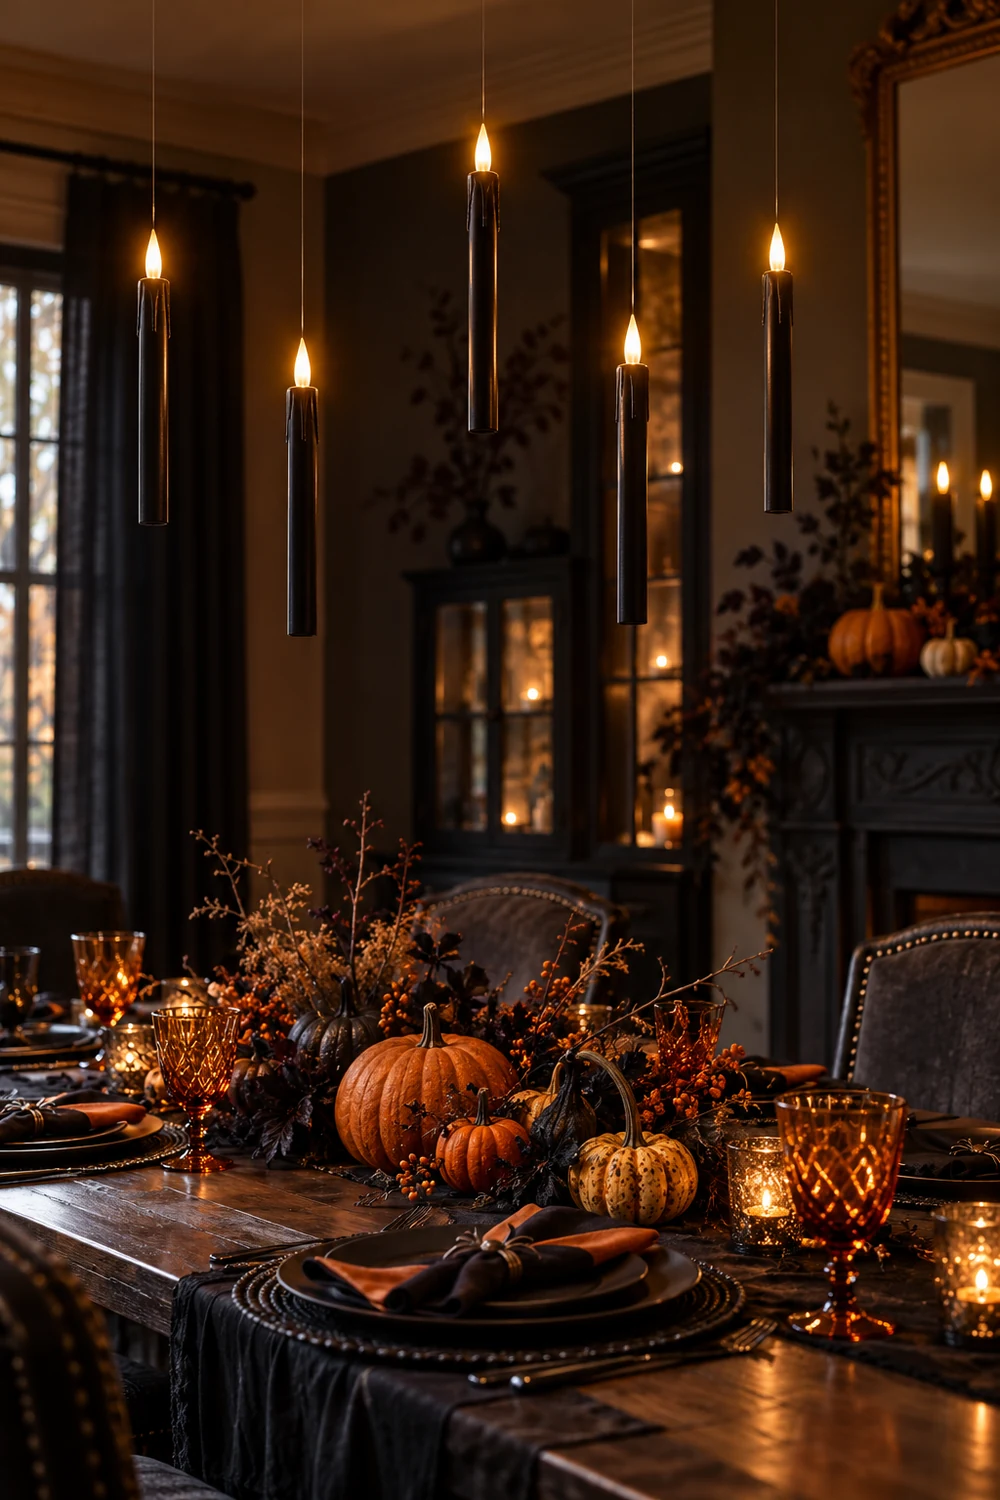
Clear fishing line disappears in dim light, which is the whole trick. From a few feet away the candles just seem to hang in the air.
Buy flameless taper candles with a battery inside. Wrap the line twice around the base of each one, then add a dab of hot glue to hold it. Cut each line to a different length, anywhere from one to four feet, and tie the other ends to a curtain rod or ceiling hooks above your table.
Hang them at uneven heights. Even spacing looks like a store display.
A bare ceiling over the dining table, with nothing to draw the eye up.
Six battery candles hanging at different heights, glowing over the table like they are floating.
14. Turn Tin Cans Into Creepy Monster Pencil Holders and Planters
The mistake people make is skipping the rim. A cut tin can edge is sharp, and nobody wants that on a kid’s desk.
Cover the top edge with a strip of washi tape, or press it flat with pliers if an adult is helping. Then paint the can in lime green, purple, or black. Glue on googly eyes, cut a toothy mouth from white felt, and add a pair of horns made from paper cones.
Use one on a desk for pencils. Fill another with a small plant for the porch.
What you need
15. Draw Silhouette Scenes on Black Paper and Tape Them Inside Windows
Sketch the shape on the back of the paper with a white pencil, so no pencil lines show on the front. Then cut it out with small, sharp scissors.
Tape the silhouette to the inside of the window so it faces the street. A lamp or string light behind the glass makes the shape stand out in a clean, bold outline.
Keep one scene per window. Two or three small scenes in one pane just look cluttered.
16. Turn an Old Frame Into a Spooky Glowing Mirror
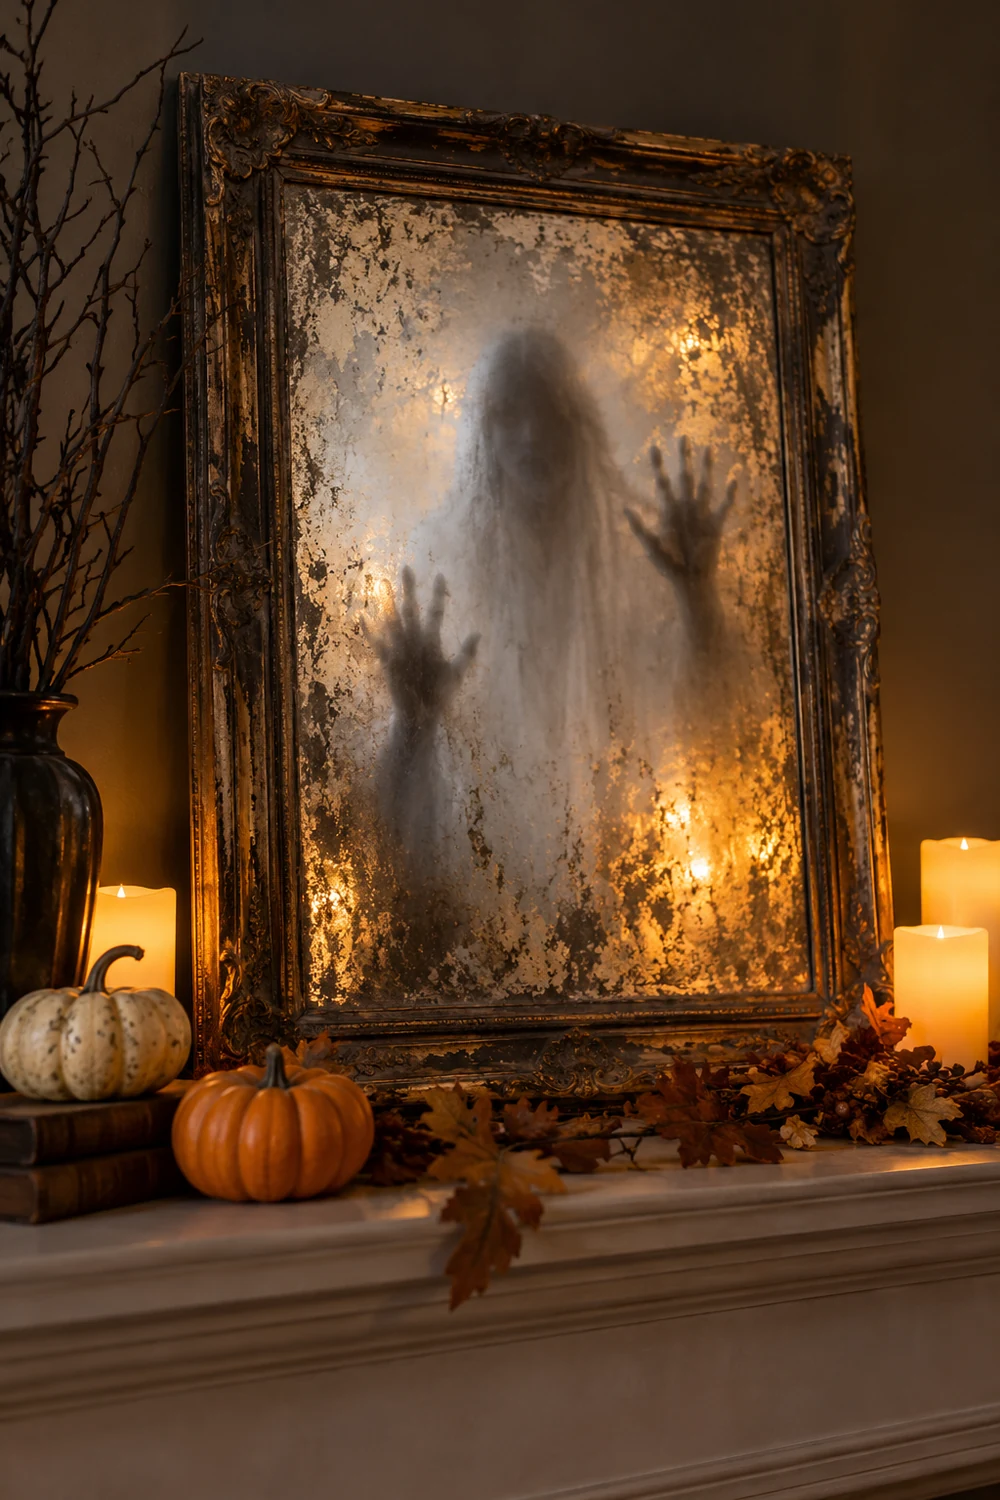
Remove the glass from an unused picture frame and replace it with a sheet of clear acetate or inexpensive reflective window film. Lightly dab gray craft paint around the edges, leaving the middle partly clear. Tape a simple ghost silhouette behind the film and place a battery light behind the frame. In daylight it looks like an aged mirror; after dark the hidden figure appears.
Safe glow: Use a cool battery light rather than a real candle behind paper, acetate, or fabric.
17. Twist Pipe Cleaners Into Oversized Spiders
Bundle four black pipe cleaners together and twist them once in the center to make eight legs. Glue a black pom-pom or a ball of crumpled black paper over the middle, then bend each leg at two points. Make several sizes and place them along a bookshelf, stair rail, or pumpkin display. A tiny dot of removable poster putty keeps them in place without damaging furniture.
18. Make Frosted Halloween Candle Jars With Tissue Silhouettes
Brush a clean jar with decoupage glue, press on one layer of orange or cream tissue paper, and smooth it gently. Add black paper silhouettes of a cat, bat, moon, or crooked house. Seal the outside with another thin coat of glue. Once dry, place a battery tea light inside for a soft stained-glass effect that works on tables and windowsills.
19. Build a Witch Broom Parking Corner
Gather three inexpensive straw brooms or make your own by tying thin branches around wooden handles. Lean them in a porch corner and add a small hand-painted cardboard sign that says “Broom Parking.” Wrap black ribbon around the handles and tuck in orange leaves. Keep the cluster away from the walking path so costumes and trick-or-treat bags do not catch on it.
20. Create Halloween Apothecary Bottles From Recycled Glass
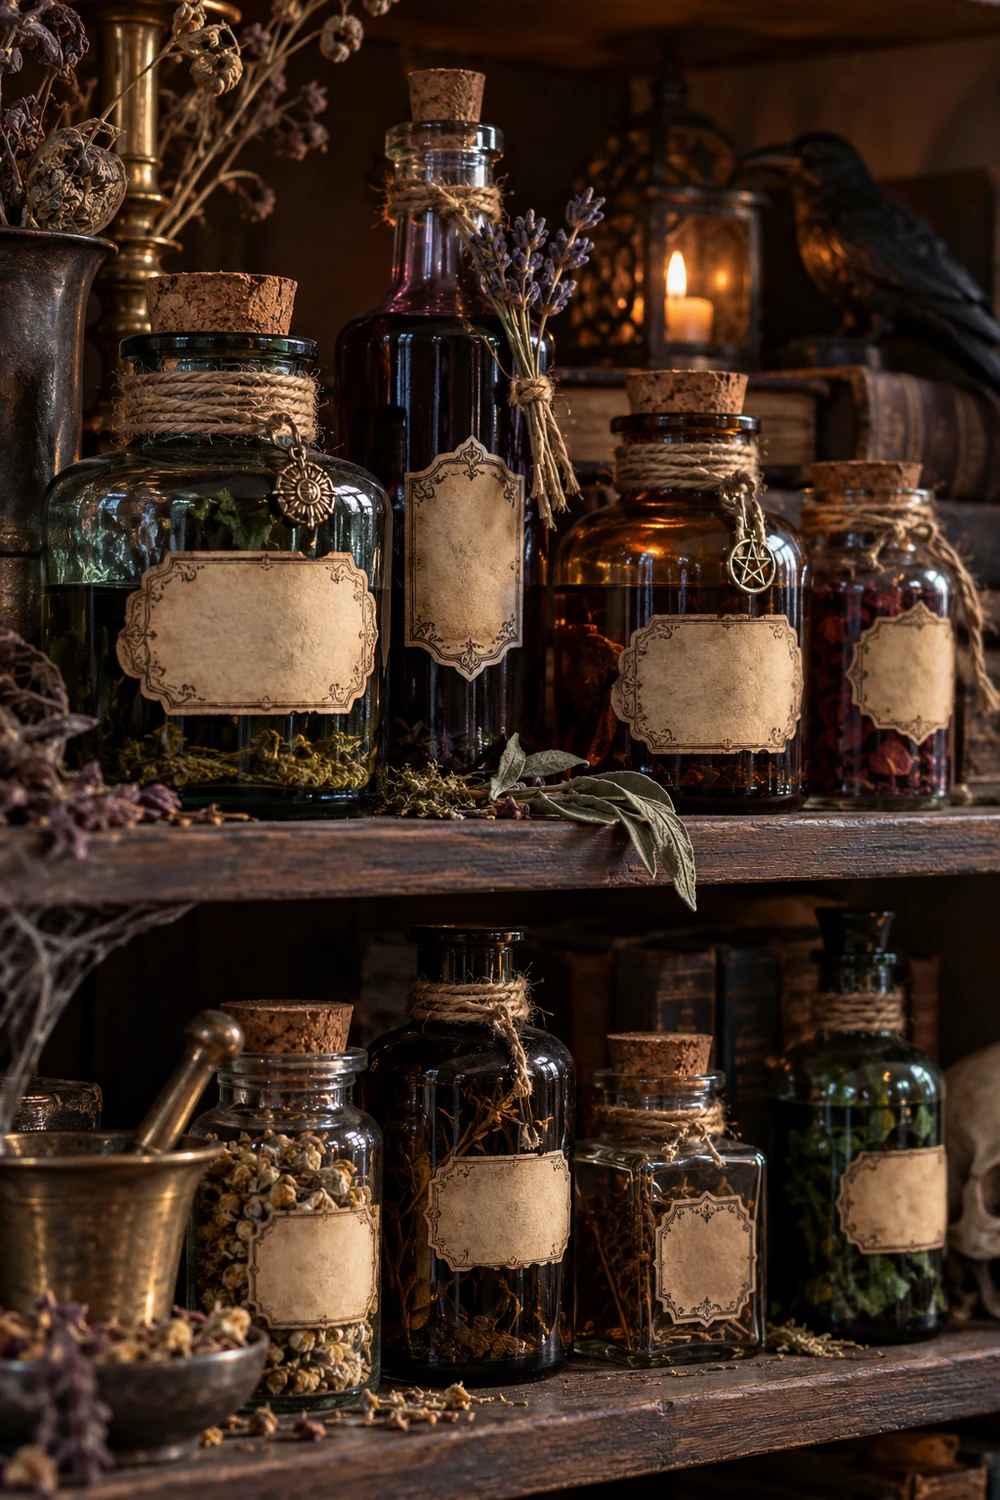
Save small bottles and jars in different shapes, remove the labels, and fill them with tinted water, dried herbs, or cotton pulled into wispy strands. Print or hand-letter simple aged labels, stain the paper with tea, and tie twine around each neck. Group the bottles on a dark tray with a battery lantern to create a witchy shelf display without buying specialty props.
Quick styling rule
Mix tall, medium, and short bottles, but repeat one color such as amber, black, or deep purple so the collection feels intentional.
Conclusion
You do not need to make all 20. Pick two or three that fit your week, like the ghost jars, the window eyes, and the cardboard tombstones, and the house will look different by Friday night.
Most of these homemade Halloween decorations use things already sitting in your recycling bin or craft drawer. That keeps them cheap, and it also makes them look like yours. Start with the idea that feels easiest, finish it, then add another when you have the time.
Save this list for the next time you want to decorate the house for October.