



It’s 6 p.m. on Halloween and your pumpkin is still sitting on the porch, uncarved. Take a breath — you don’t need hours of work or fancy stencils to make a jack-o’-lantern that looks amazing. The best last-minute pumpkin-carving ideas deliver maximum impact with minimum effort: bold simple cuts, shortcuts like drills and cookie cutters, and lighting that does the heavy lifting. Every idea below takes under 30 minutes from first cut to glowing finish. If you’re skipping patterns, our guide to carving pumpkins without a template is the perfect companion. Grab a pumpkin and a small saw — let’s get glowing.
1. The Classic Grin in Ten Minutes
Scoop your pumpkin, then cut two triangle eyes and one wide jagged grin with a small serrated saw — no drawing needed if you eyeball the shapes. The secret is confidence: keep cuts chunky and the mouth wide, because big openings glow brighter. Drop in a warm LED tea light before you finish so you can watch the face come alive as you carve. Tools: small pumpkin saw, spoon, LED tea light. Time: 10 minutes. Make the eyes slightly different sizes on purpose — lopsided faces have more personality and cost zero extra effort.

2. Drilled Polka-Dot Glow
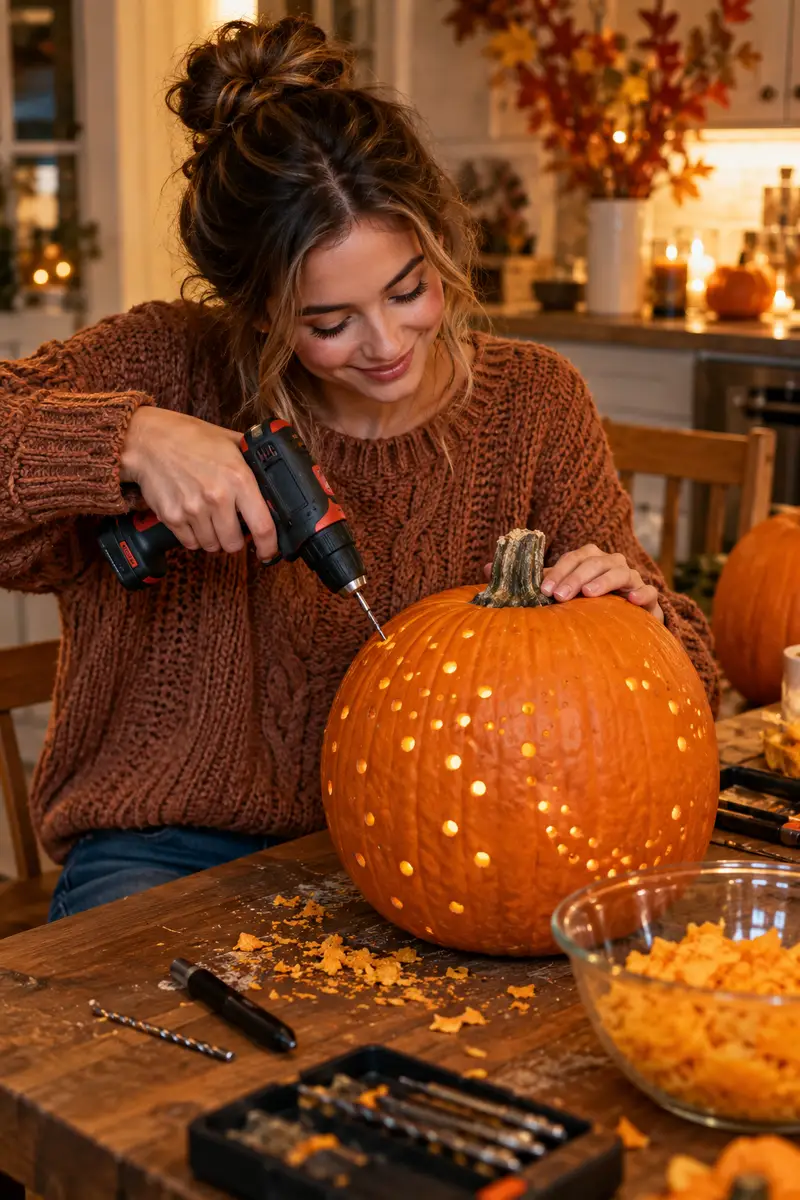
Skip the saw and let a power drill do the carving. Scoop the pumpkin, then drill holes of different sizes all over the shell — the result looks like a glowing lantern dotted with stars. Vary the bit sizes for the prettiest effect, keeping holes an inch apart so the shell stays sturdy. From across the porch it reads as pure magic, and up close the pattern looks deliberate and modern. Tools: power drill with assorted bits, spoon, LED candle. Time: 15 minutes. Wipe the drilled holes clean with a damp cloth so every dot shines bright.
3. Cookie-Cutter Shapes, Zero Drawing
Press a metal cookie cutter into the pumpkin’s side and tap it firmly with a mallet until it cuts through the flesh — then push the shape out from the inside. Stars, moons, hearts, and ghosts all work beautifully, and the edges come out crisp with zero drawing skill required. Cluster three or four shapes on one side for a design that looks planned. Tools: metal cookie cutters, rubber mallet, spoon, LED light. Time: 15 minutes. Warm the pumpkin briefly with a hair dryer first; softer flesh lets the cutter slide through much more easily.
Your 30-Minute Game Plan
- Minutes 0–5: Cut the opening and scoop fast.
- Minutes 5–20: Carve your design.
- Minutes 20–25: Clean edges, wipe the shell.
- Minutes 25–30: Add the light, set it outside.
4. Tape-Stencil Stars and Moons
Stick painter’s tape on the pumpkin and cut star and moon shapes out of it with a craft knife — the tape becomes your stencil. Trace around the openings with a marker, peel the tape off, and carve along the lines with a small saw. The tape keeps lines crisp and stops smudging, the real reason rushed carvings look messy. Tools: painter’s tape, craft knife, marker, small saw, LED light. Time: 20 minutes. Keep the shapes large — tiny tape details tear and slow you down. Two stars and one crescent moon is a complete design; don’t overcomplicate it.
5. The Sleepy Jack
Draw two curved downward lids and a tiny round “o” mouth with a marker, then carve — this drowsy face takes minutes and always gets laughs. The beauty of the sleepy jack is that it forgives wobbly lines; droopy is the whole point. Carve the lids as simple arcs and the mouth as a small circle, then add an LED candle and watch your pumpkin look like it’s nodding off. For more five-minute faces, browse our collection of simple pumpkin faces. Tools: marker, small saw, LED candle. Time: 12 minutes. Tilt the pumpkin slightly for extra sleepy charm.

6. Vampire Fangs in Fifteen
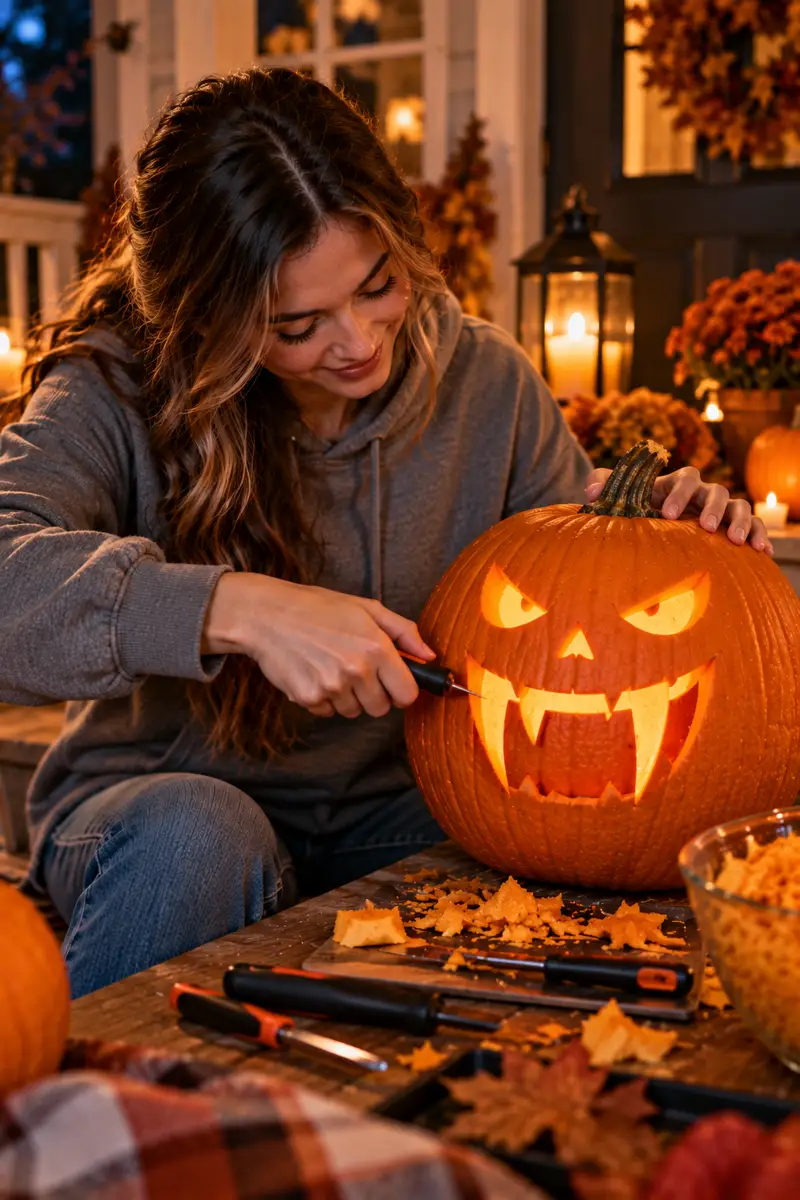
Carve two angry slanted eyes and a wide mouth, then cut two sharp downward triangles from the top of the mouth for fangs. The fangs are the entire design — they read instantly from the street and need no extra detail. Keep the mouth extra wide so the fangs hang dramatically, and use a flickering LED light inside for a menacing glow. Tools: small saw, marker, flickering LED candle. Time: 15 minutes. Sketch the fangs with marker first so both sides match. A red LED makes the fangs look even scarier if you have one handy.
Last-Minute Tool Checklist
- Small serrated pumpkin saw
- Sturdy spoon for fast gutting
- Power drill with assorted bits
- Cookie cutters and a mallet
- LED tea lights — never real flames
7. The Winking Pumpkin
One round eye, one winking eye made from a simple curved line, and a crooked grin — this face takes ten minutes and looks like your pumpkin is in on the joke. Draw the wink as a downward curve and carve it as a single line cut. The asymmetry is what makes it charming, so don’t stress about matching sides. Tools: marker, small saw, LED tea light. Time: 10 minutes. Line cuts are the fastest cuts, making this a great first carve with kids. Pair a winking pumpkin with a classic grin — the duo always photographs well.

8. Carved “BOO” Lettering
Write BOO in big block letters on the pumpkin’s smoothest side and carve straight through. Block letters are faster than faces because every cut is a straight line — no curves to fuss over. Keep the letters large and thick so the glow reads clearly from the sidewalk. Sketch the letters on scrap paper first — one minute of planning guarantees even spacing. Tools: thick marker, small saw, LED lights. Time: 20 minutes. Leave small bridges of flesh inside letters like O so the centers don’t fall out. String lights inside make lettered pumpkins glow evenly across every letter.
9. Mini Lanterns From Lids
Don’t throw away the lids — carve a simple star or moon into each one and set a tea light underneath for instant mini lanterns. Small pumpkins carve in minutes because the flesh is thinner, and these little glowing lids look adorable lined along porch steps. If you love tiny pumpkins, our small pumpkin carving ideas are full of quick designs sized for little hands. Tools: small saw, marker, LED tea lights. Time: 10 minutes per lid. Group three lids together — odd numbers always look best. A dab of petroleum jelly on the cut edges keeps them fresh for days.

Speed-Carving Tips That Work
- Cut the bottom, not the top.
- Thin the walls so the saw glides.
- Drill holes instead of sawing shapes.
- Keep every shape big and simple.
10. Drilled Spiderweb Corner
Drill a ring of small holes radiating from one corner of the pumpkin, then connect them with carved curved lines to suggest a spiderweb. You don’t need a perfect web — from a distance the glowing dots and arcs read as a web instantly. Add a plastic spider on top for a finishing touch that takes three seconds. Tools: drill with small bit, small saw, plastic spider, LED light. Time: 18 minutes. Keep the web in one corner; a full-pumpkin web takes too long when minutes matter. Angle the drill slightly so the holes catch more light from inside.
11. Your Initial, Carved
Carve the first letter of your family name in big block style on the pumpkin — personal, classy, and faster than any face. One letter means one set of straight cuts, and a monogrammed pumpkin looks like you planned it for weeks. Center the letter on the pumpkin’s flattest face and keep it large enough to read from the street. Tools: marker, small saw, LED light. Time: 15 minutes. Letters with straight lines (T, L, E, H) carve fastest — save the curvy ones for next year. Trace the letter from a printed font if your freehand feels shaky.
What to Skip When Rushing
- Intricate stencils and tiny details.
- Real candles — they eat minutes.
- Painting — it needs drying time.
- Chasing perfect symmetry.
12. Hole-Punch Constellations
Use a drill to punch out your favorite constellation — the Big Dipper is just seven dots and everyone recognizes it. Mark the star positions lightly with a marker first, drill each one, and let the glowing holes tell the story. It’s modern, unexpected, and genuinely beautiful on the porch at night. Tools: drill, marker, LED candle. Time: 12 minutes. Use two bit sizes: small holes for dim stars, bigger holes for the bright ones. Orion’s belt is just three big dots — the fastest constellation of all. Tape a printed star map to the pumpkin and drill right through the paper.
13. Marker-First, Cut-Second Faces
Draw the whole face with a thick marker before cutting — carving becomes connect-the-dots. The marker step takes two minutes and prevents the mid-carve panic of a lopsided eye you can’t undo. Once the face looks right in marker, carve through the lines with a small saw. Tools: thick marker, small saw, LED tea light. Time: 15 minutes. Wipe away marker smudges with a damp cloth after carving for clean, sharp lines. This is also the best method for carving with kids — they draw, you cut. Let the marker dry for a minute before cutting so it doesn’t smear.

Quick Lighting That Looks Great
- LED tea lights — cheap, safe, bright.
- String lights coiled inside for max glow.
- Glow sticks: crack, drop in, done.
14. Mini Teeth, Big Smile
Carve a huge open grin, then leave small squares of flesh standing inside it for teeth — the classic monster mouth that takes twelve minutes. Cut the mouth as one big shape first, then carve small notches up and down to form the teeth. Keep the teeth chunky so they don’t snap off. Tools: small saw, marker, LED light. Time: 12 minutes. A flickering LED behind the teeth makes the grin look alive and extra spooky. Two teeth is classic; five teeth is a full monster — your call. Cut the teeth before the mouth so the small pieces stay stable.
15. The Whole-Porch Cluster
When one pumpkin won’t cut it, carve three small ones in ten minutes each: one grin, one drilled dots, one cookie-cutter star. A cluster of small glowing pumpkins beats one elaborate pumpkin and takes the same total time. Vary the heights with crates or steps for a display that looks styled. Tools: small saw, drill, cookie cutter, LED lights. Time: 30 minutes total. Light them all at once just before guests arrive for maximum wow. Odd numbers and mixed designs are the whole secret — three beats one every time. One battery pack of string lights can light all three at once.

Last-minute doesn’t have to mean lackluster. With bold cuts, a drill or cookie cutter, and the right light, you can go from blank pumpkin to glowing jack-o’-lantern in under 30 minutes. Pick the idea that matches your tools, skip the fiddly details, and let the glow do the talking. Happy Halloween!